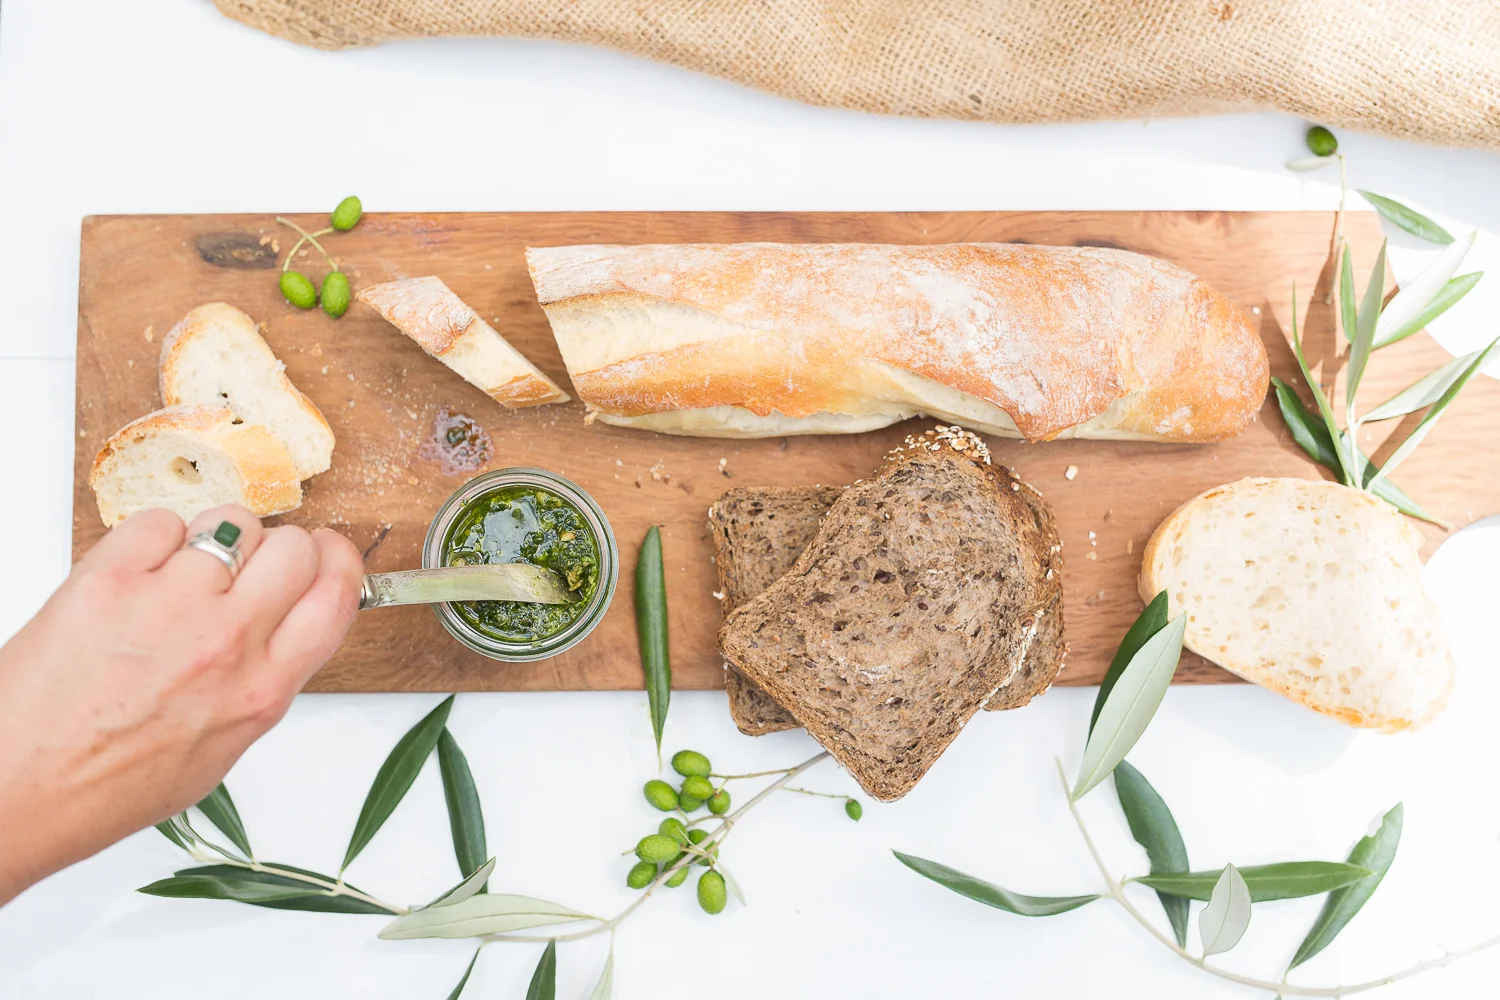
nut milk in our new home

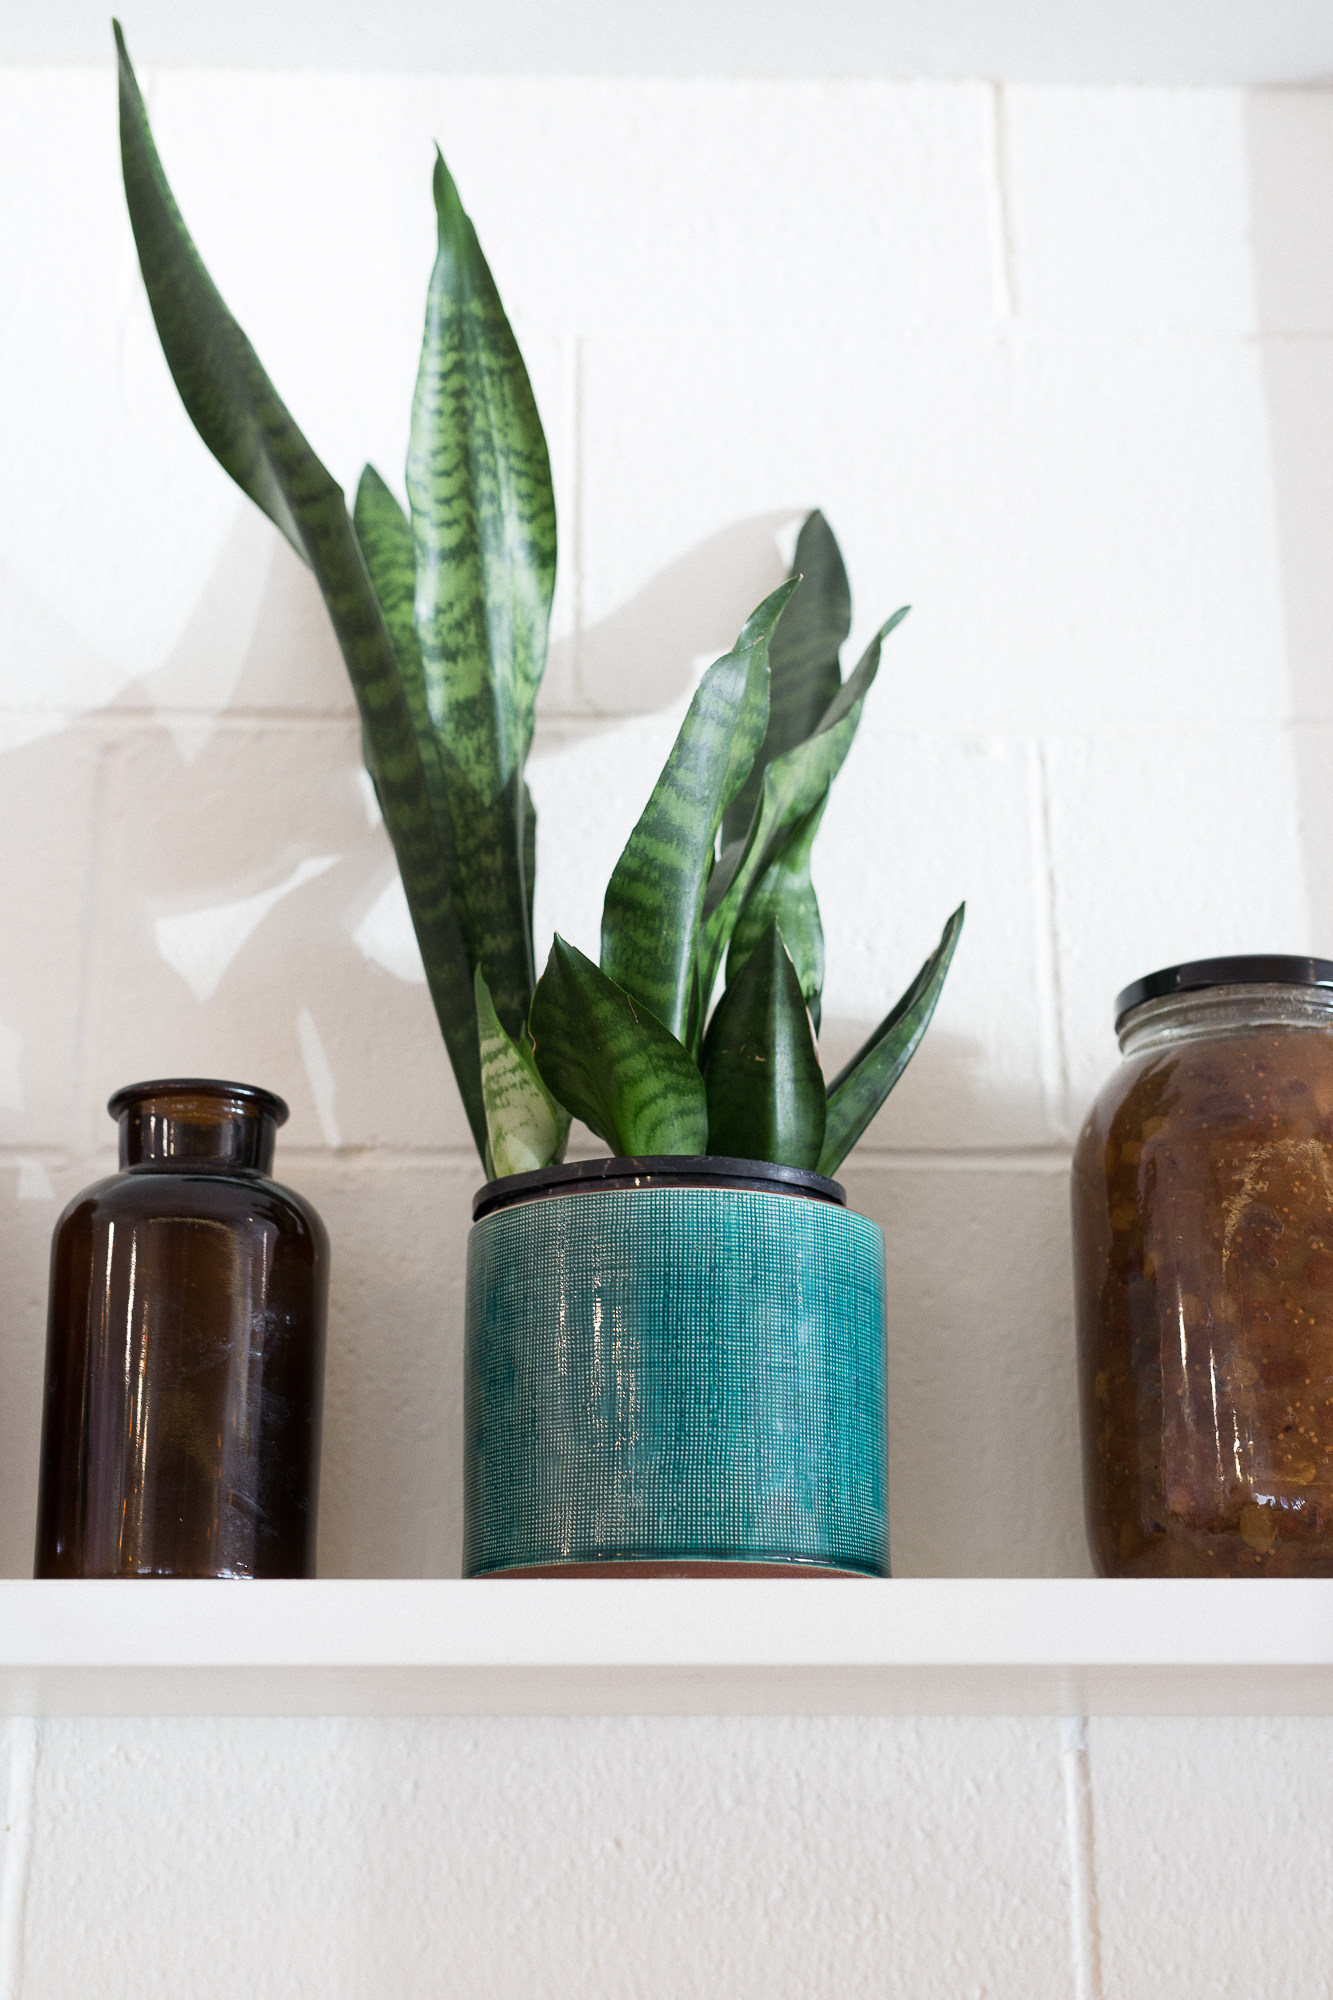
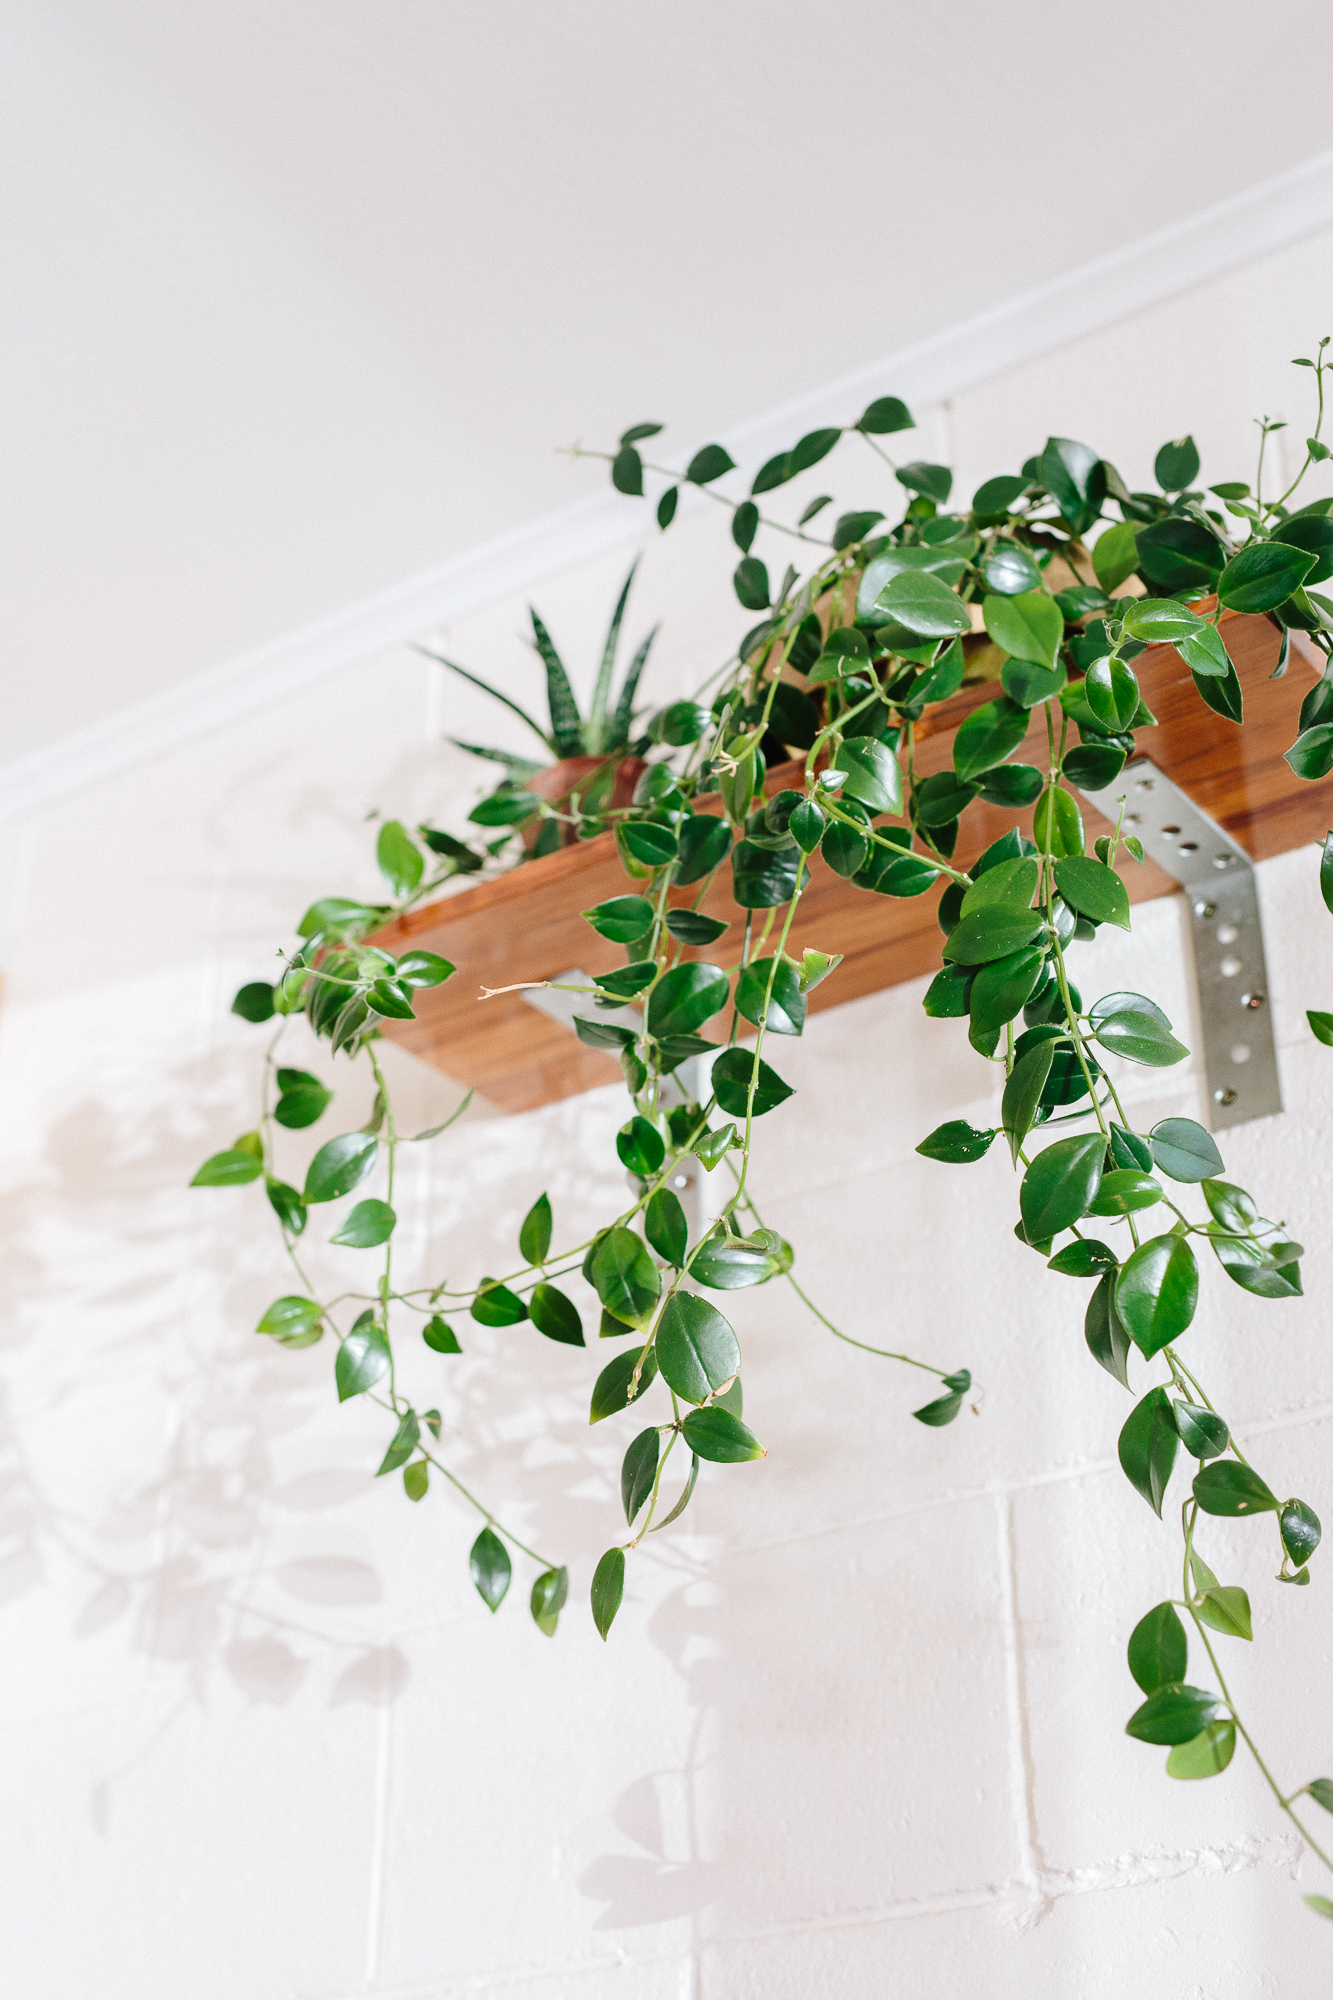
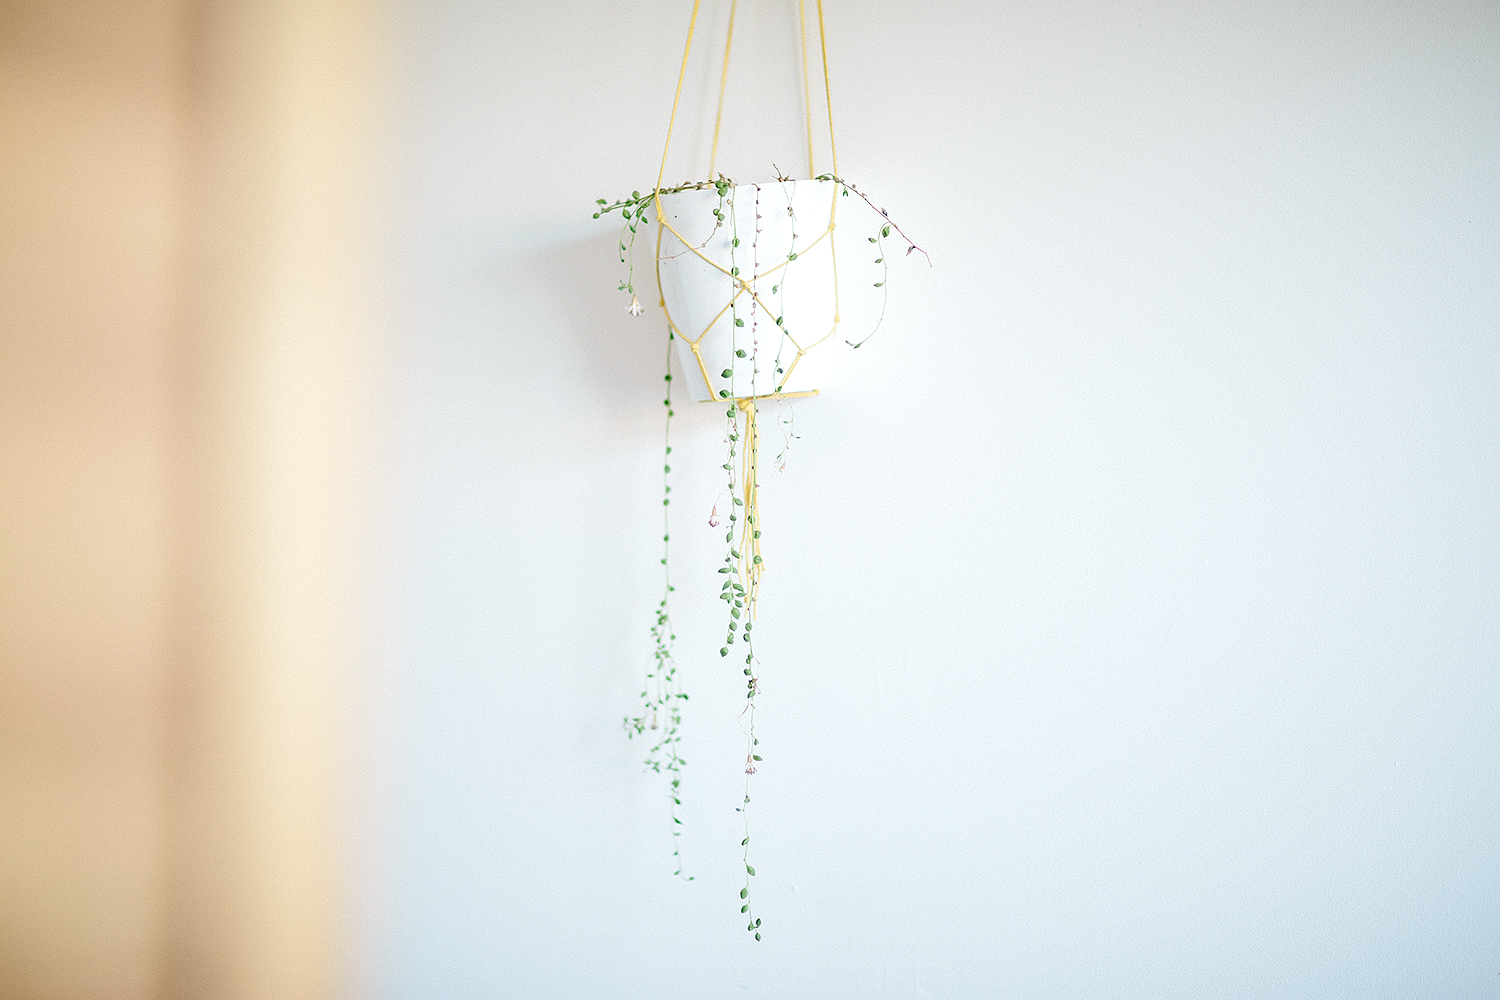
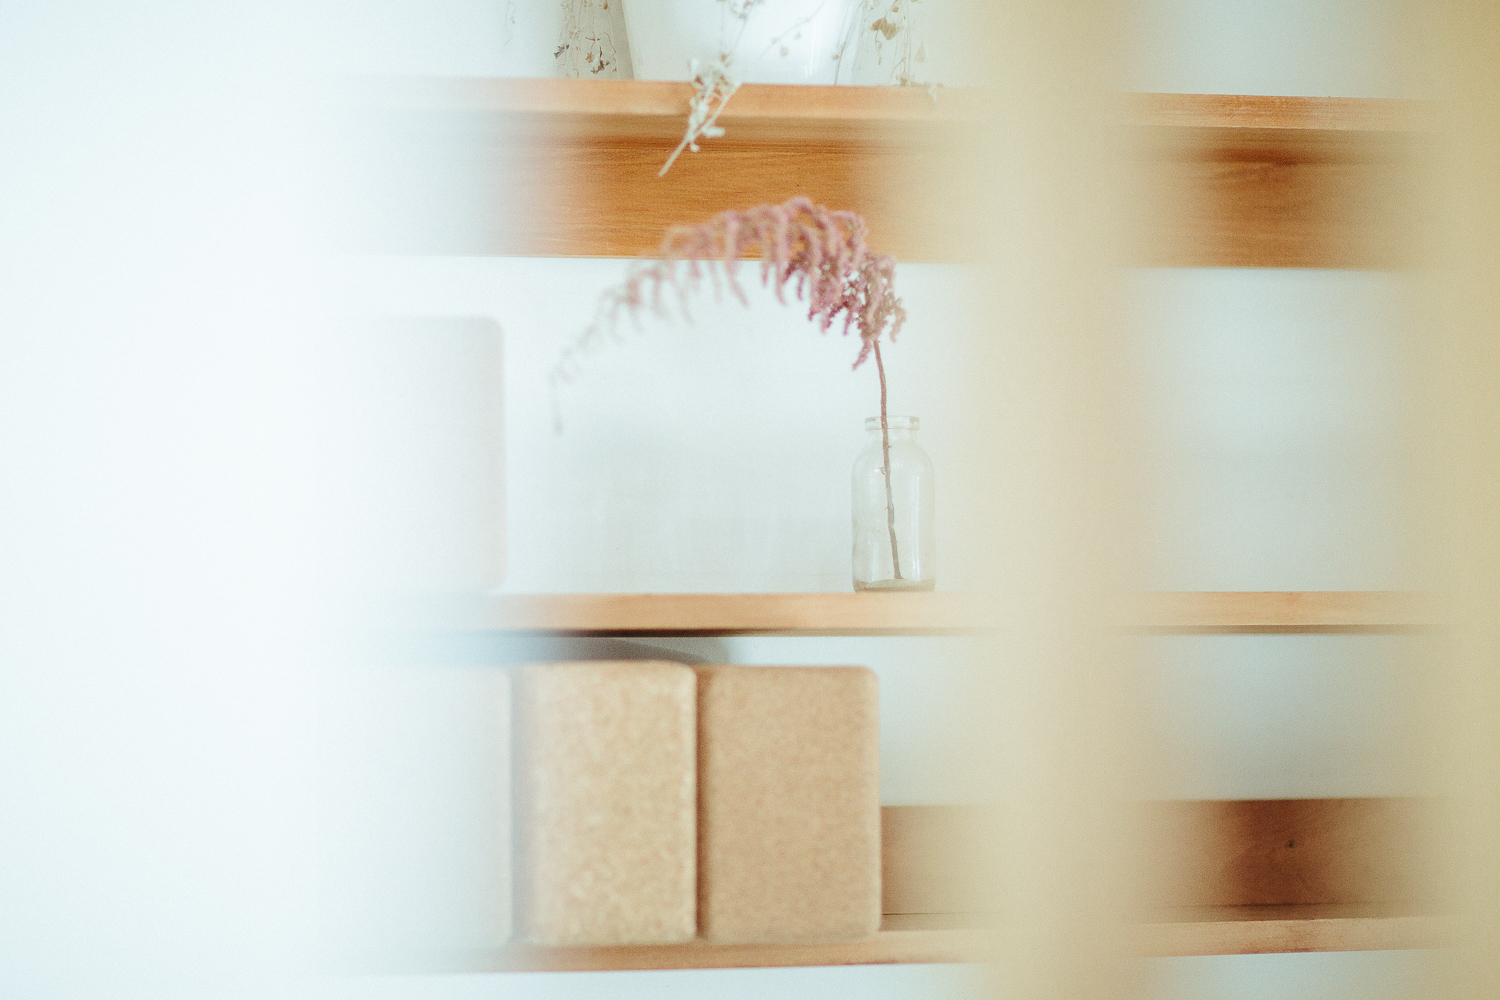
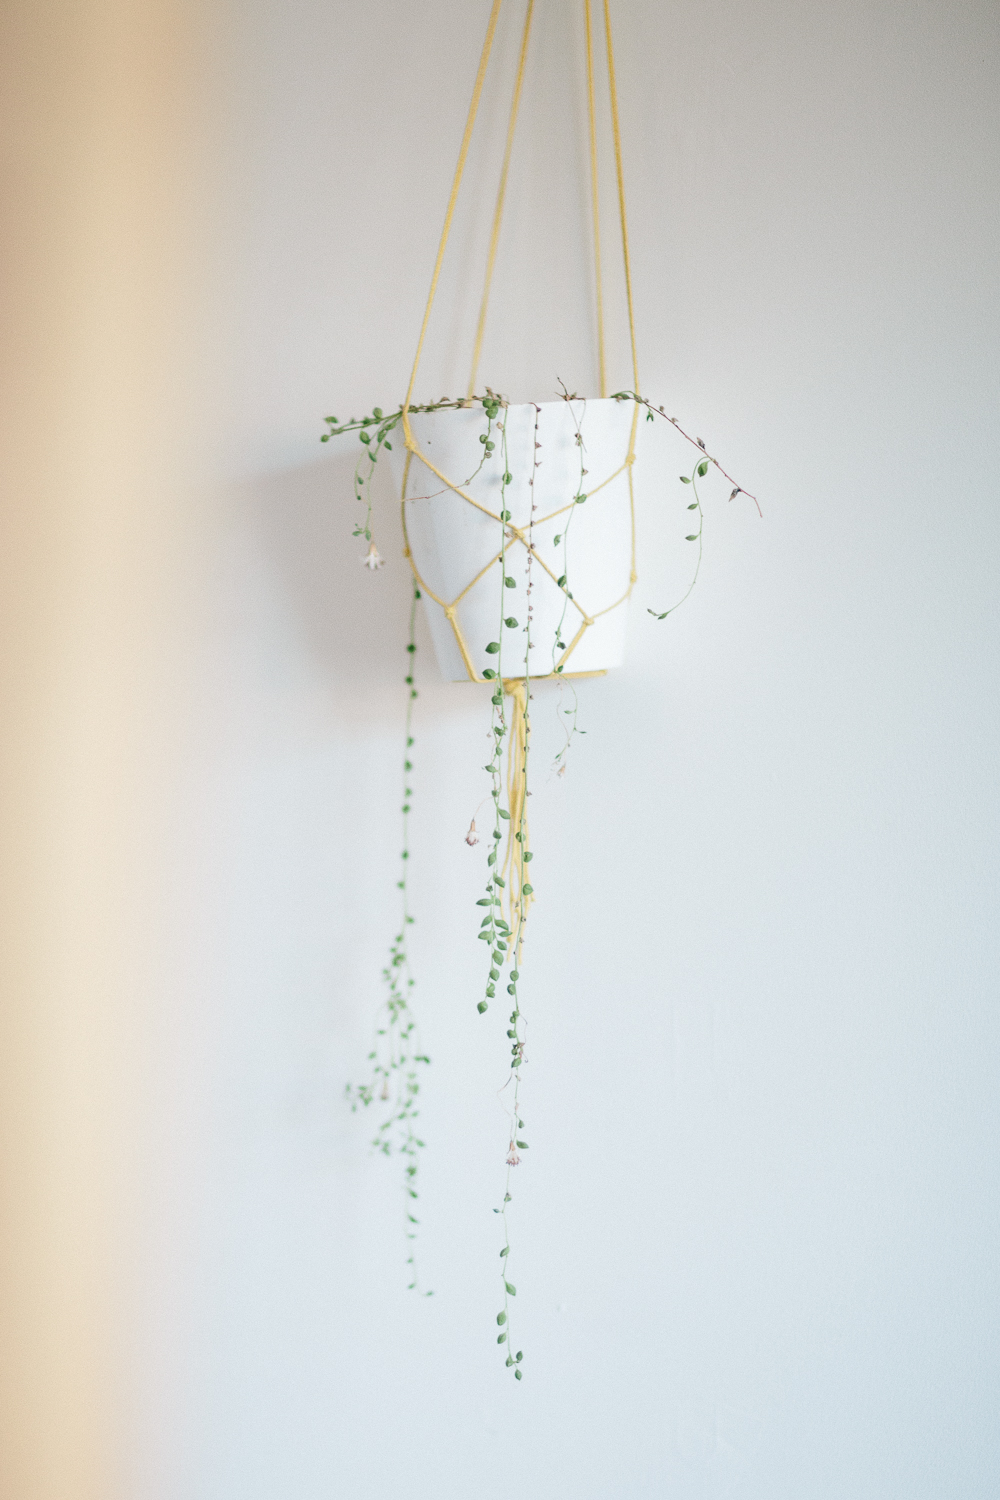
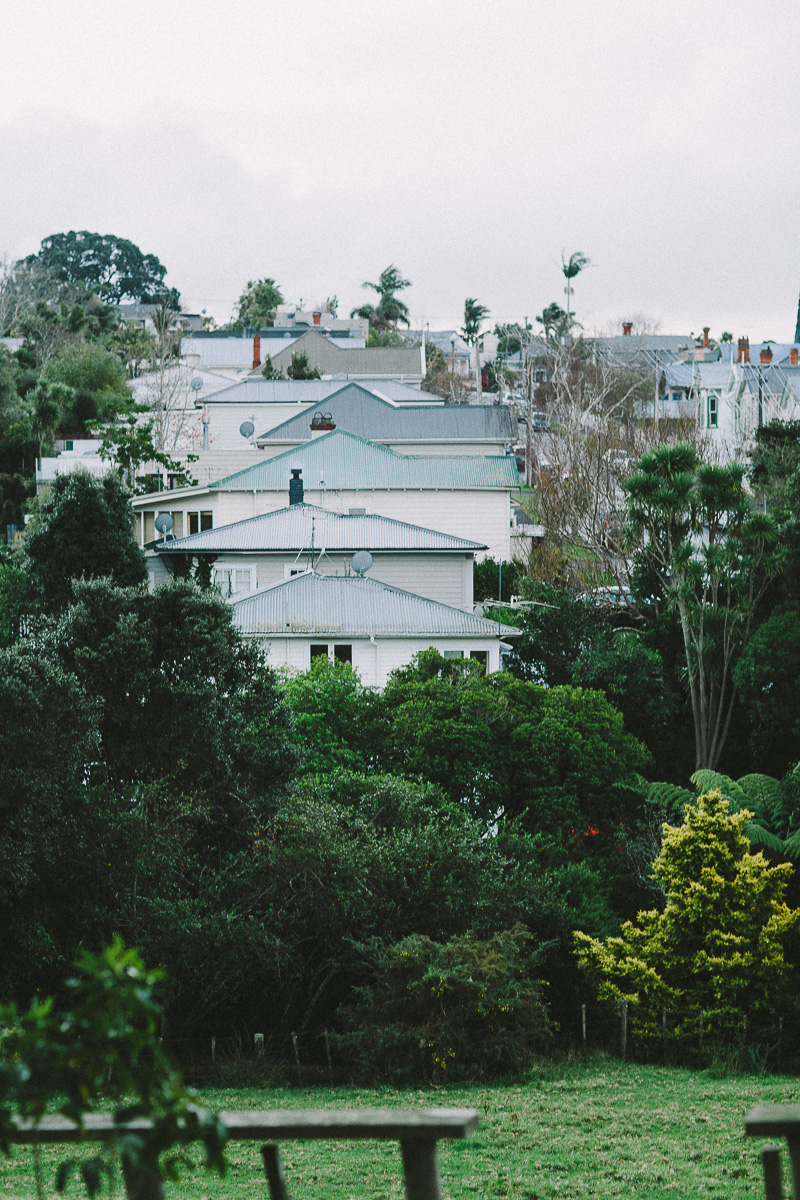
We moved to a new flat recently which means a new kitchen! I'm really excited for this new space which is sunny, has windows above the sink and a view onto our green yard. Our last little flat was very dark with low ceilings and bench space of only about a half a metre. I wonder whether this was a contributing factor to my sadness and retreat from a natural tendency to spend hours in the kitchen blending and creating. In any case, I'm excited for our new space and the change in me feels very wonderful. Inspired by different surroundings, I feel my eye being drawn to different frames as simple objects are lit up by changing shadows (particularly this week when winter has hit and it's literally felt like four seasons in a day!). Reach for the camera, here there... curiosity. I even took a picture looking out from our toilet window! Here I've documented some snippets of a daily ritual for me - just making a simple vanilla almond milk, embedded since those very early days in Stockholm when I became obsessed with raw food. Soaking nuts you know. One attempt of hands included, to make the series more "real". Although it's difficult on your own when holding the camera in one hand and pretending to look natural with the other. There is a recipe too - although they are easy to come by. This is my version and it is oh so good!


vanilla almond milk
- Soak 1 cup of almonds in filtered water for a minimum of 6 hours.
- Rinse nuts and blend in a high speed blender with 3 cups of filtered water.
- Strain blended nut mixture through a nut milk bag.
- Pour mixture back into blender and add 2 medjool dates, 1 tsp vanilla extract or 1/2 teaspoon of vanilla bean powder, and a pinch of salt. Blend again for 30 seconds.
- Add 1 Tbsp melted coconut oil to mixture whilst blending on a low spend.
Bon appetit!
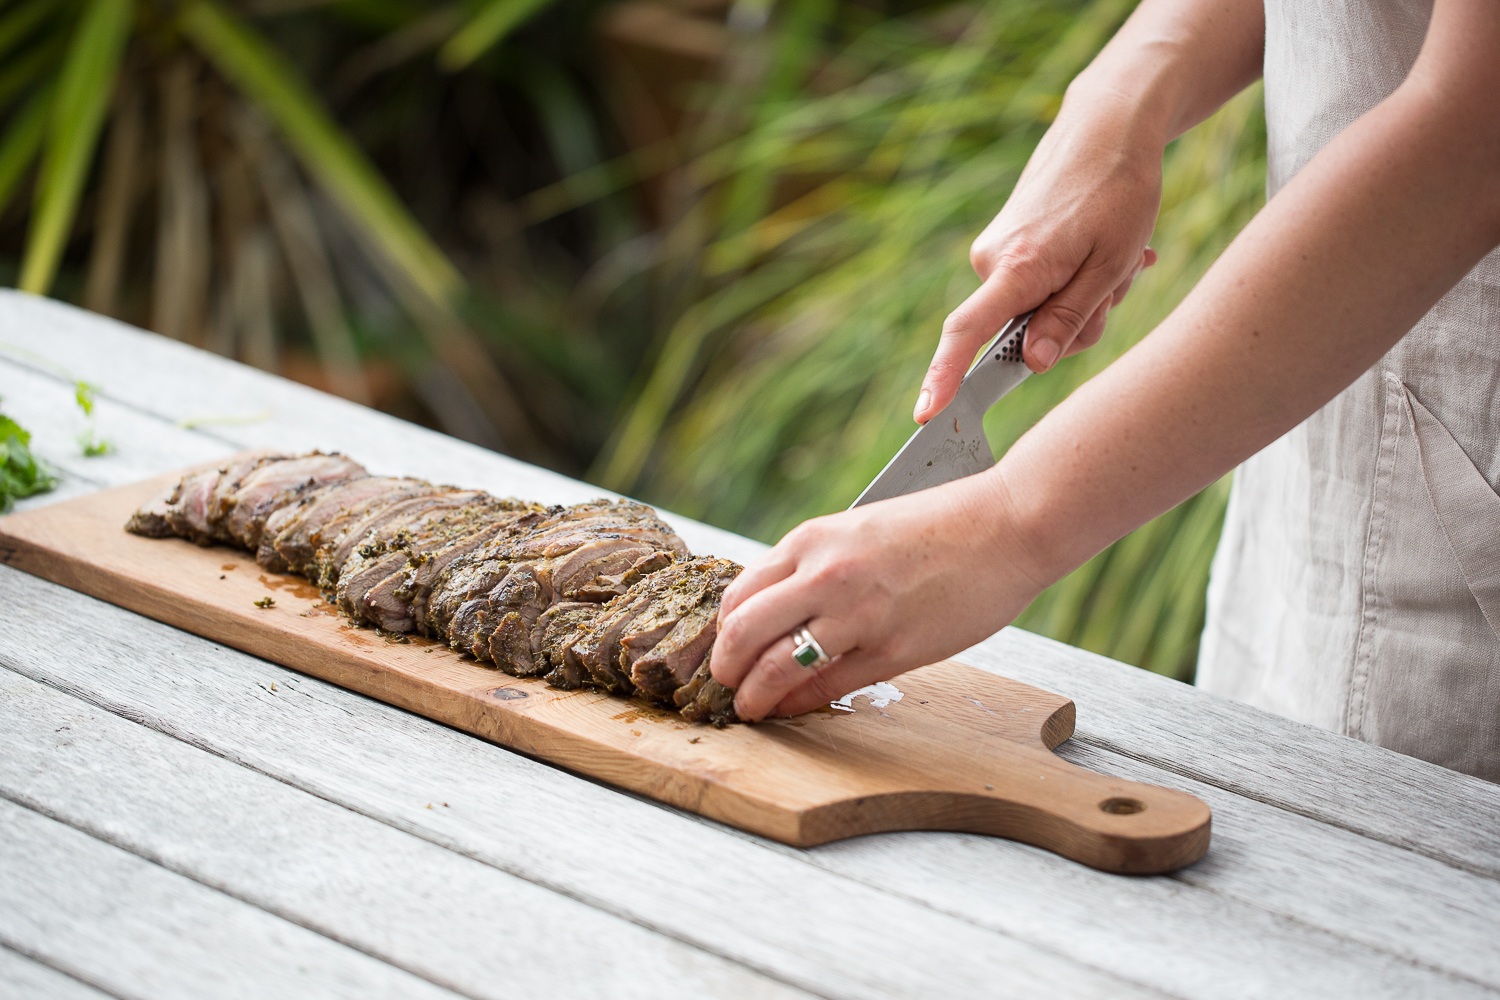
autumn rice pudding with coconut chai

Inspired by "Saturday night projects" from my long admired restaurant crush Noma, my good friend Tracey and I have started our own creative styling project. We have set ourselves the goal of once a week creating a dish to make and style together - this in order to foster creativity, solidify a style and learn in a safe environment (I'm sure there'll be many failed attempts!). Aside from me also getting to play with the angle of my images, I hope it will bring me back to the kitchen and rekindle the fire of doing what I most love. The year and half since I left a corporate career to pursue my passions of working with organic plant-based food, has not only taken me down a whirlwind path of photography but more recently the unknown and unstable existence as well as other things, resulted in me losing all the passion inside of me and left me feeling constantly hopeless and very scared of life. After finally seeking help with the encouragement from dear friends, I realise that these feelings were not normal. Nor that my tearful disposition, lethargy and overwhelming worrying thoughts were just "me", but that I have for a long while been quite unwell. Whilst energy came from working with my beloved clients, when those projects were done I would slump without the energy or fire to pursue personal work such as this. Today however I do feel good - actually in a way I've only known once before. This ongoing project therefore, has a role to play in keeping myself structured and well. Life really is a precious but funny thing - having been given the greatest gift to pursue doing what I love, this freedom somehow resulted in all that I love evaporating and leaving in it's wake sadness and fear. But anyhow - watch this space for the continuation of creative styling projects, recipe development and the rekindling of that flame. I'll be heading back to Sweden soon which gives me a big motivation to keep things rolling till I go. Till next time xo
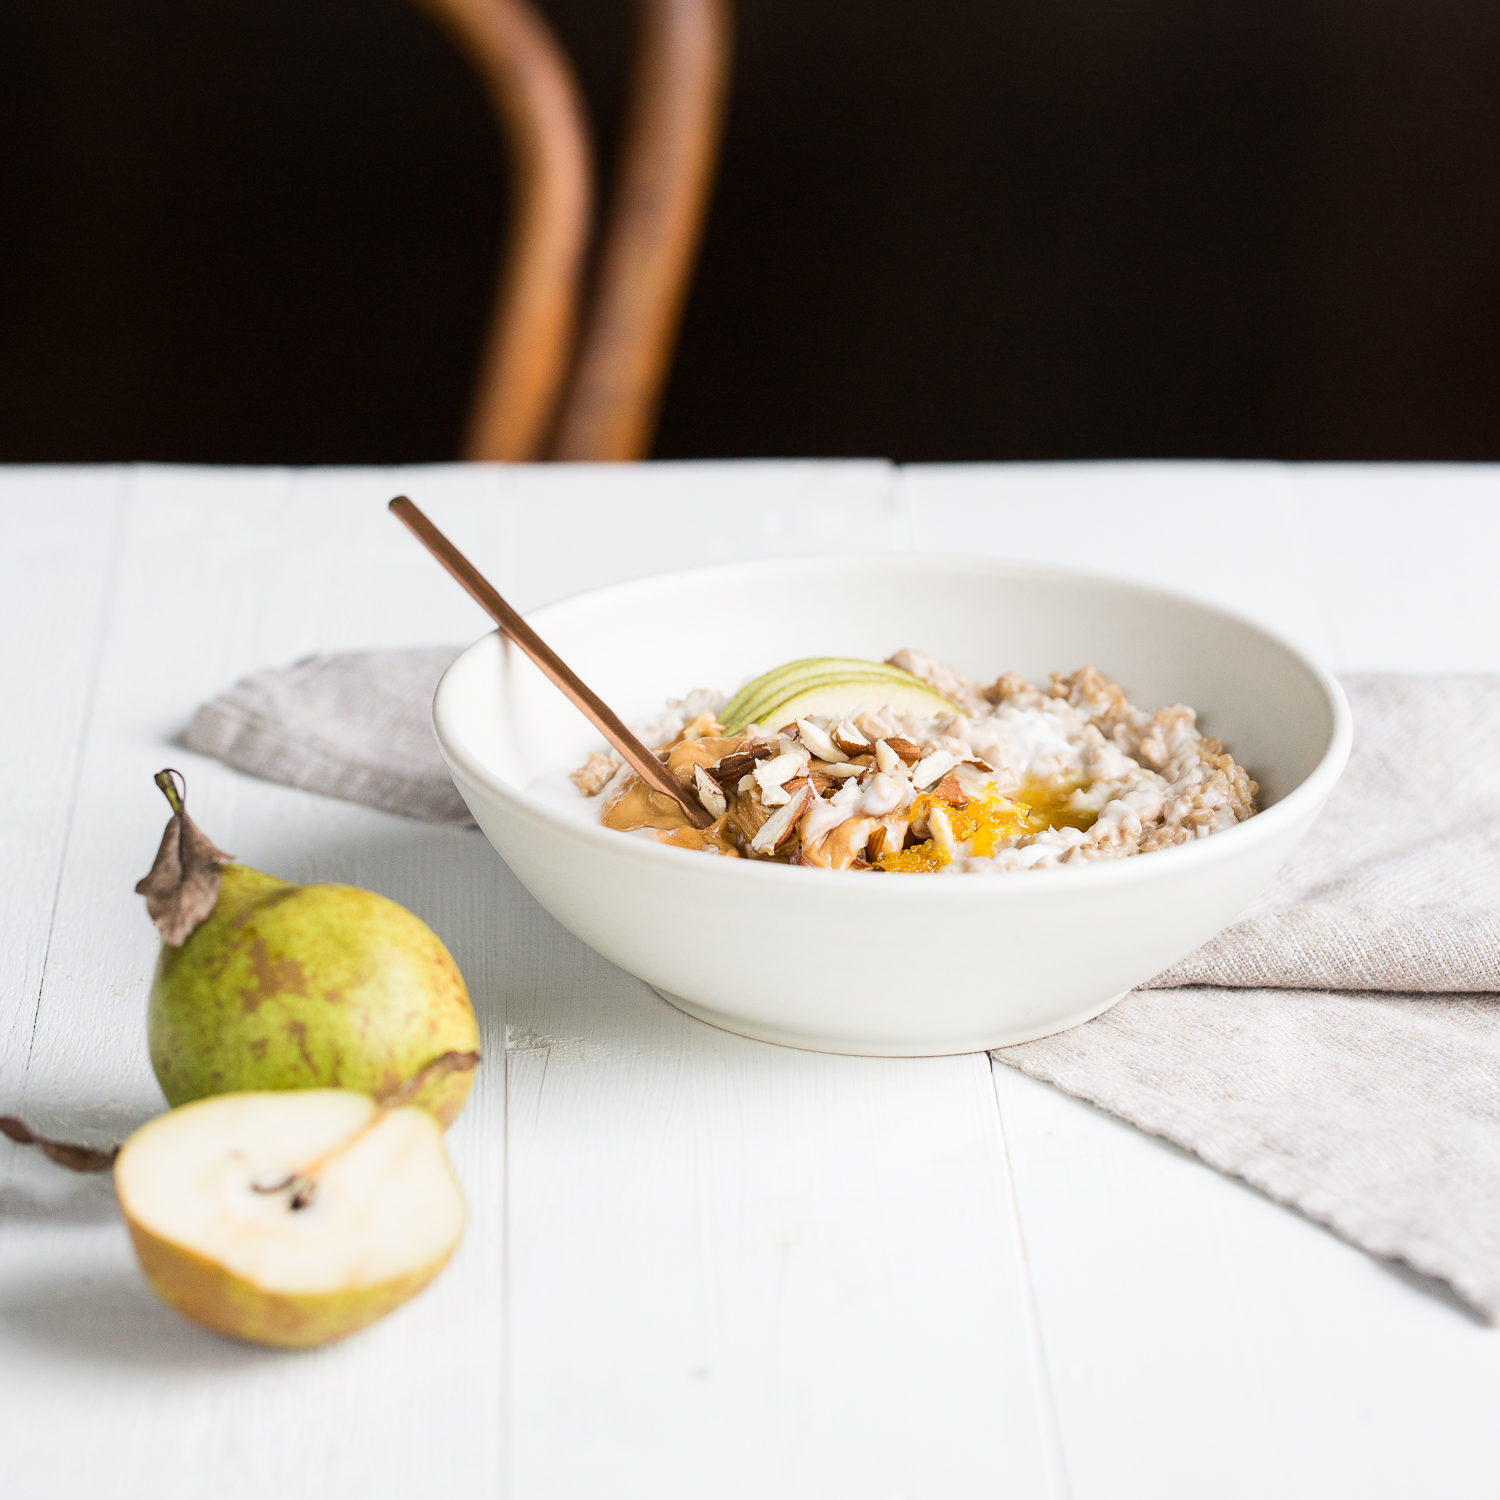


*Tracey made this rice pudding using Storm and India Tea Sisters coconut chai tea as an infusion. We topped with organic coconut milk, rice malt syrup, Ceres organics nut butter, almonds, coconut chips, Blue Frog orange syrup and seasonal pears.


el mono loco
One of the things I love about working with food and photography, is the new relationships I've made and old connections rekindled. El mono loco is one of the latter. Bridget Seramafidis, (founder of El Mono Loco with her husband Stelios), and I first met in high school (Tauranga Girls College quite a number of years ago now!). We first reconnected through our mutual love for food when I was living in Stockholm, having just returned from Matthew Kenney’s raw culinary school in Los Angeles. Then I was spending all my spare time making and styling raw foods and posting on social media, while Bridget was busy working on super yachts in the Mediterranean. Back then I’d never held a proper camera, and El Mono Loco had not been born. Bridget happened to see one of my posts and now more recently, my photography.

Now both back in New Zealand, apart from seeing each other fleetingly at the Papamoa Domain night markets, Bridget and my first real meeting since high school was a couple of weeks ago when I turned up to shoot images for El mono loco’s website. Before going into the details of the shoot, might I say that El Mono Loco is a very cool and dynamic young business! Under the brand, Bridget and Stelios provide Peruvian fusion street from their epic food truck (check it out on their website!), gourmet catering and healthy takeout through the Delicioso arm. The result is a fine fusion of their backgrounds (Stelios is from Peru), and talents.


The shoot was designed to depict the catering part of the business, using a few select dishes from the menu as well as fresh produce. I wanted to go for a rustic organic feel, combining consistent backgrounds and incorporating Bridget to give a personal feel to the story.


We shot at Bridget’s parents house which was a dream – ending up with 2 kinds of light woods, and a white board as the settings for the food. White simple plates denoted the gourmet catering and minimal other styling touches enabled the food to shine. I really loved the way my neutral coloured apron and Bridget's ring were a consistent theme. This is what we came up with :)


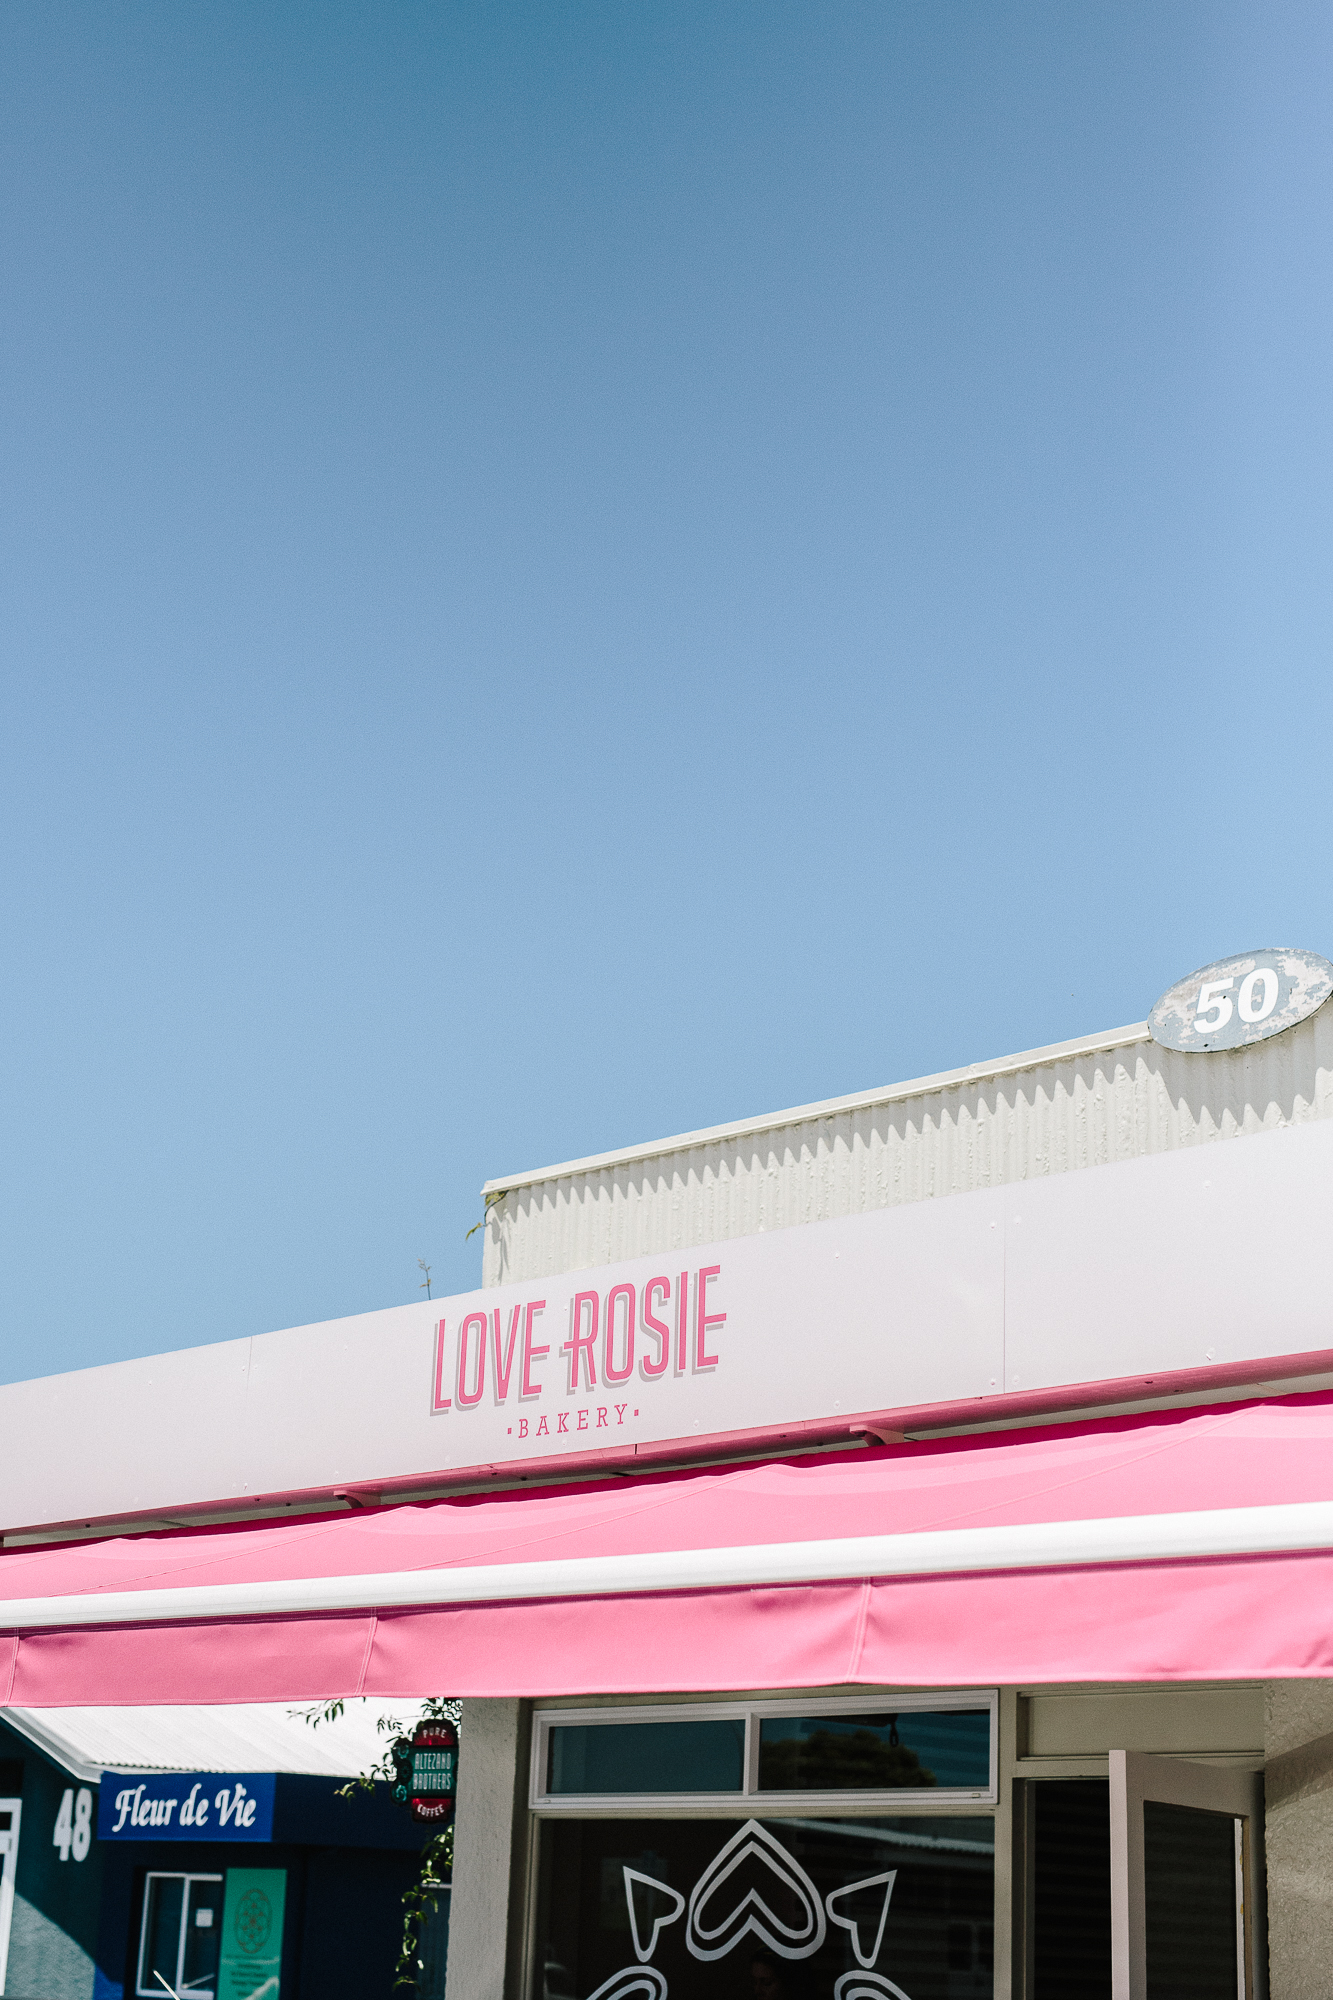
love rosie

When I was at home over the Christmas holidays (i.e. Mum and Dad's place at Papamoa beach), Fredrik and I stumbled upon a super sweet cafe called Love Rosie. I seem to be developing a curiosity for taking pictures in cafes and spaces with an aesthetic that captures my eye. Luckily enough the Love Rosie staff were kind enough to let me take a few images, and even more lucky was that the owners Kate and Brent allowed me to use these images on my blog. Here are a few to share.


spotted cups & summer dusk
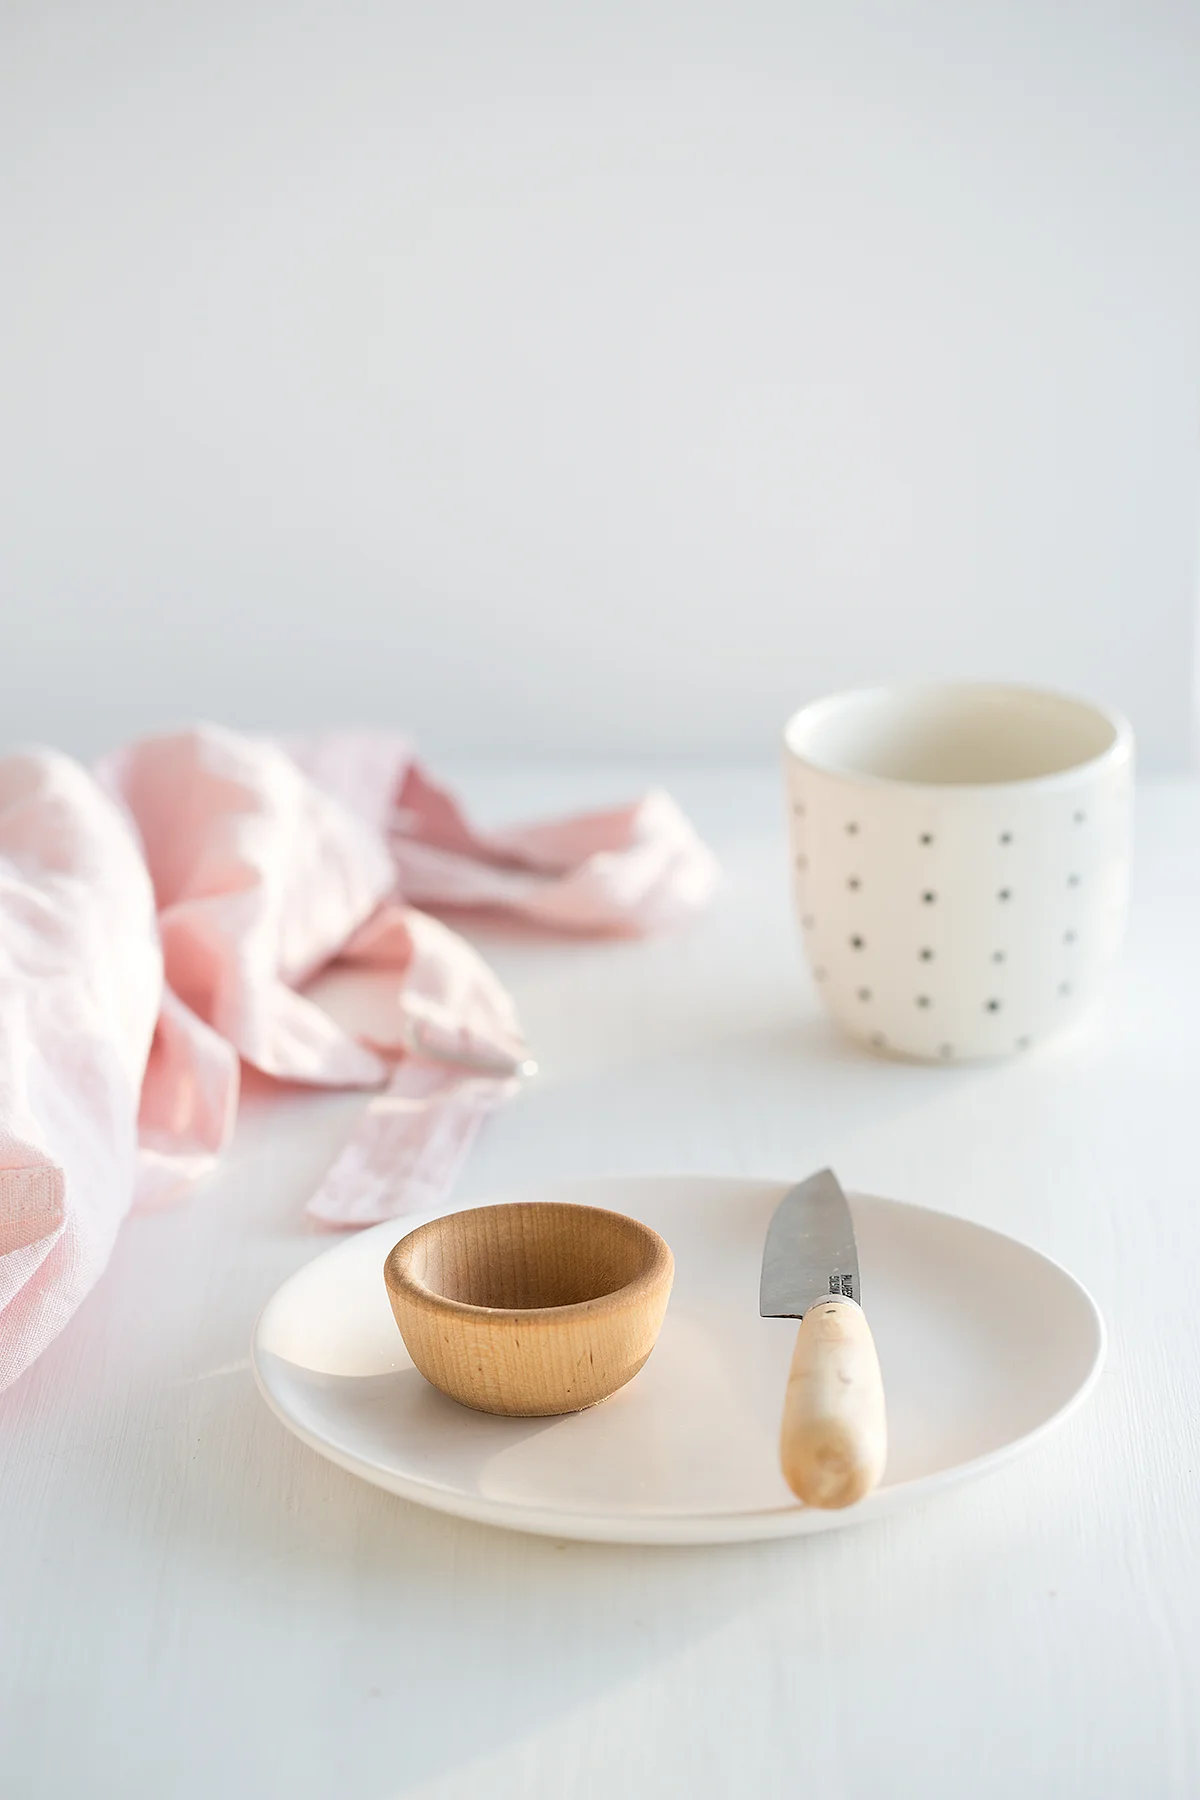
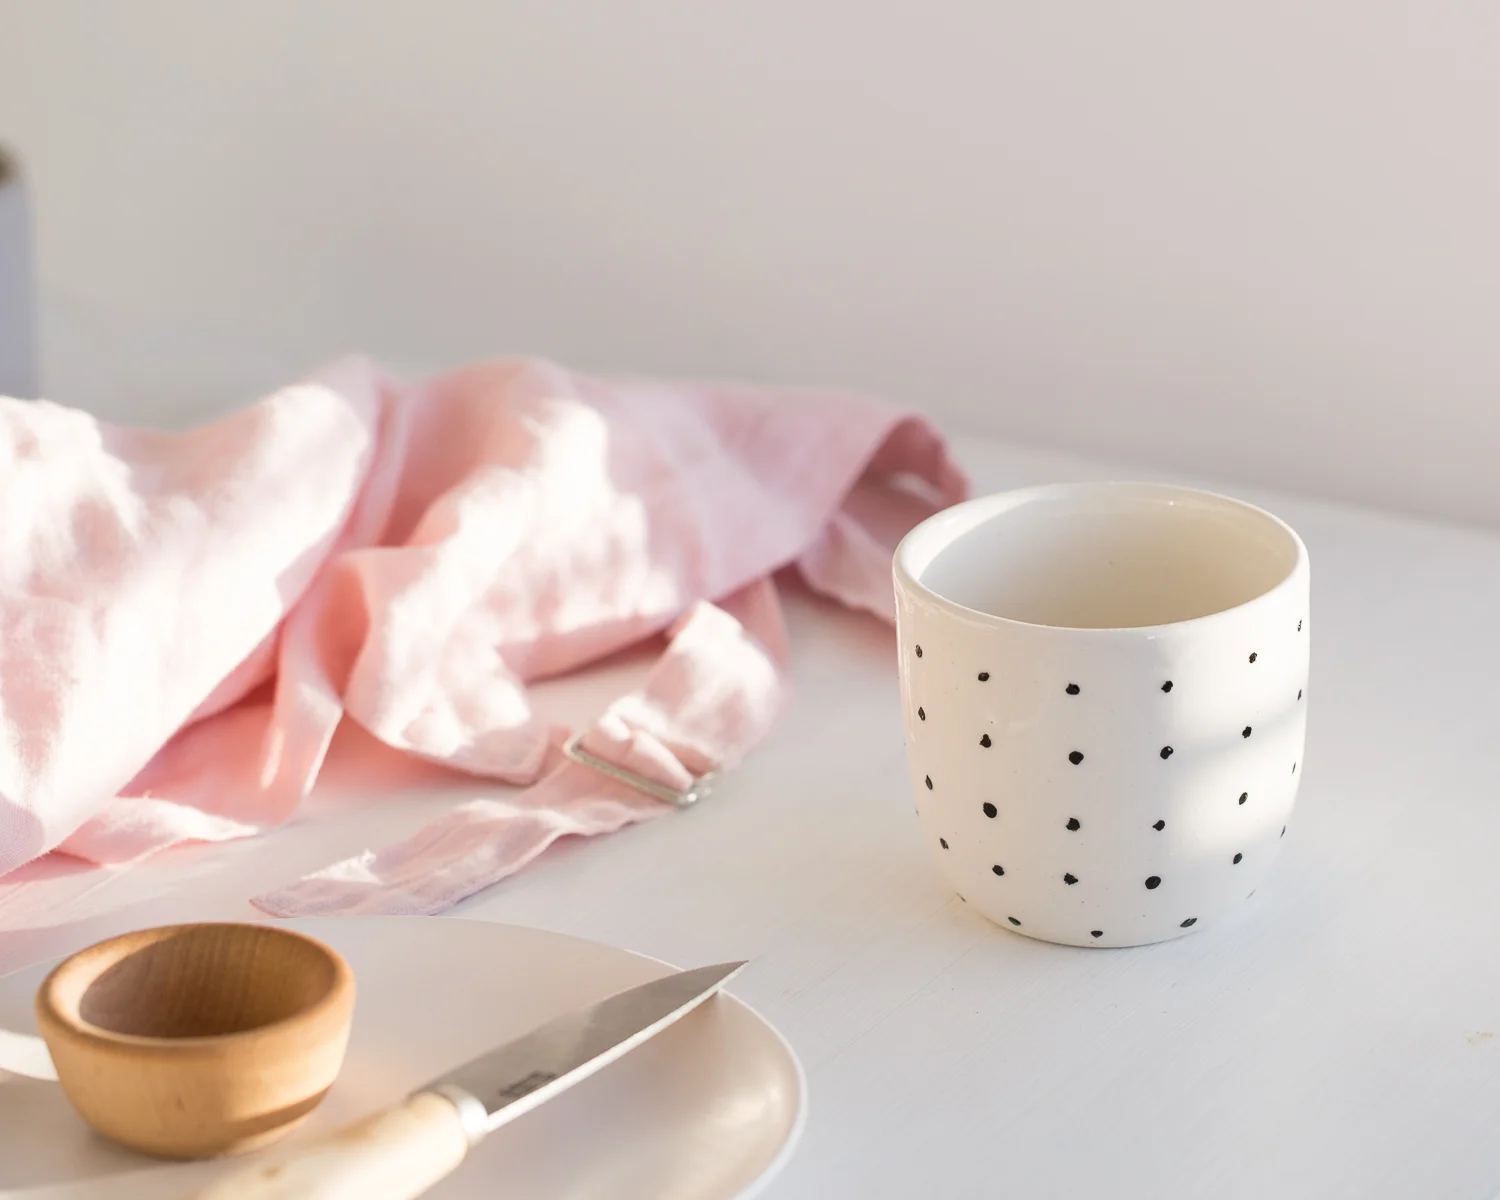
Last night I played around with some things in my props kit in the summer dusk :) I have a few favourites which I've collected from various stores in Auckland including the spotted cup collaboration between kowtow and Houston Design Co. It's a great feeling to experiment and produce things you like without any expectations - just an inquisitive curiosity and playfulness. This was one of those shoots which so happened as I was walking to my bedroom and noticed the beautiful light as it made patterns through the blinds. I'm always aspiring to understand light better and to consolidate a style that draws from the various aesthetics that inspire me. So much practice and an ever changing vision twisting and changing in my mind. This shoot I am happy with at least and today it feels like i'm on the right track :)


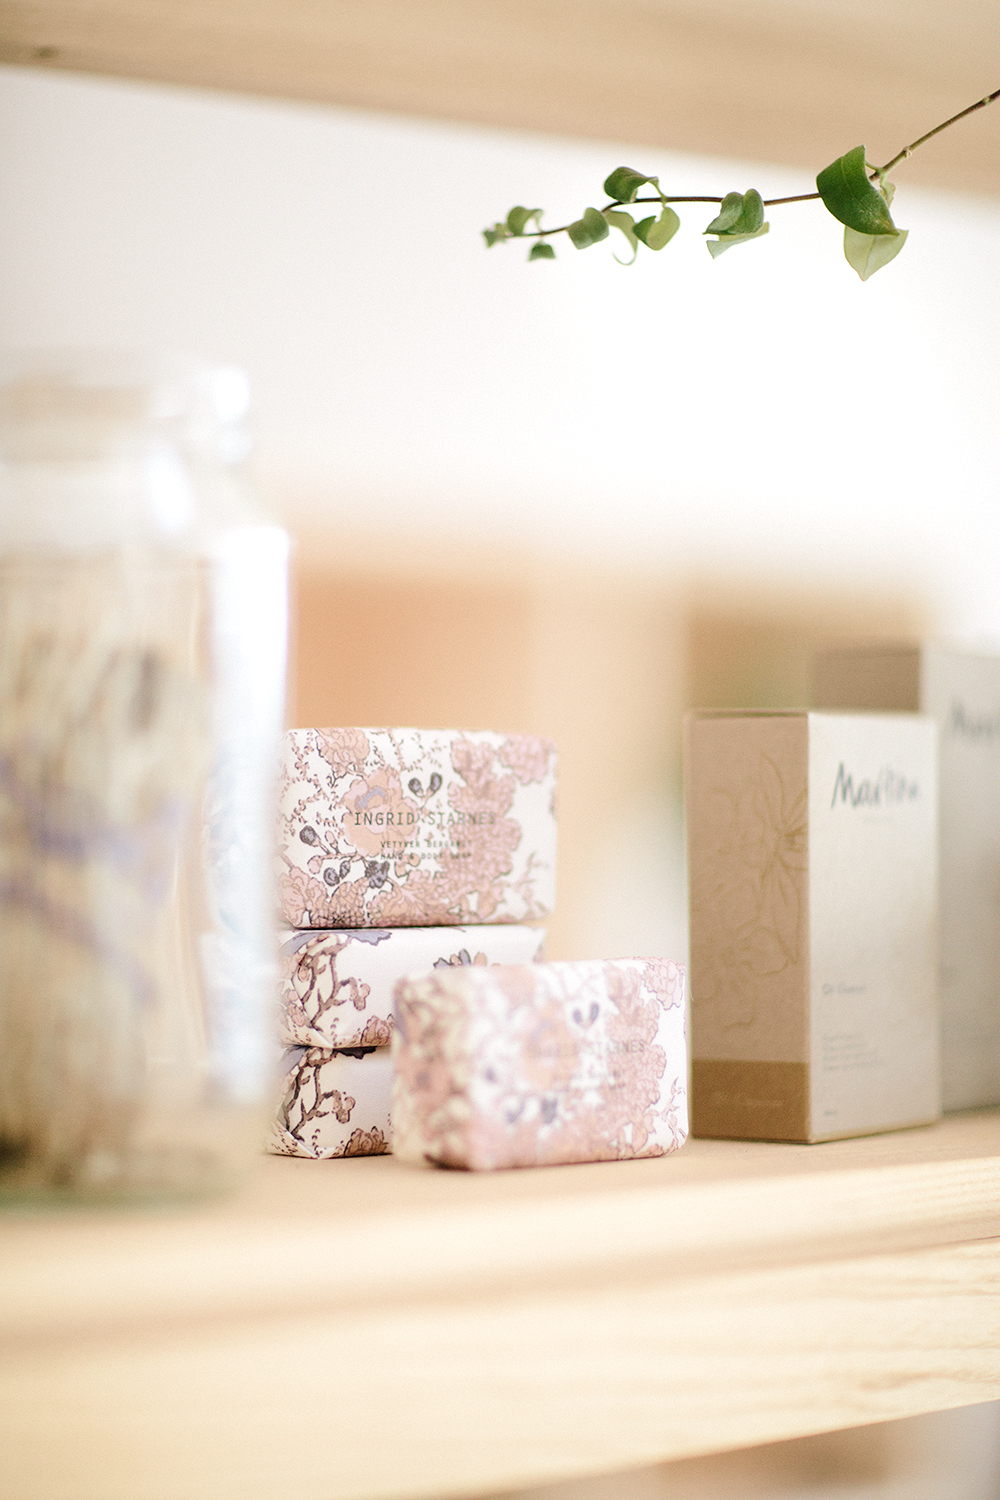
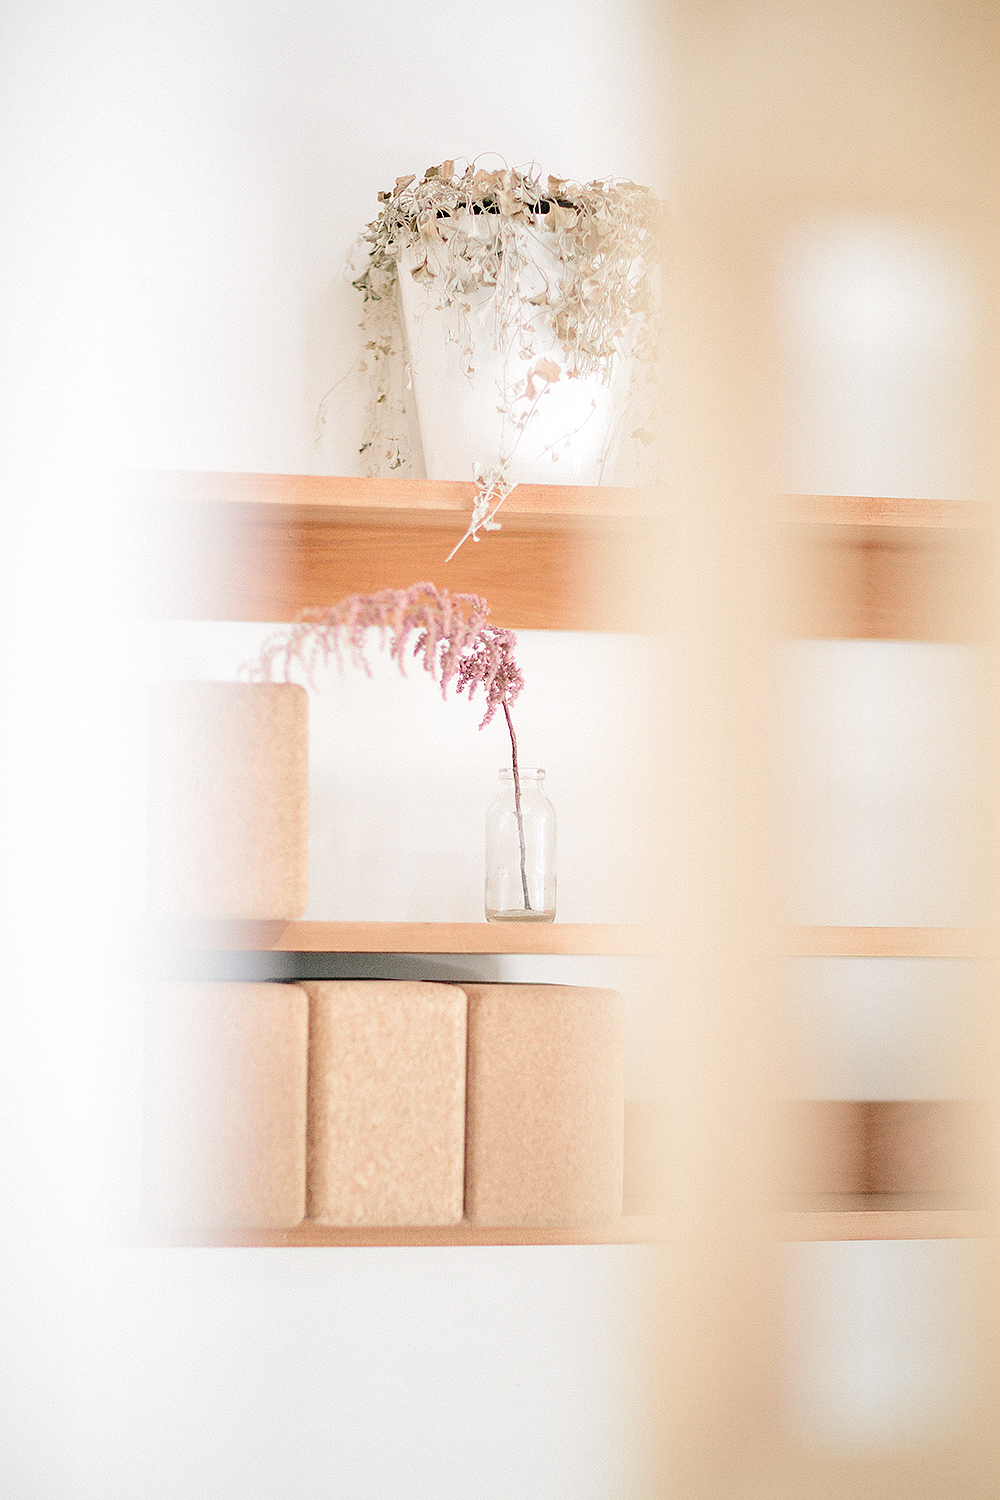
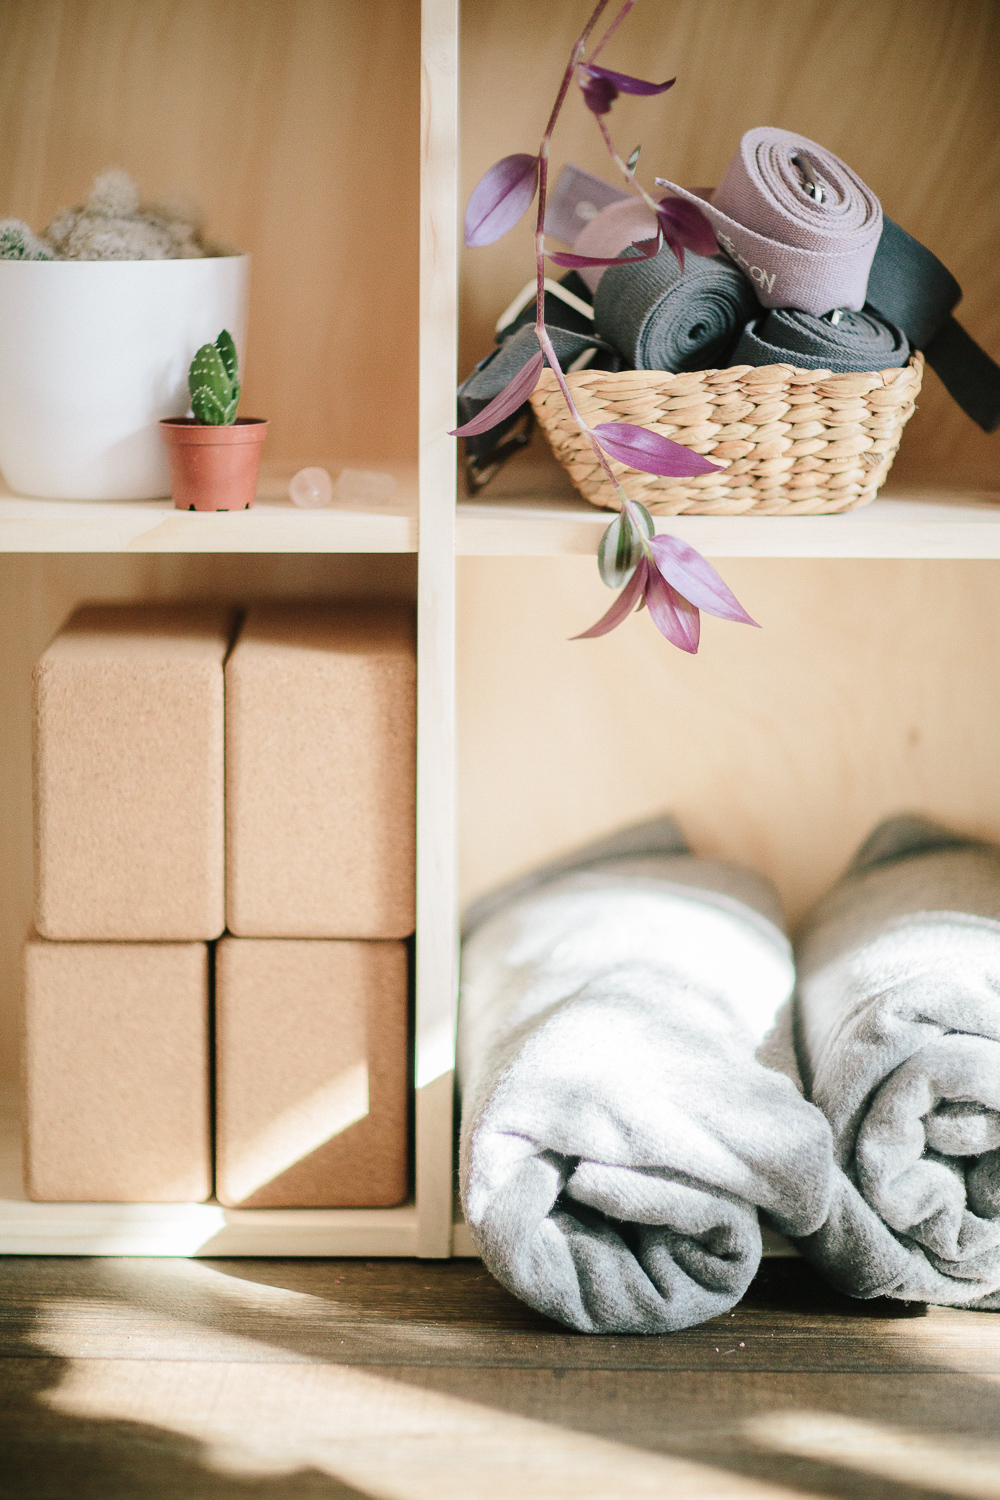
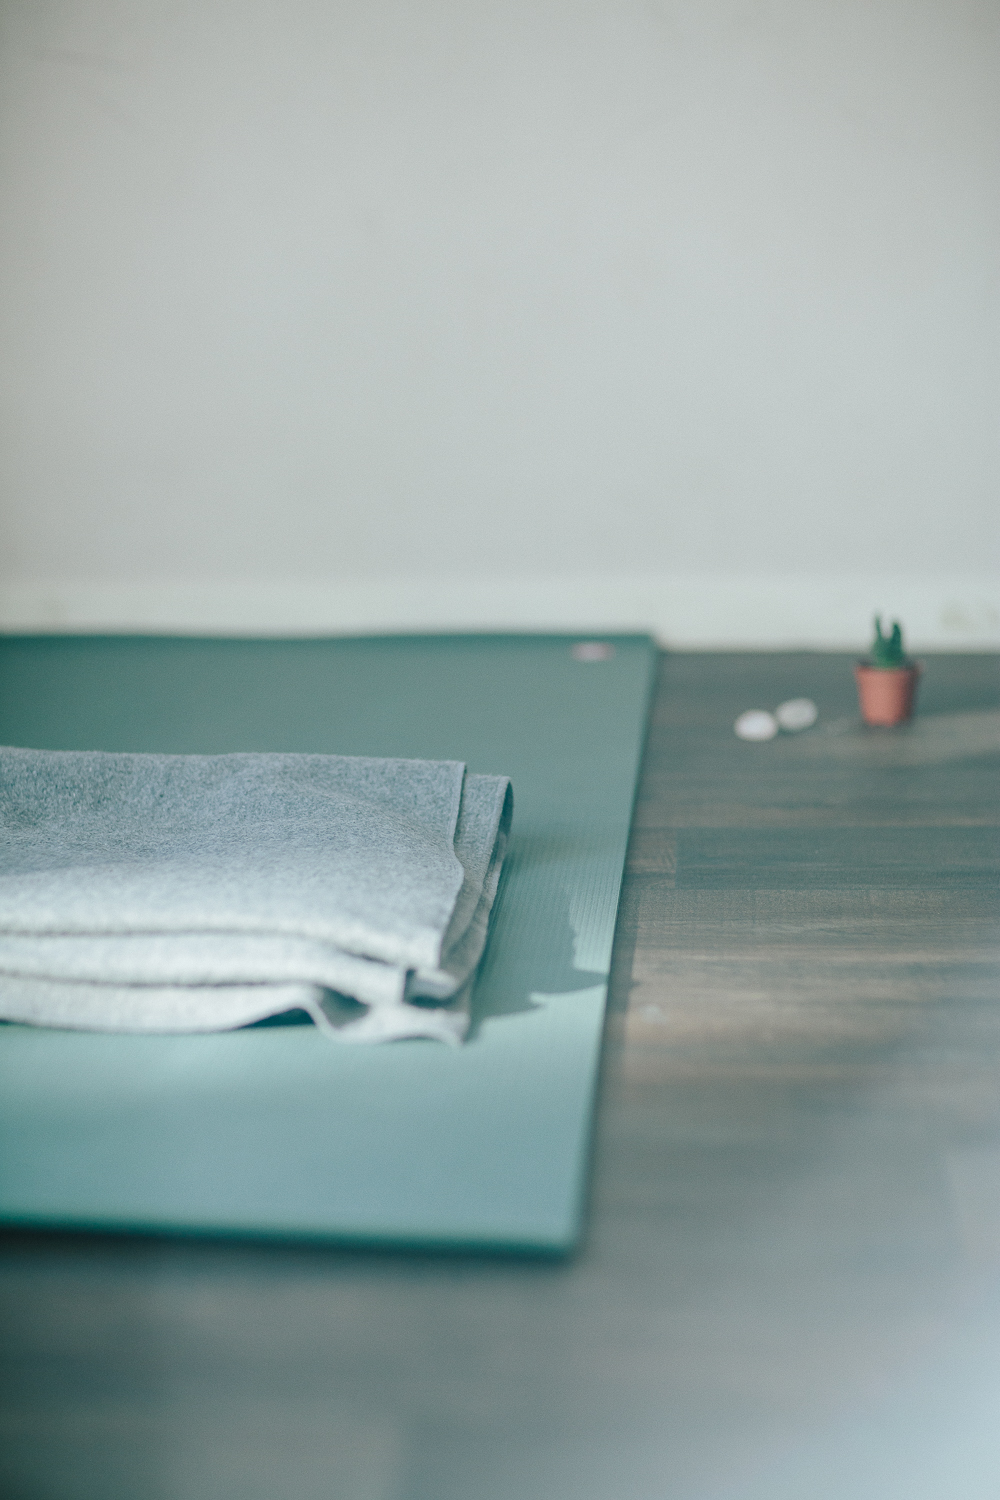
the Centre


There is a place on New North Road in Kingsland, Auckland. It is right above the little bird Unbakery and it is called the The Centre. Born out of the heart of phenomenal woman Rebecca, (whom I'm proud to call my friend), it is a beautiful space that does a LOT of good. It is a place of yoga, of caring, and community. During this past year I have been very lucky to immerse myself inside the heart of the Centre and it's people. A humbling opportunity allowing me to not only capture the interior of it's walls on a camera, but also to cultivate a style that I have come to like and am proud of.


mango & kaffir lime mousse pops on dark

It was about this time last year that I developed the recipe for and photographed my mango & kaffir lime mousse pops. It was early morning in Papamoa and I experimented photographing the dish a few different ways. In the end however, I decided to go with a light look and used photographs of the mousse pops on a white background. Stumbling across the dark shots the other day however, I thought that they were pretty cool. As it is a goal this year to start experimenting with darker colours, I've decided to repost the recipe with the final shots on dark. See which version you like best! Aimee x

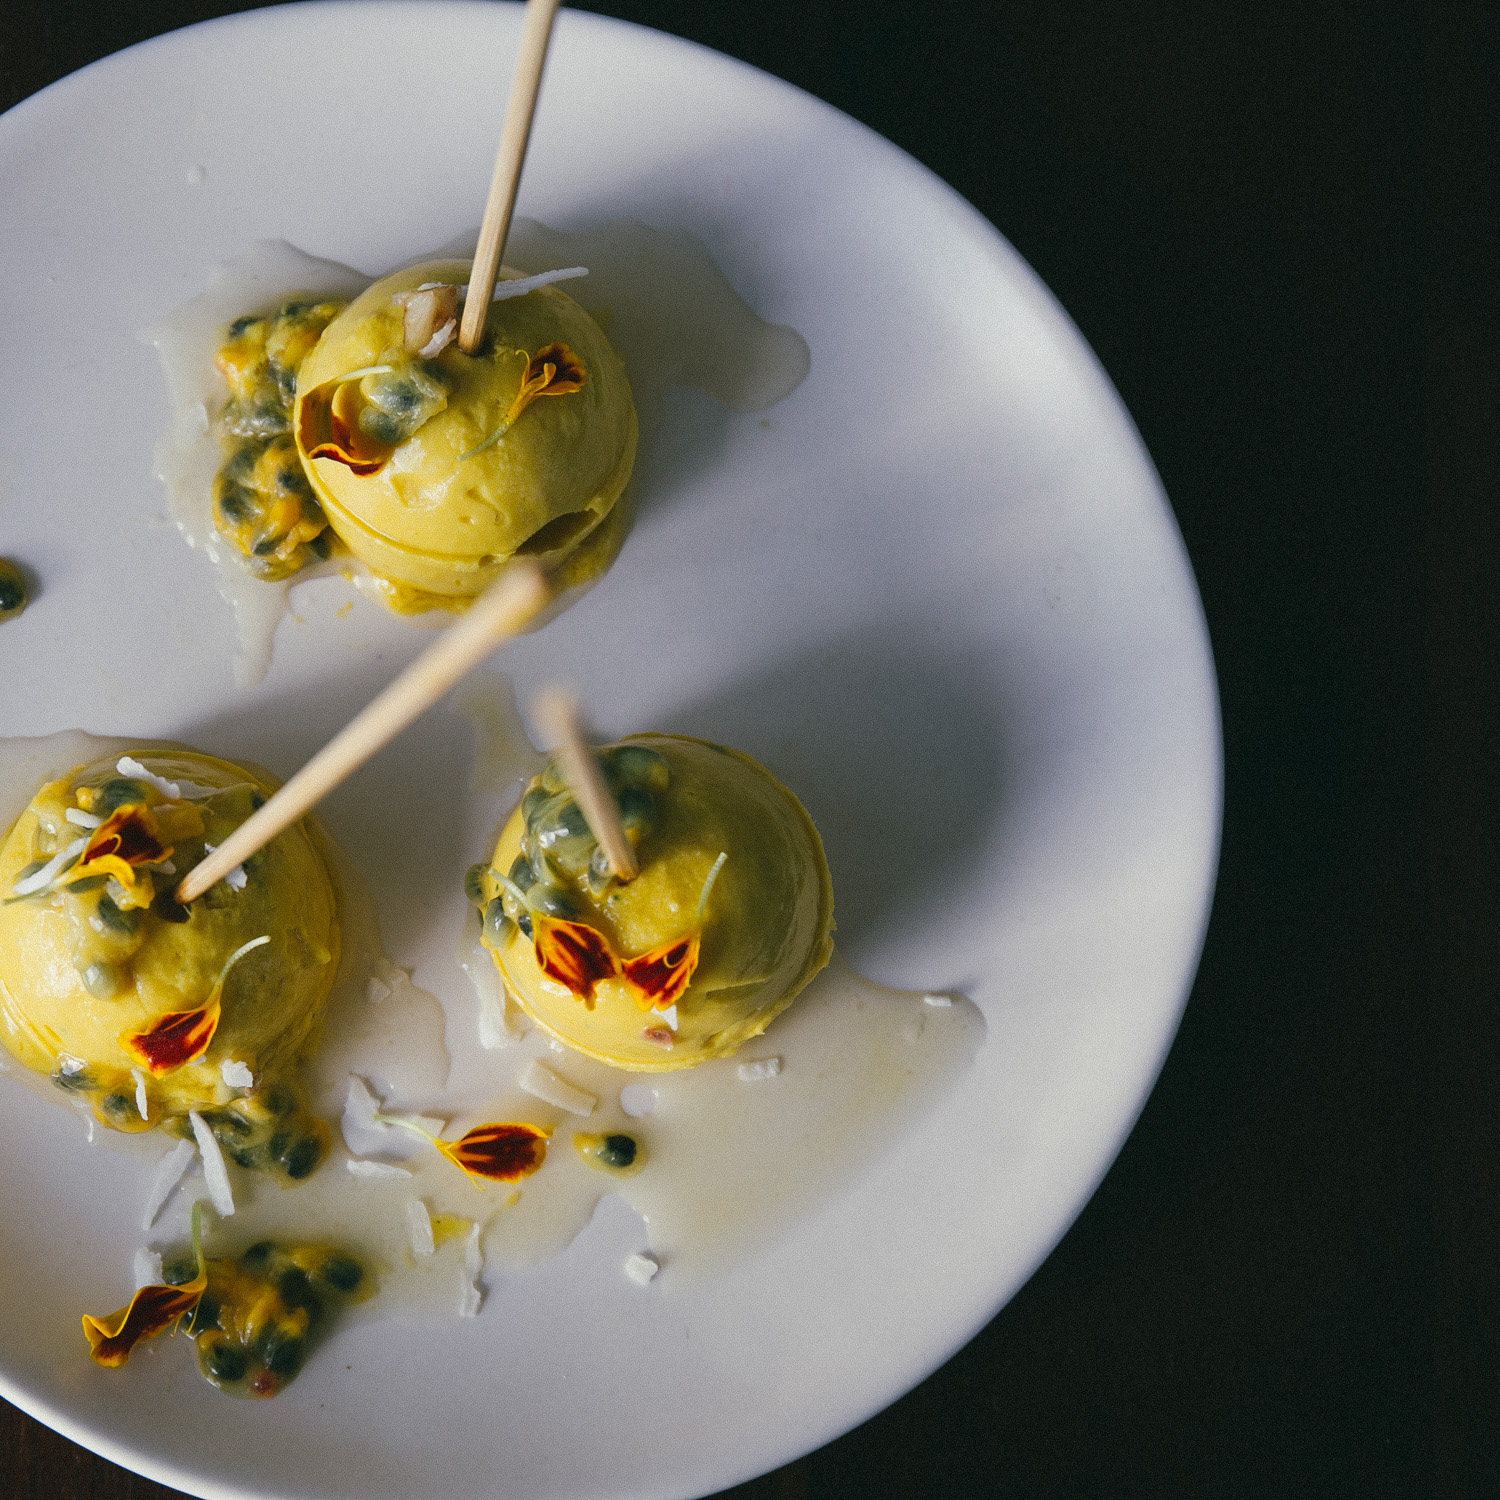
mousse pops (or mousse)
Makes approximately 4 mousse pops or serves 1 to 2 as a traditional mousse
- 1 large mango
- juice of 1 lime
- 1 Tbsp coconut butter (I used Artisana brand)
- 1 Tbsp maple syrup
- 1/2 kaffir lime leaf chopped into small pieces
- pinch of himalaya mountain salt or sea salt
Mix all ingredients excluding the kaffir lime leaf, in a a blender. Once blended smooth, add the kaffir lime leaf to the mixture and pulse a few times to give small bursts of green (in colour and in flavour!). For mousse pops, freeze mousse mixture in moulds (see original blog post). Once frozen, remove top mould and insert sticks when preparing to serve. For plain mousse, try serving in the discarded passionfruit casing or otherwise in a favourite glass or bowl.
* Optional - add 1/2 a frozen banana to the mixture before blending. My mousse pops are made without banana as I'm not much of a banana smoothie person =) Bananas and mango do however work as a classic flavour combination.
Garnish with passionfruit pulp drizzled on top and organic shredded coconut.
dried wildflowers & chocolate
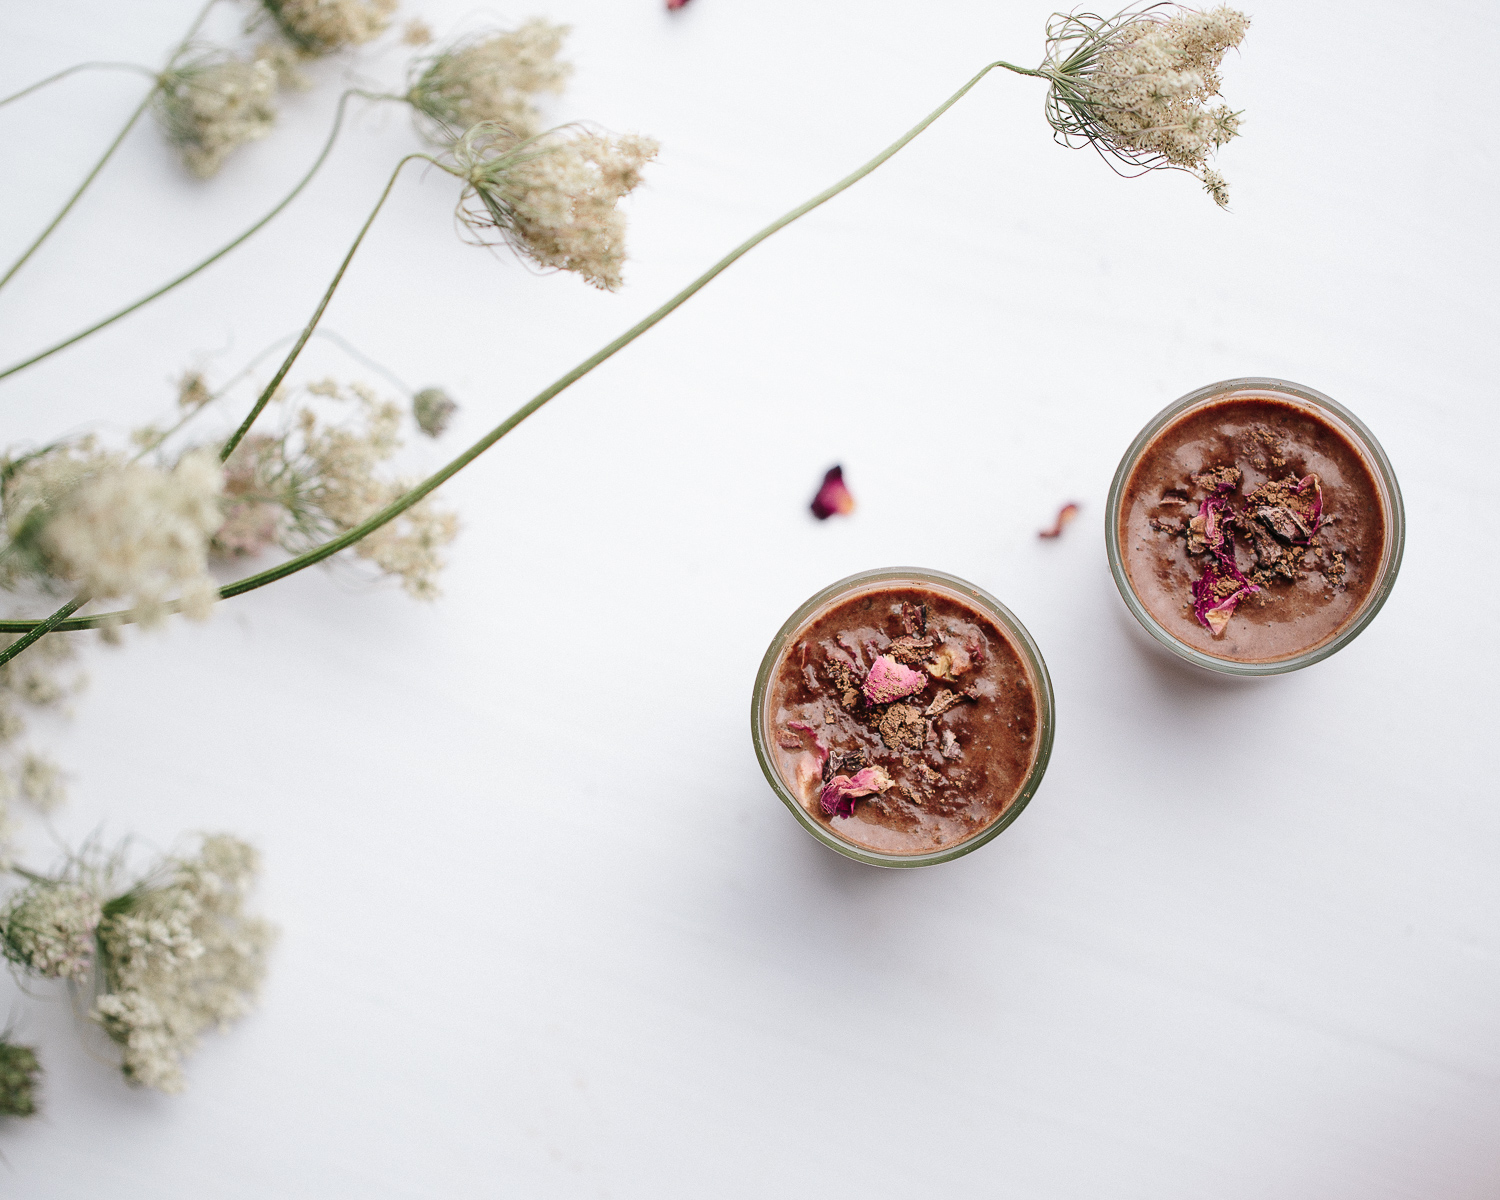
I've been having lots of fun exploring my creative inner-self these holidays. I started experimenting with drying flowers a few months ago and these wildflowers I picked up off the side of the road after a family walk in the hills. I've also been immersing myself in a plethora of artists whom I find inspiring and as such have begun to experiment more with light and darker shadows. This is a little shoot in my room at the beach, bringing these things and some favourite ingredients (namely cacao) together...


dear jervois
I'd never been into the Auckland cafe Dear Jervois until recently. I'd always been intrigued when driving past as I have an affinity for certain spaces. For old buildings painted white on the inside. With high ceilings, wooden floors and foliage they remind me of what our apartment in Stockholm used to look like. I got my chance after a recent morning shoot with Storm and India Tea Sisters at Tessuti down the road, and I really did love what I saw. The aesthetic reminded me of my favourite shop Grandpa in Sweden. And so without wanting to be too conspicuous, I grabbed a cup of tea and managed to sneak a few quick snaps. x


little bird organics social media photography
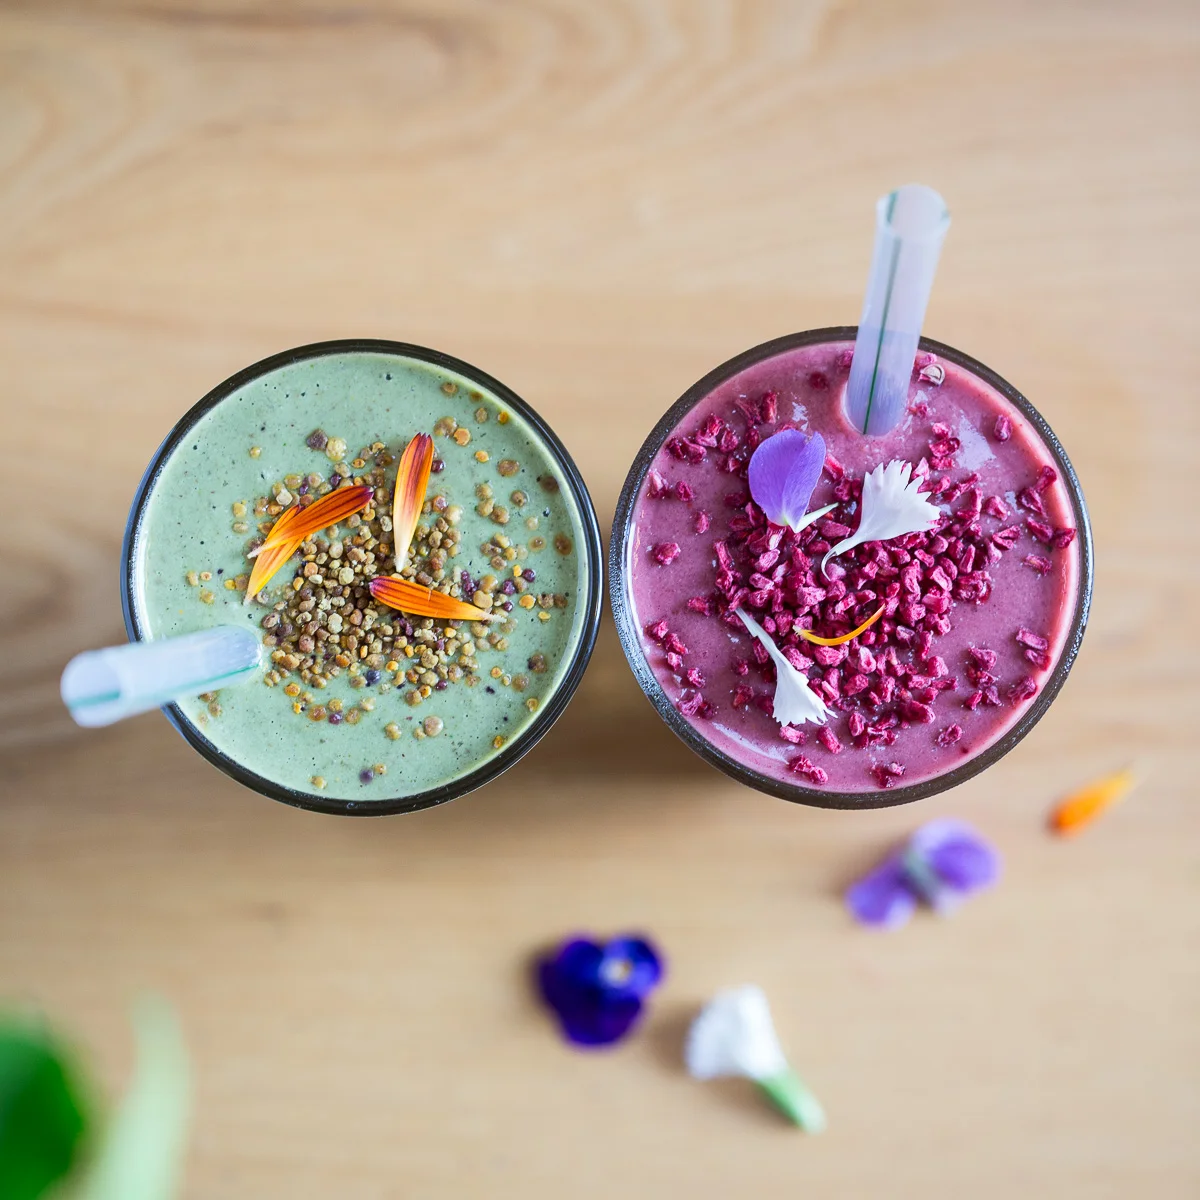
A couple of months back, I had the amazing opportunity to photograph for the little bird organics social media account. Little bird organics is a raw and whole foods company started by my dear friend Megan May. Here is my interpretation of their beautiful food and drinks as seen through my lens.


While there has been a large focus on photography of late, hopefully I'll be back in my own kitchen again soon. Happy days! xo
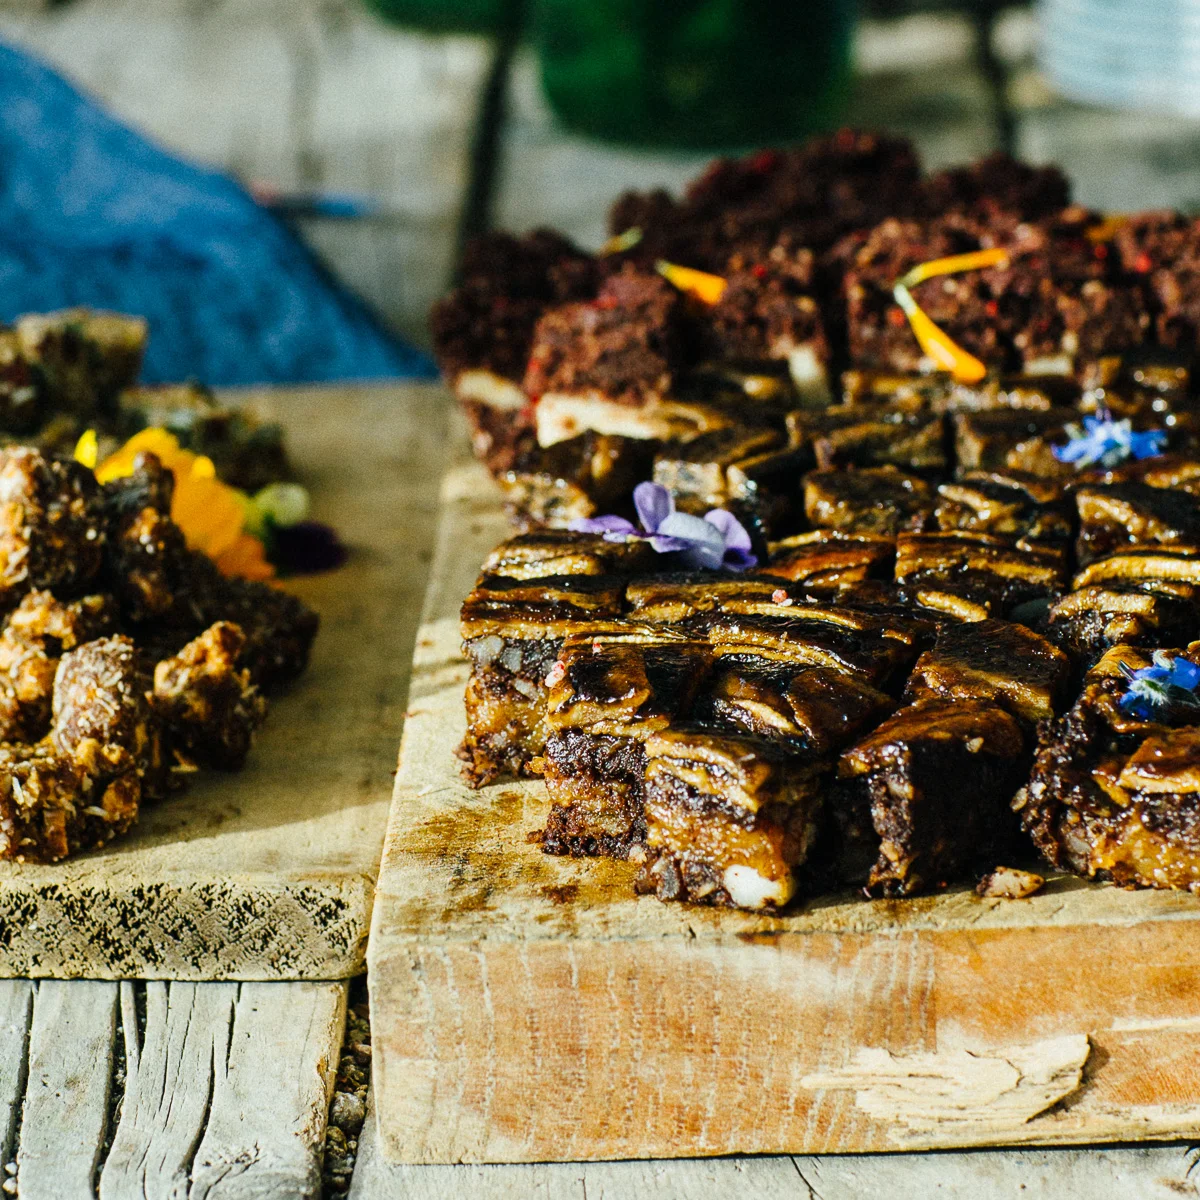
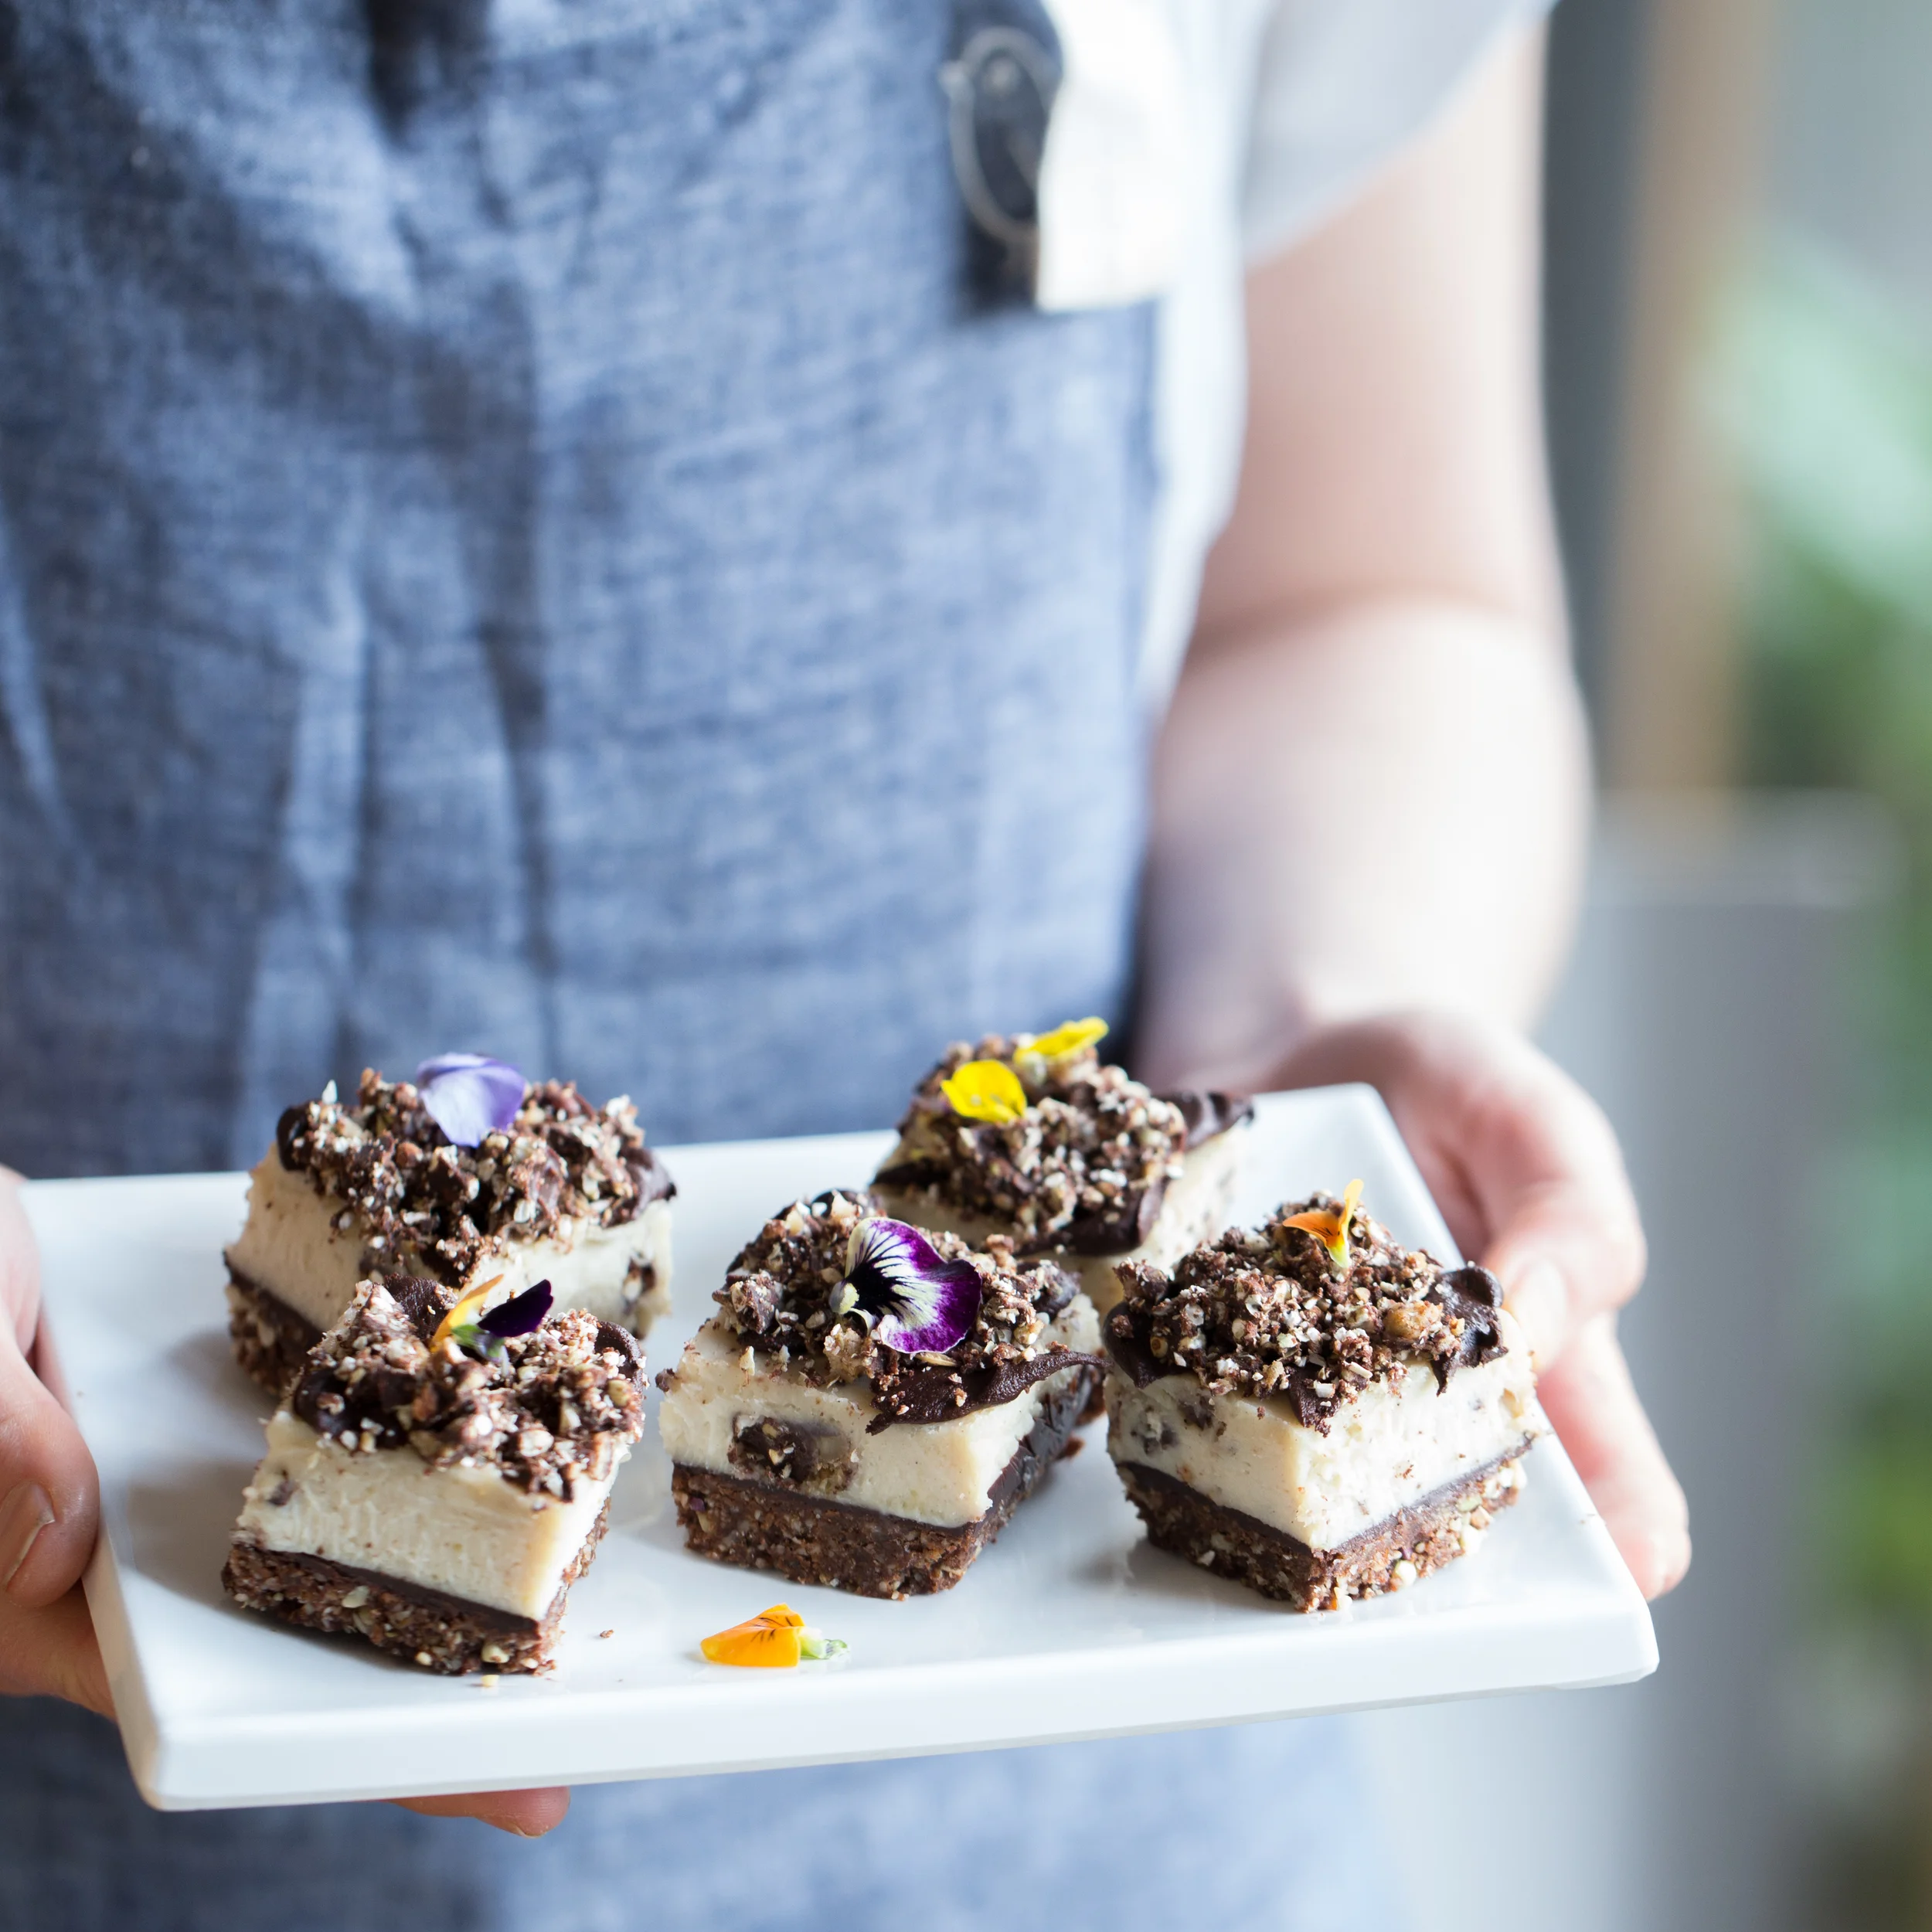
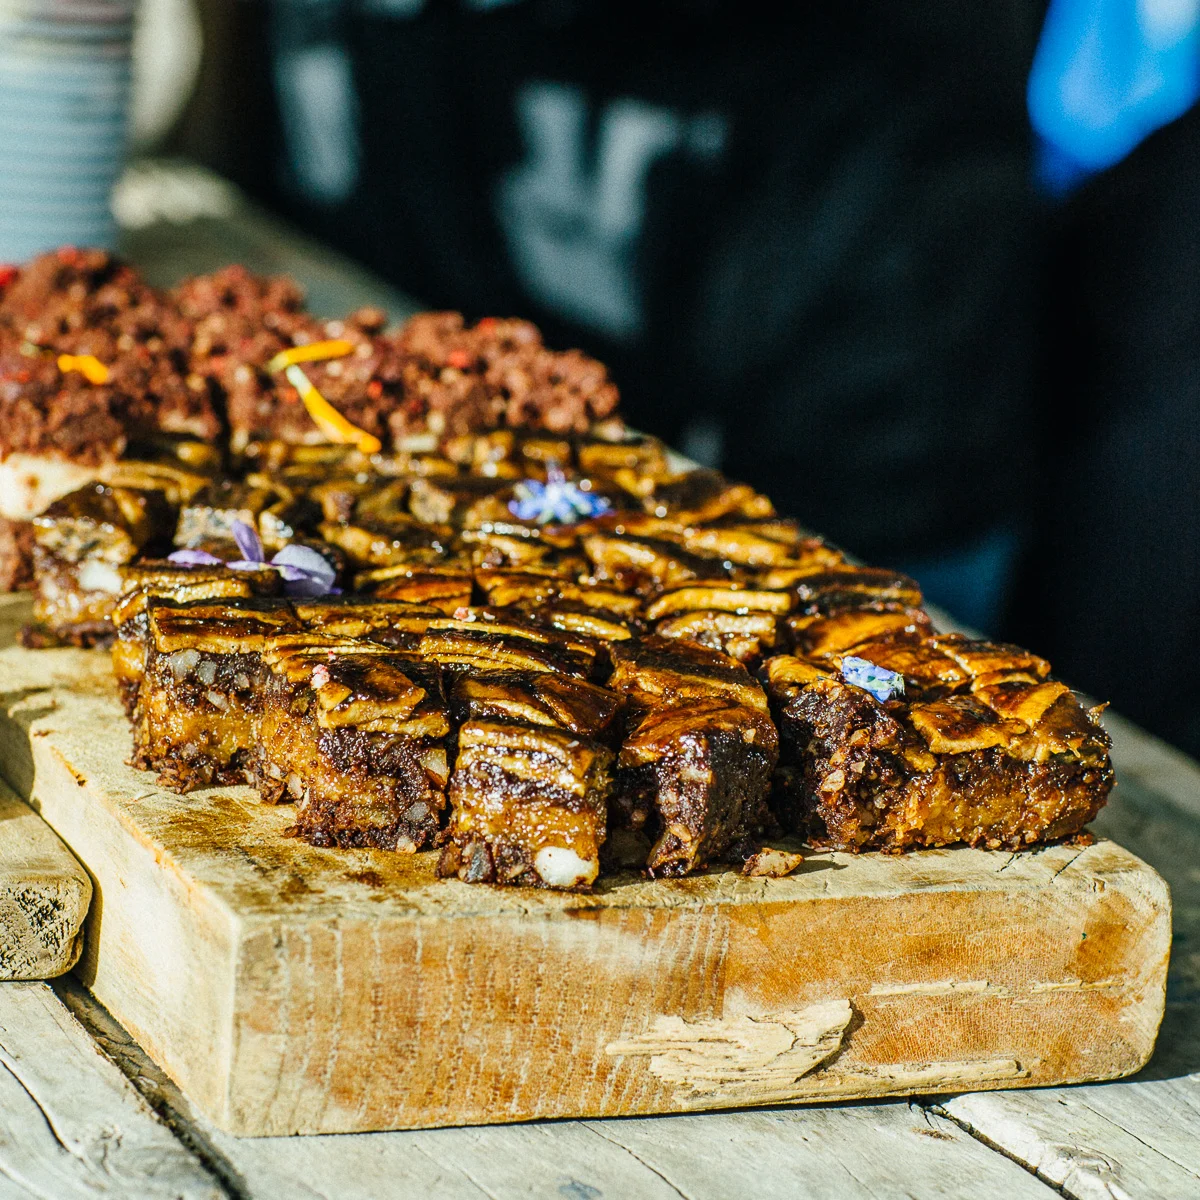
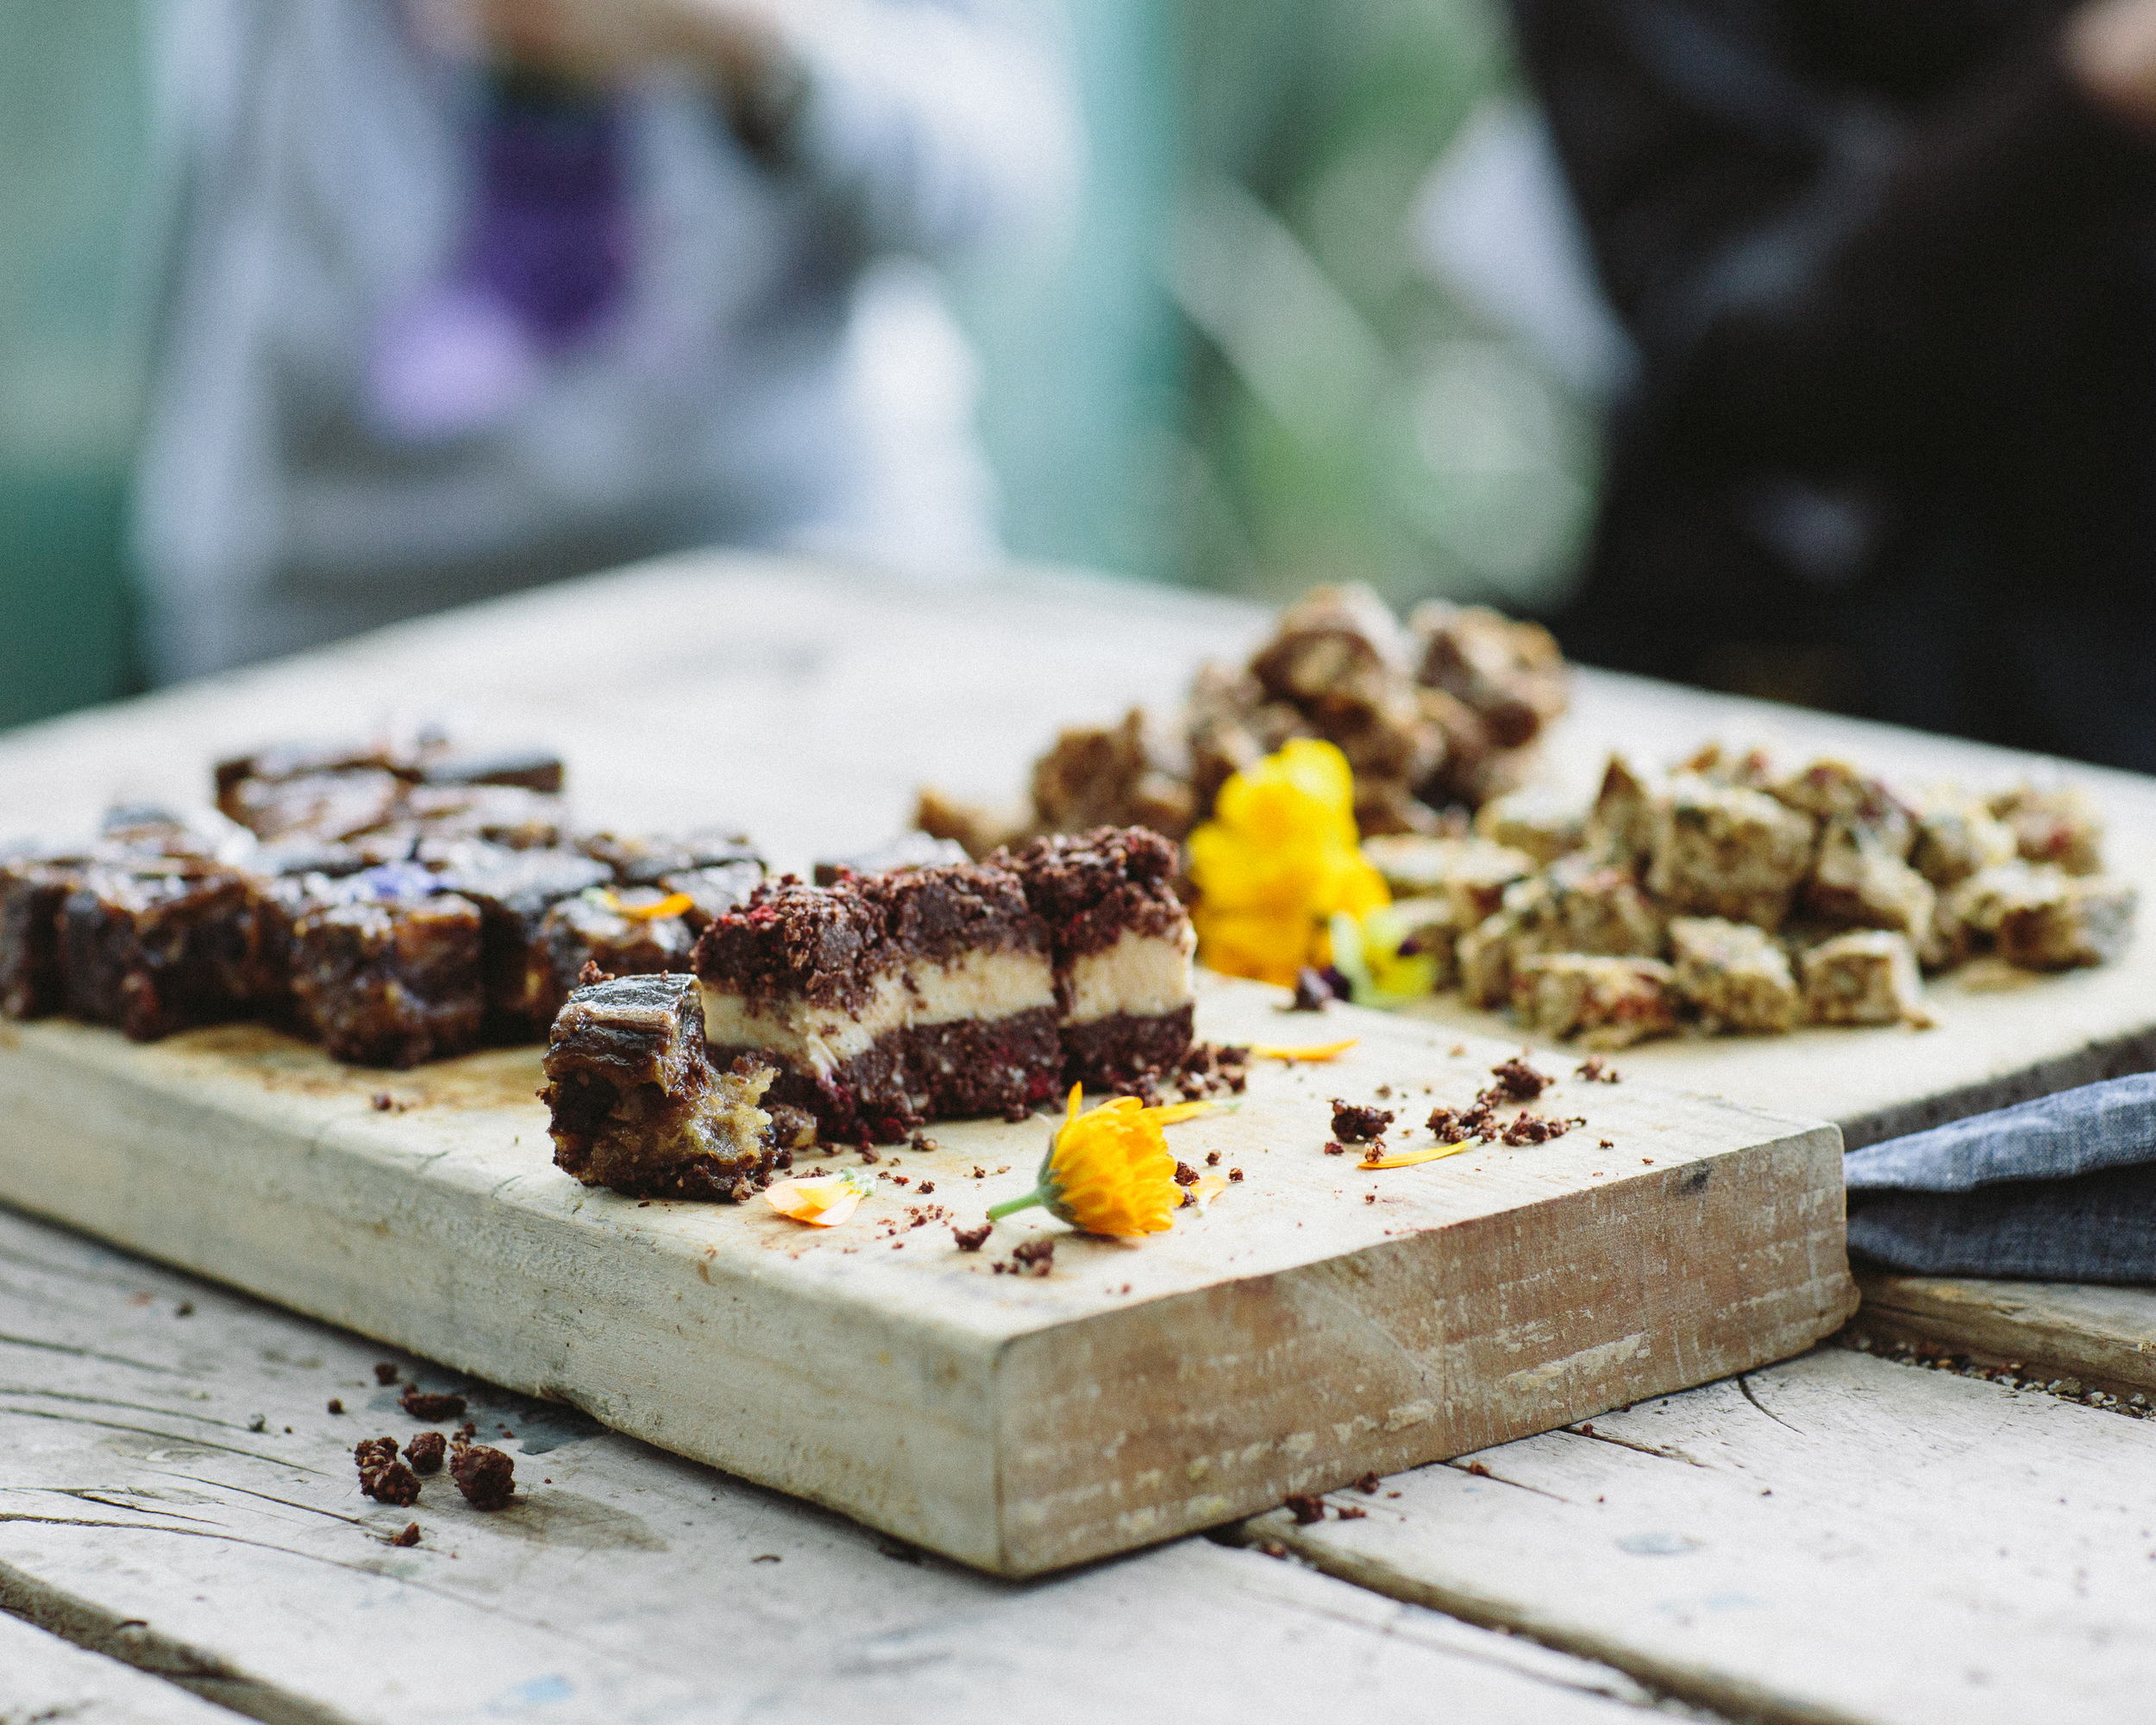
little bird, grown & gathered & Megs raw caramel brownie

Meg and little bird organic's raw caramel & banana brownie, and apricot logs.
Some more pictures from the Grown and Gathered year round harvest workshop with little bird organics, at Kelmarna organic city farm in Auckland. Also, Meg's raw caramel and banana brownie recipe from the Unbakery cookbook, which was enjoyed by workshop goers on the day. Truly delicious. Enjoy!

Herbal teas of kawakawa and nettle - why not brew direct from nature?
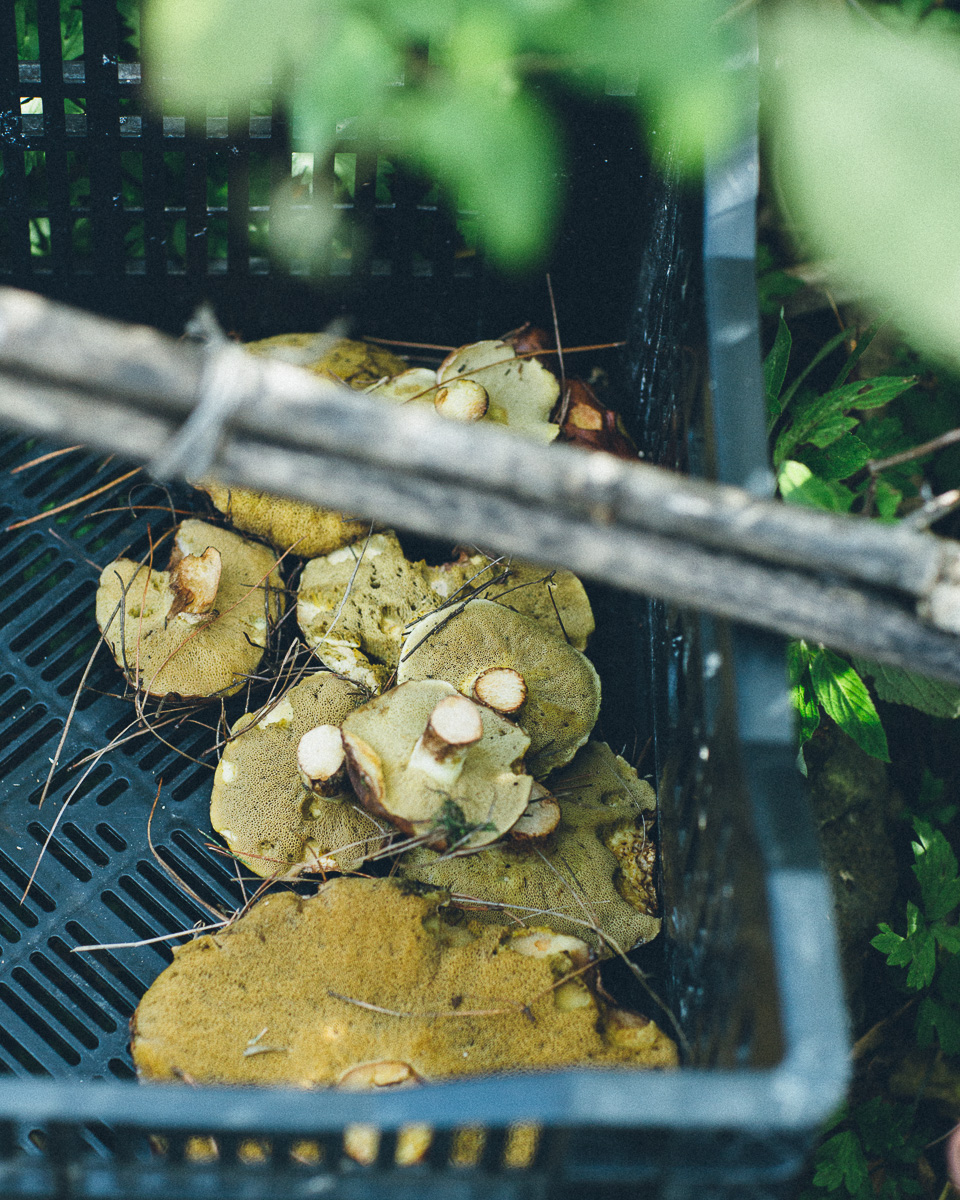
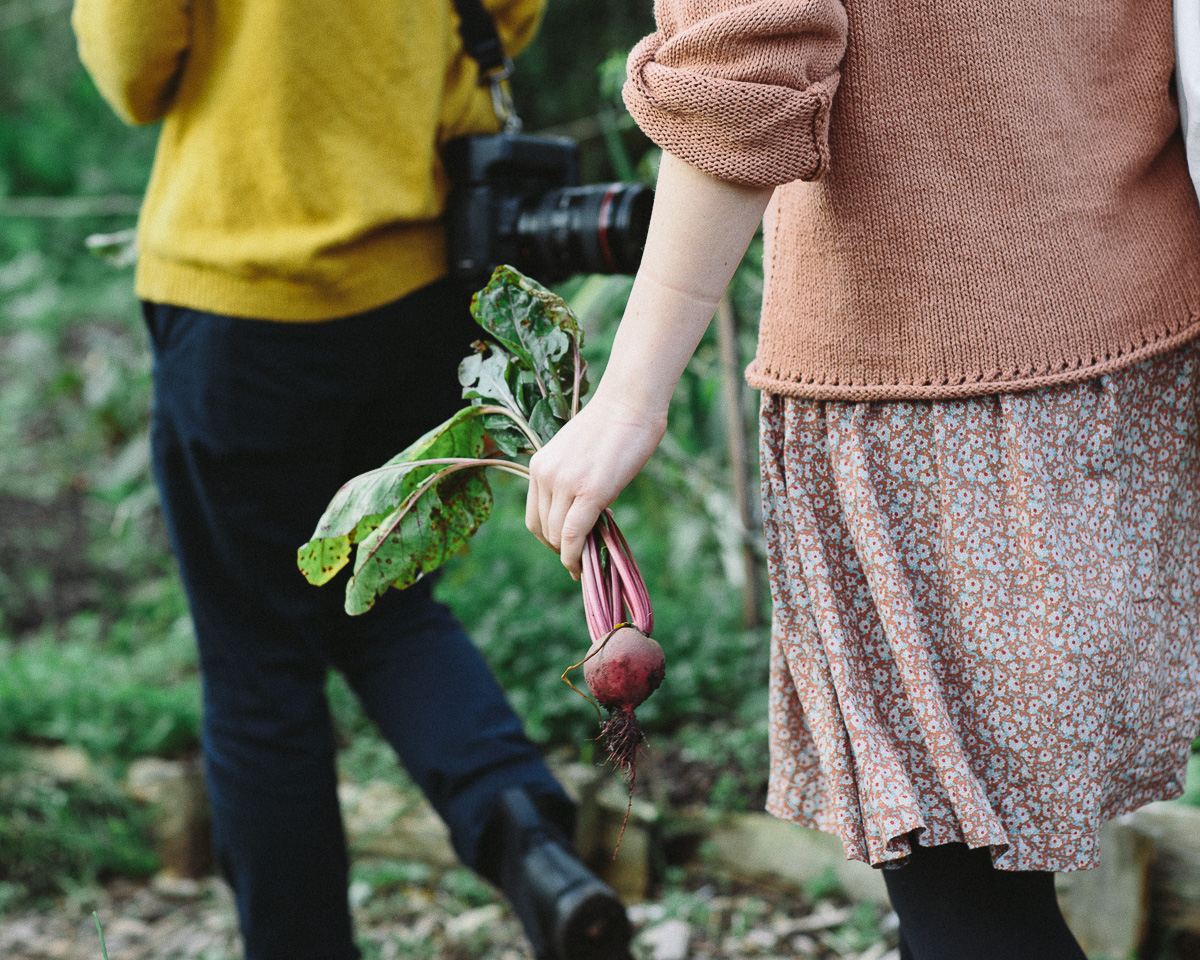
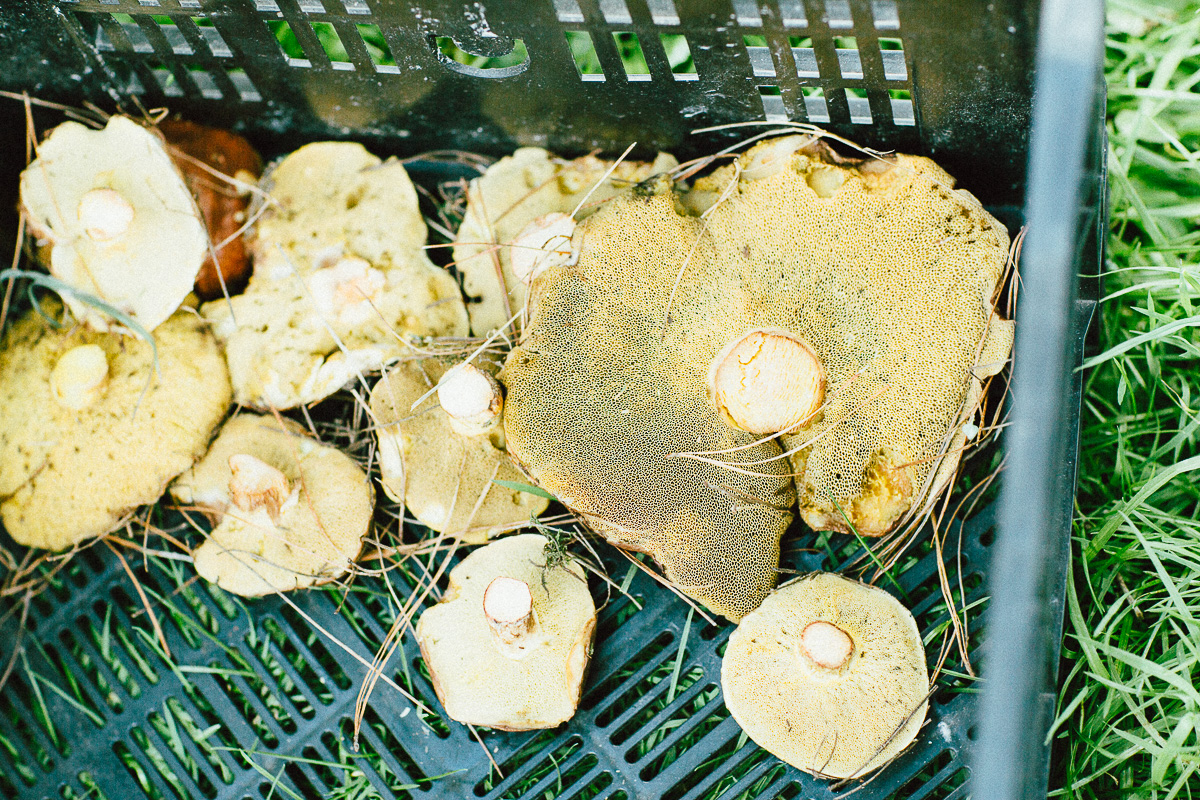
Wild mushrooms foraged by Matt & Lentil.
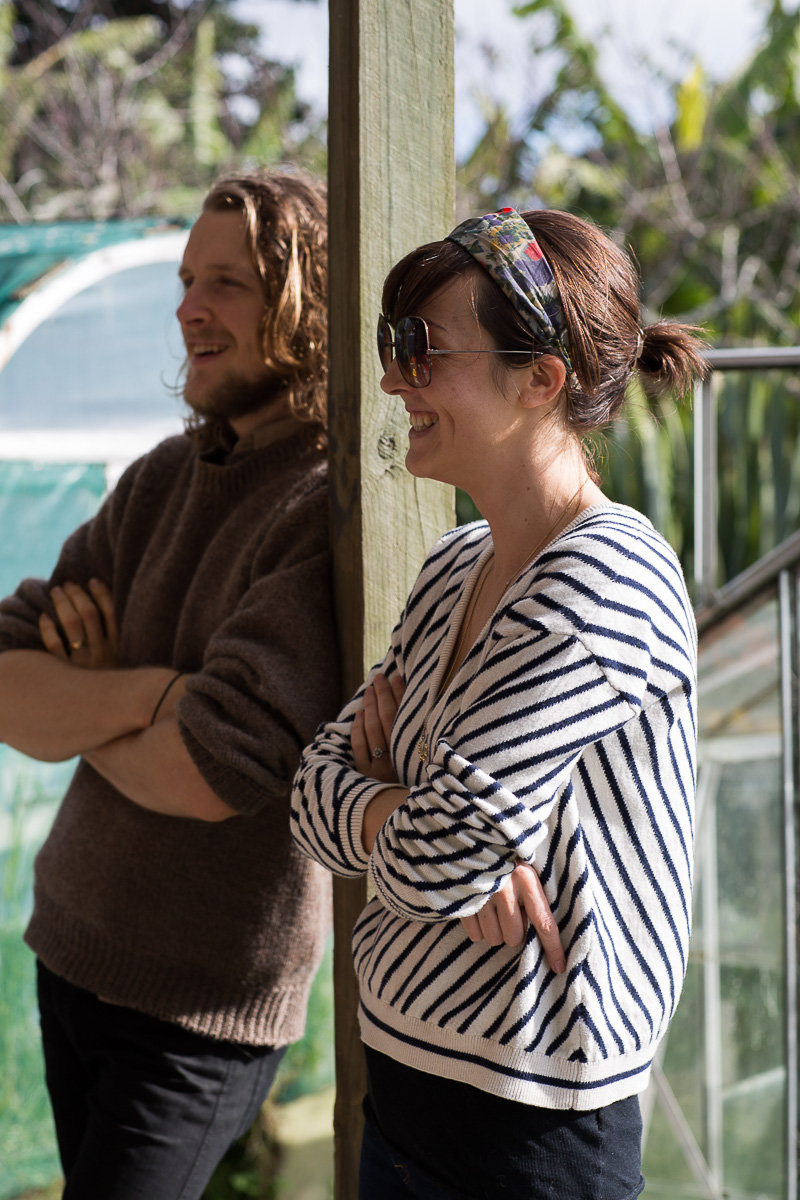
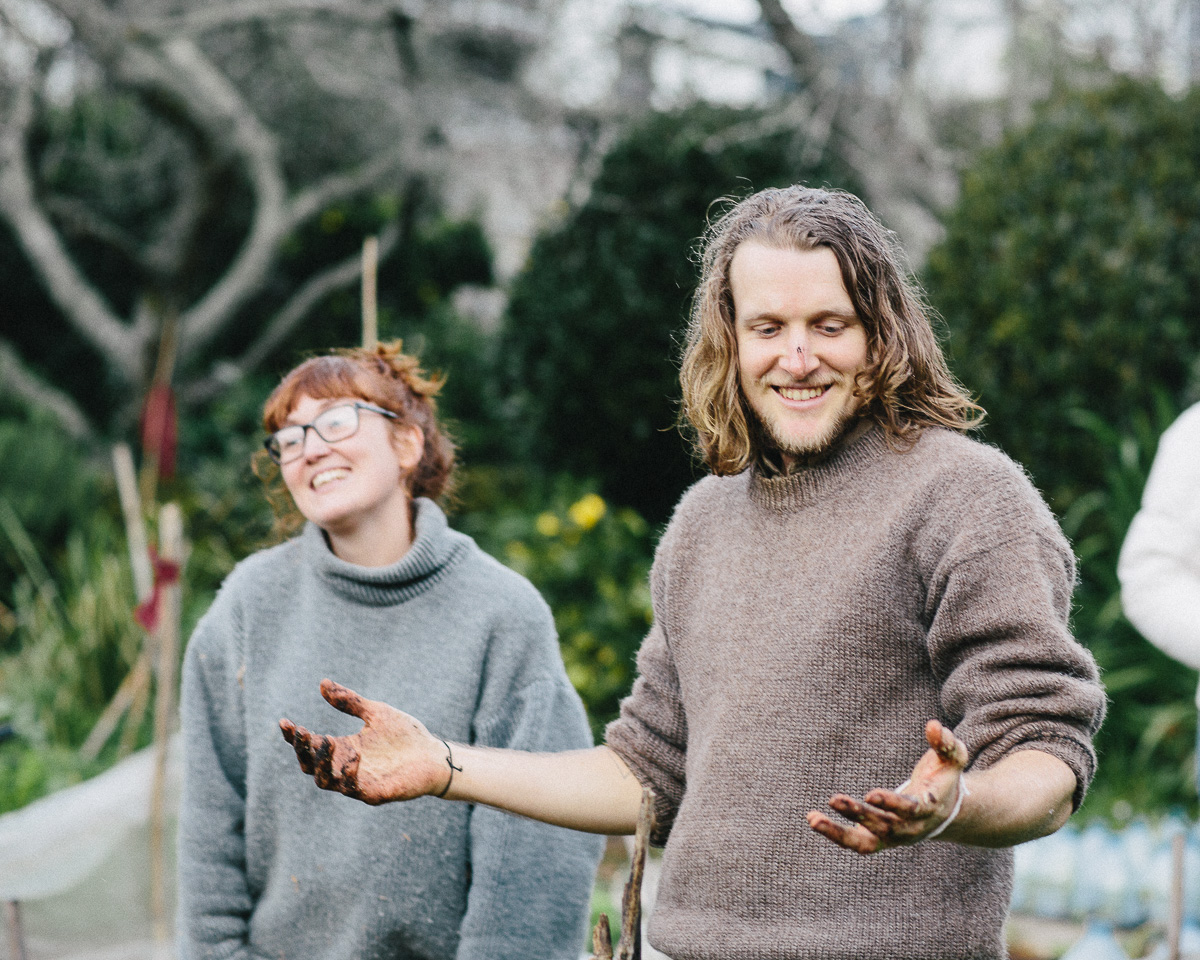
Meg and Matt


Foraged wild flowers for trading


Little bird caramel & banana brownie
From the Unbakery cookbook by Megan May - makes 15 brownies
Caramelised bananas (optional)
Start with the caramelised bananas if including this step.
- 3 ripe bananas
- 3 Tbsp lemon juice
- 1/4 cup coconut sugar
- Slice bananas horizontally to get 5mm slices (approx 4 to 6 slices per banana).
- Place the slices on a dehydrator sheet and drizzle with lemon juice, then sprinkle with coconut sugar.
- Dehydrate for 6 hours at 46 degrees celsius.
Raw caramel
- 1/2 cup pecans
- 1 1/2 cups pitted dates
- 1 tsp vanilla extract
- 1/2 cup maple syrup/raw agave/coconut crystals or raw honey
- pinch sea salt
- Mix the pecans into a flour in your food processor and set aside.
- Process the dates and vanilla extract until they form a paste. Scrape the dates from the side as you go.
- Add sweeter and blend until you get a lighter coloured mixture.
- Add the pecan flour and blend until combined. Set aside, while you make the base.
Base
- 3 1/4 cups brazil nuts
- 1 1/4 cups cacao powder
- pinch sea salt
- 2 cups pitted dates
- 1 1/2 avocado
- 2 tsp vanilla extract
- Mix brazil nuts into a coarse flour in a food processor - there should still be some nut chunks.
- Place in a bowl and mix with the cacao powder and sea salt. Set aside.
- Blend dates into approximately 5mm chunks in a food processor. Add the avocado and vanilla and blend again until there are no chunks of avocado to be seen.
- Add the brazil nut and cacao mixture and pulse until well combined (be careful not to over-mix, you want the mixture to be coming together whilst still retaining some of the texture from the brazil nuts).
Assembly:
- Line a 20 cm slice tin with plastic wrap. Press 3/4 of the base mixture into the tin - you want to make lengthways indentations, creating lines like waves so that the caramel can be set in between the 'waves'.
- Fill the indentations with the caramel using a spoon or piping bag. Cover with the remaining base mixture, making sure you can't see any of the caramel. Layer the caramelised bananas on top, pressing them in lightly to the mixture.
- Cover with plastic wrap and refriderate for 4-6 hours.
- Remove from the refrigerator and cut into approximately 15 square slices. The brownie will keep for 1 week in an airtight container in the refrigerator.
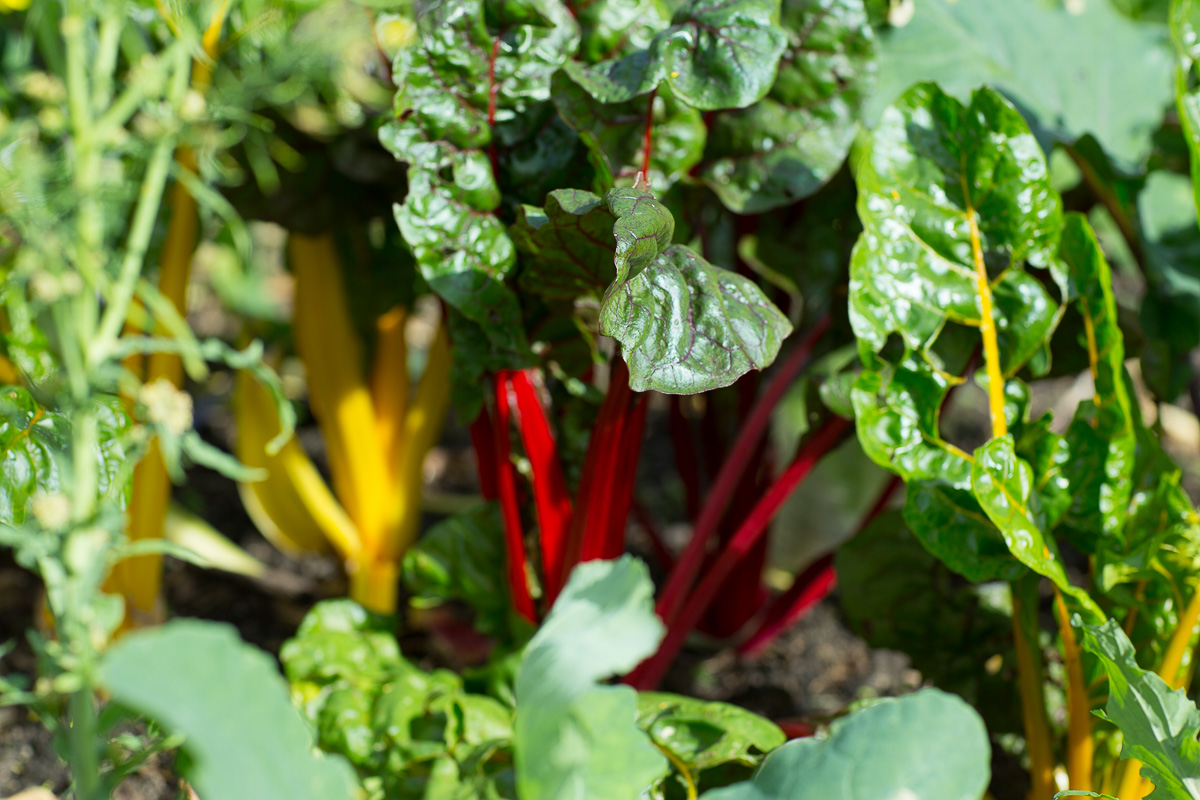
chioggia beet salad and a 'year round harvest' workshop with grown & gathered
This is part one of a photo story of a sunny and blustery Sunday at Kelmarna Organic City Farm in the heart of Auckland with Matt and Lentil from 'Grown & Gathered' and Little Bird organics.

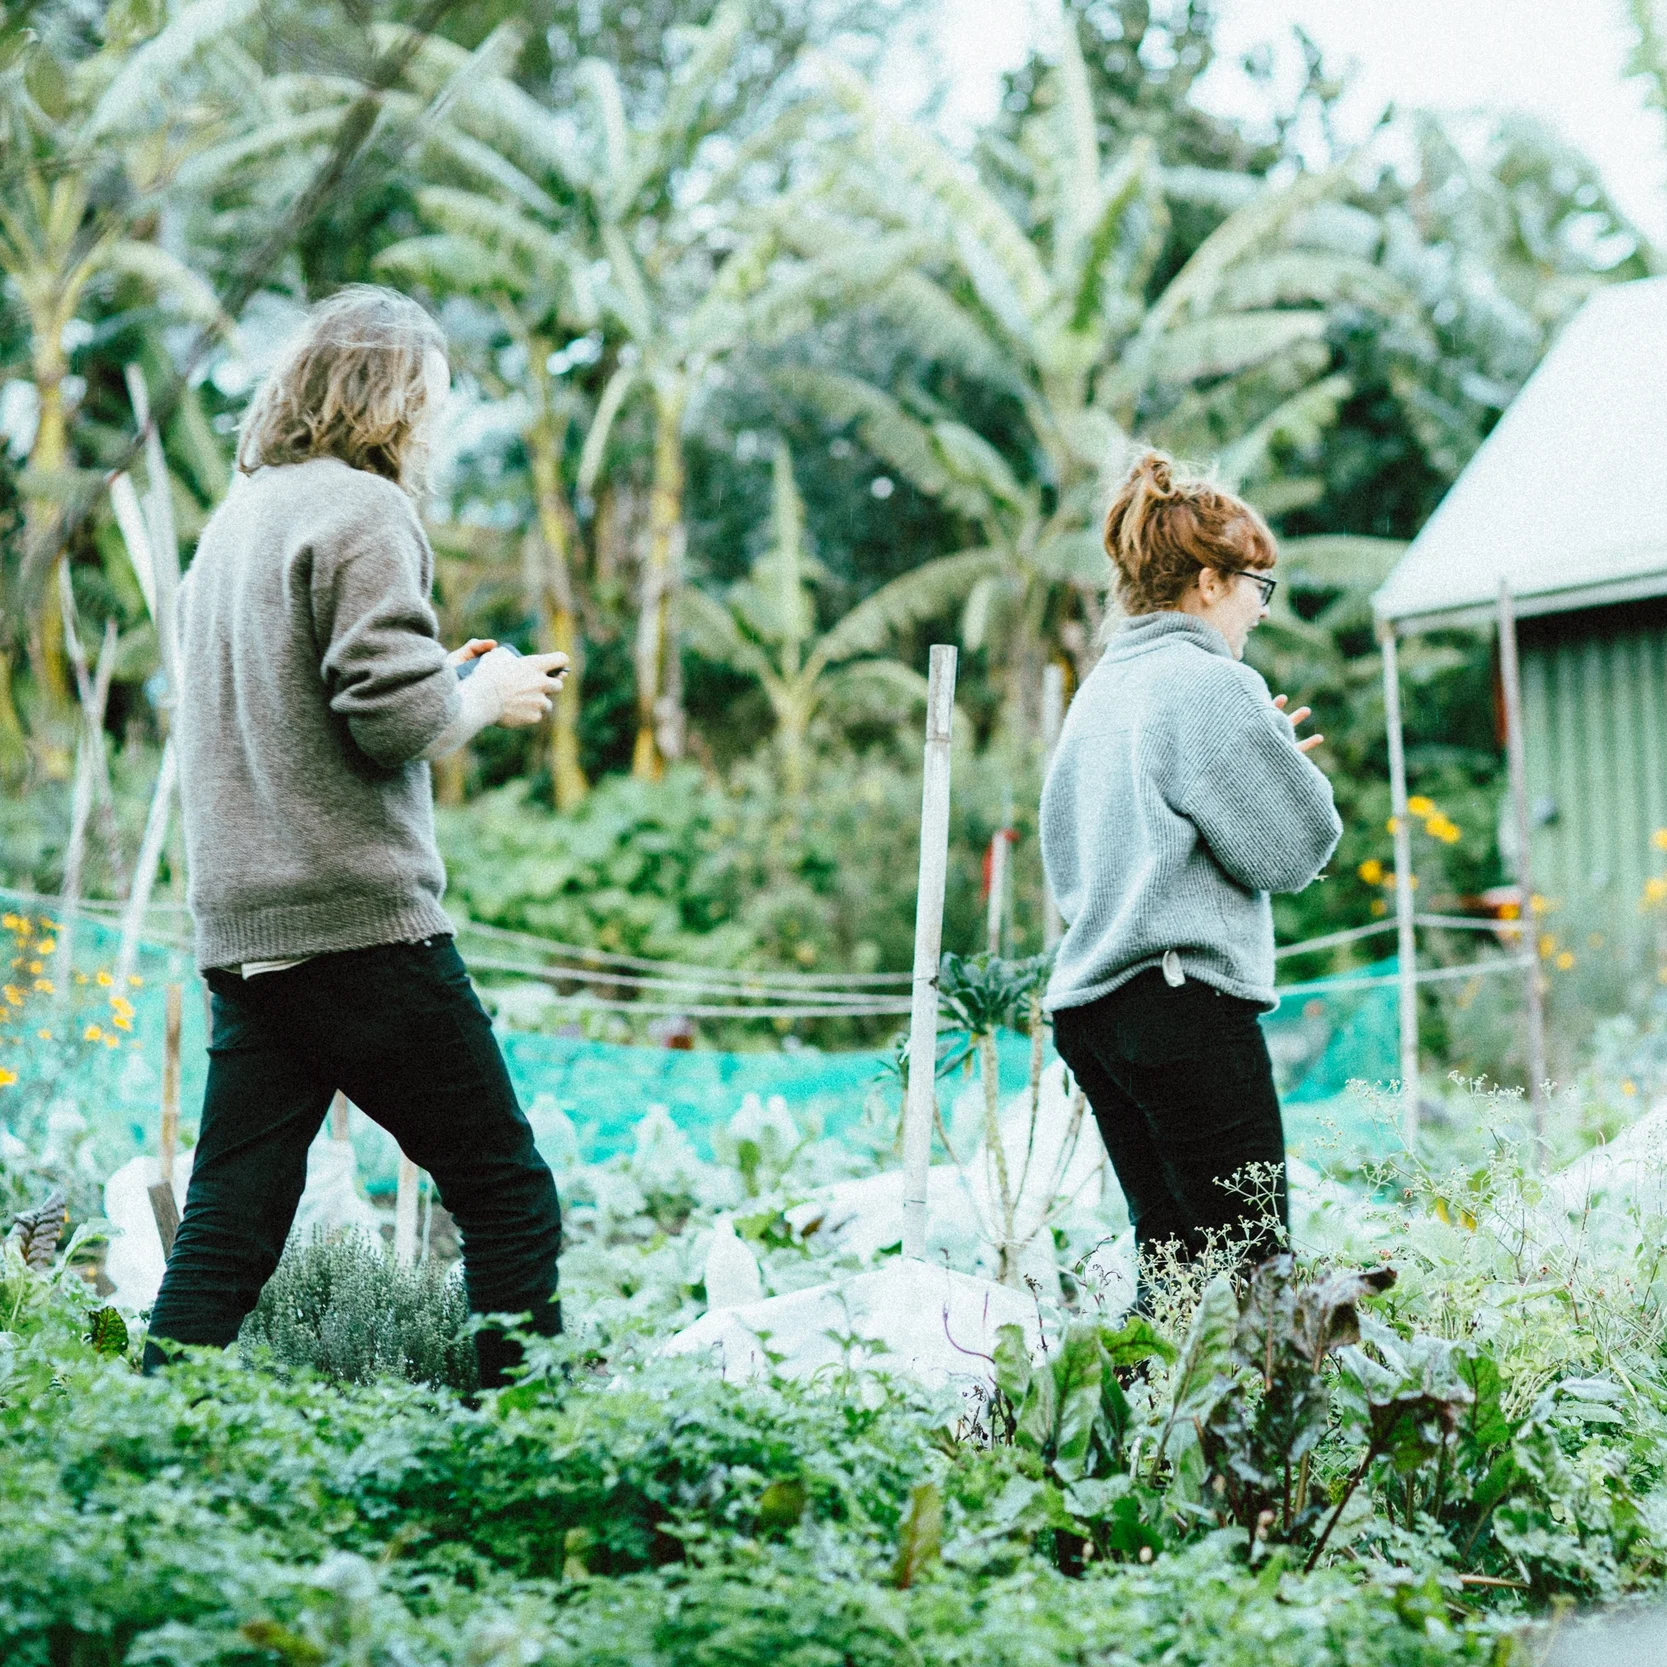
Before I begin, I'd like to say that these next few posts have been a long time coming. Partly because I’ve been busy with some exciting projects, but also because I've felt the photographs from the 'Grown & Gathered' 'year round harvest' workshop at Kelmarna, were just too beautiful to have not been thought through. Whilst I've caught snippets of time here and there I somehow haven't been able to commit my full attention to editing and piecing it all together, something which easily happens when my mind is full of many things. It also happens with things I feel are so special that I become almost fearful of publishing them, in case I don't do them the deserved justice. In any case, here is part one of my photo story of how this special day unfolded...

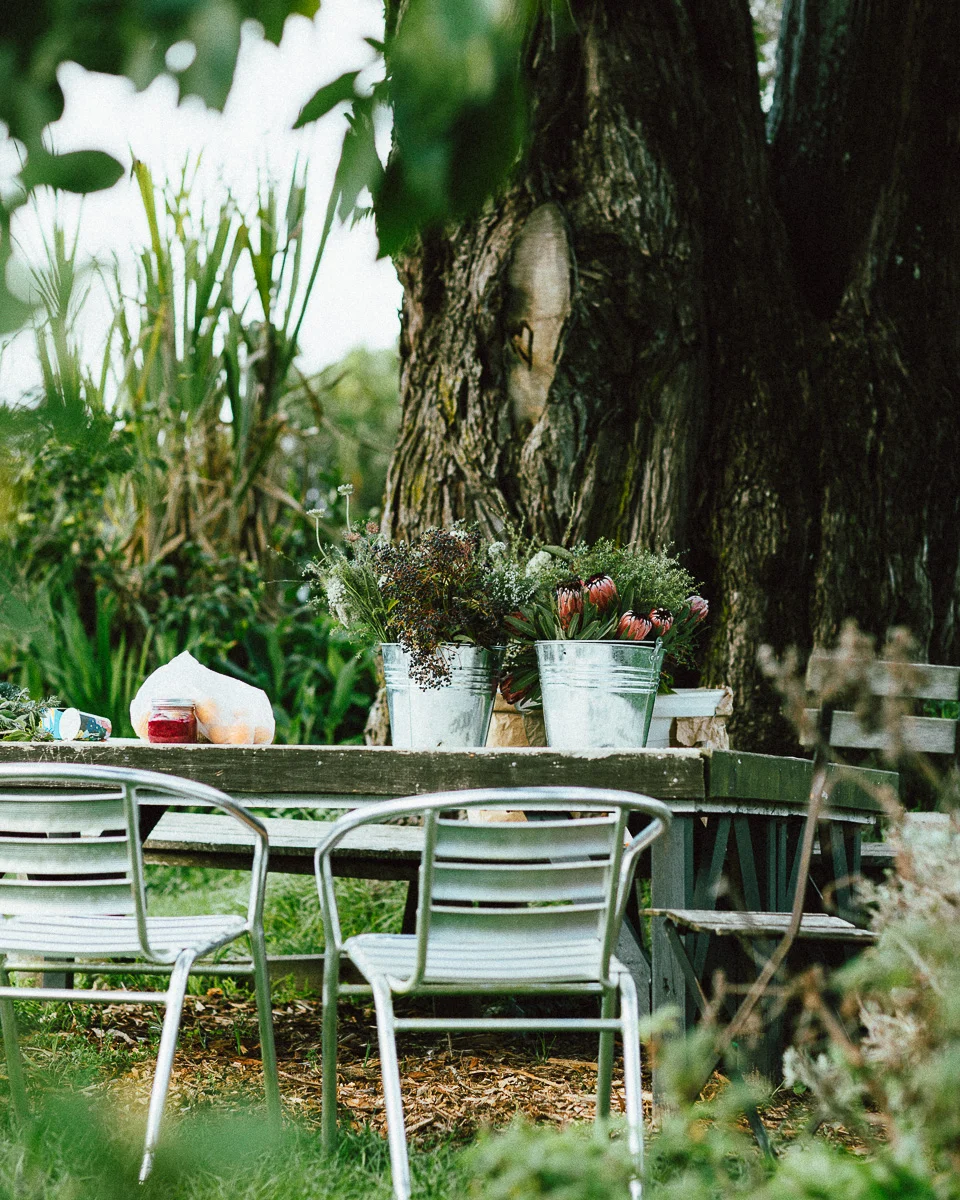

We began sitting beneath a giant tree around a table adorned with buckets of foraged wildflowers, while Matt and Lentil talked about Trading and their Flower Exchange at the Melbourne farmers market. Instead of selling the flowers they grow on their farm for money they instead trade them for some other form of non-monetary consideration. This concept really struck a note with me - both because of the way Lentil described it but also as trade is something I seem to be doing quite a lot of lately through my photography. Yes, trading something you have in abundance, are good at, or passionate about, directly with another seems like a much more meaningful and beautiful way to transact. In any case the table of wildflowers, which you see in the photographs, were foraged by Matt and Lentil for the purposes of trading with workshop guests - a sample of the Flower Exchange in Auckland.


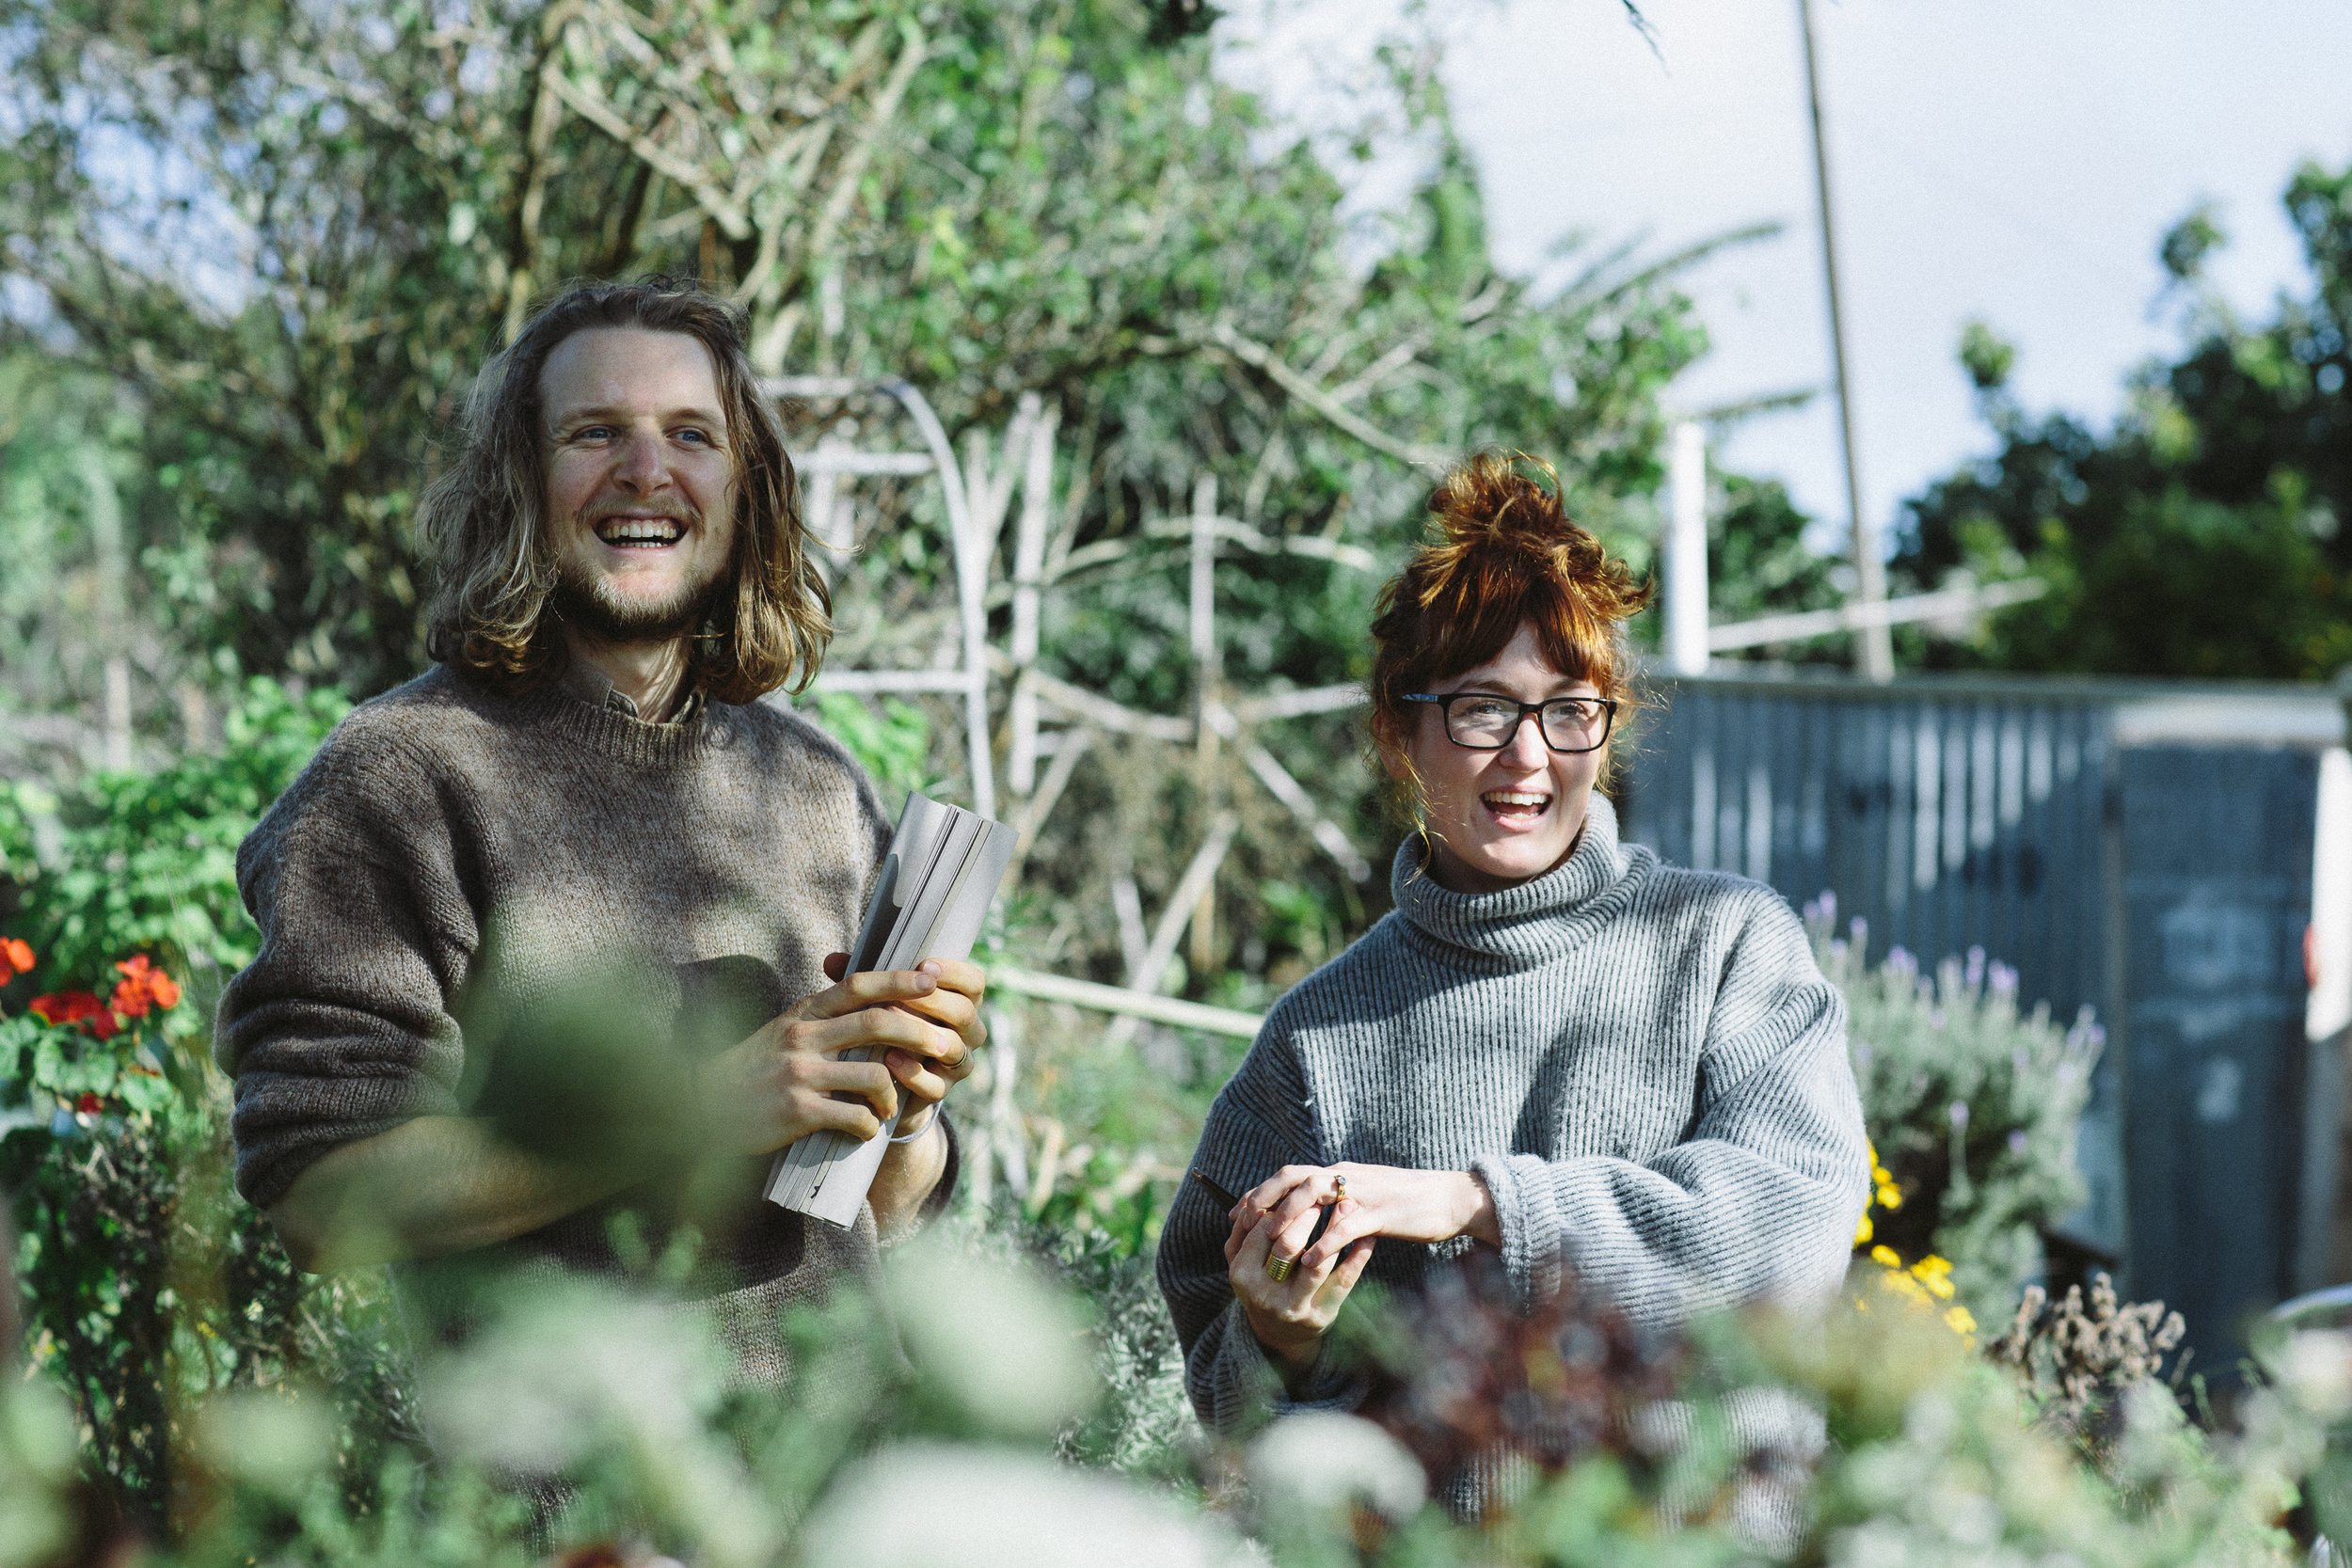
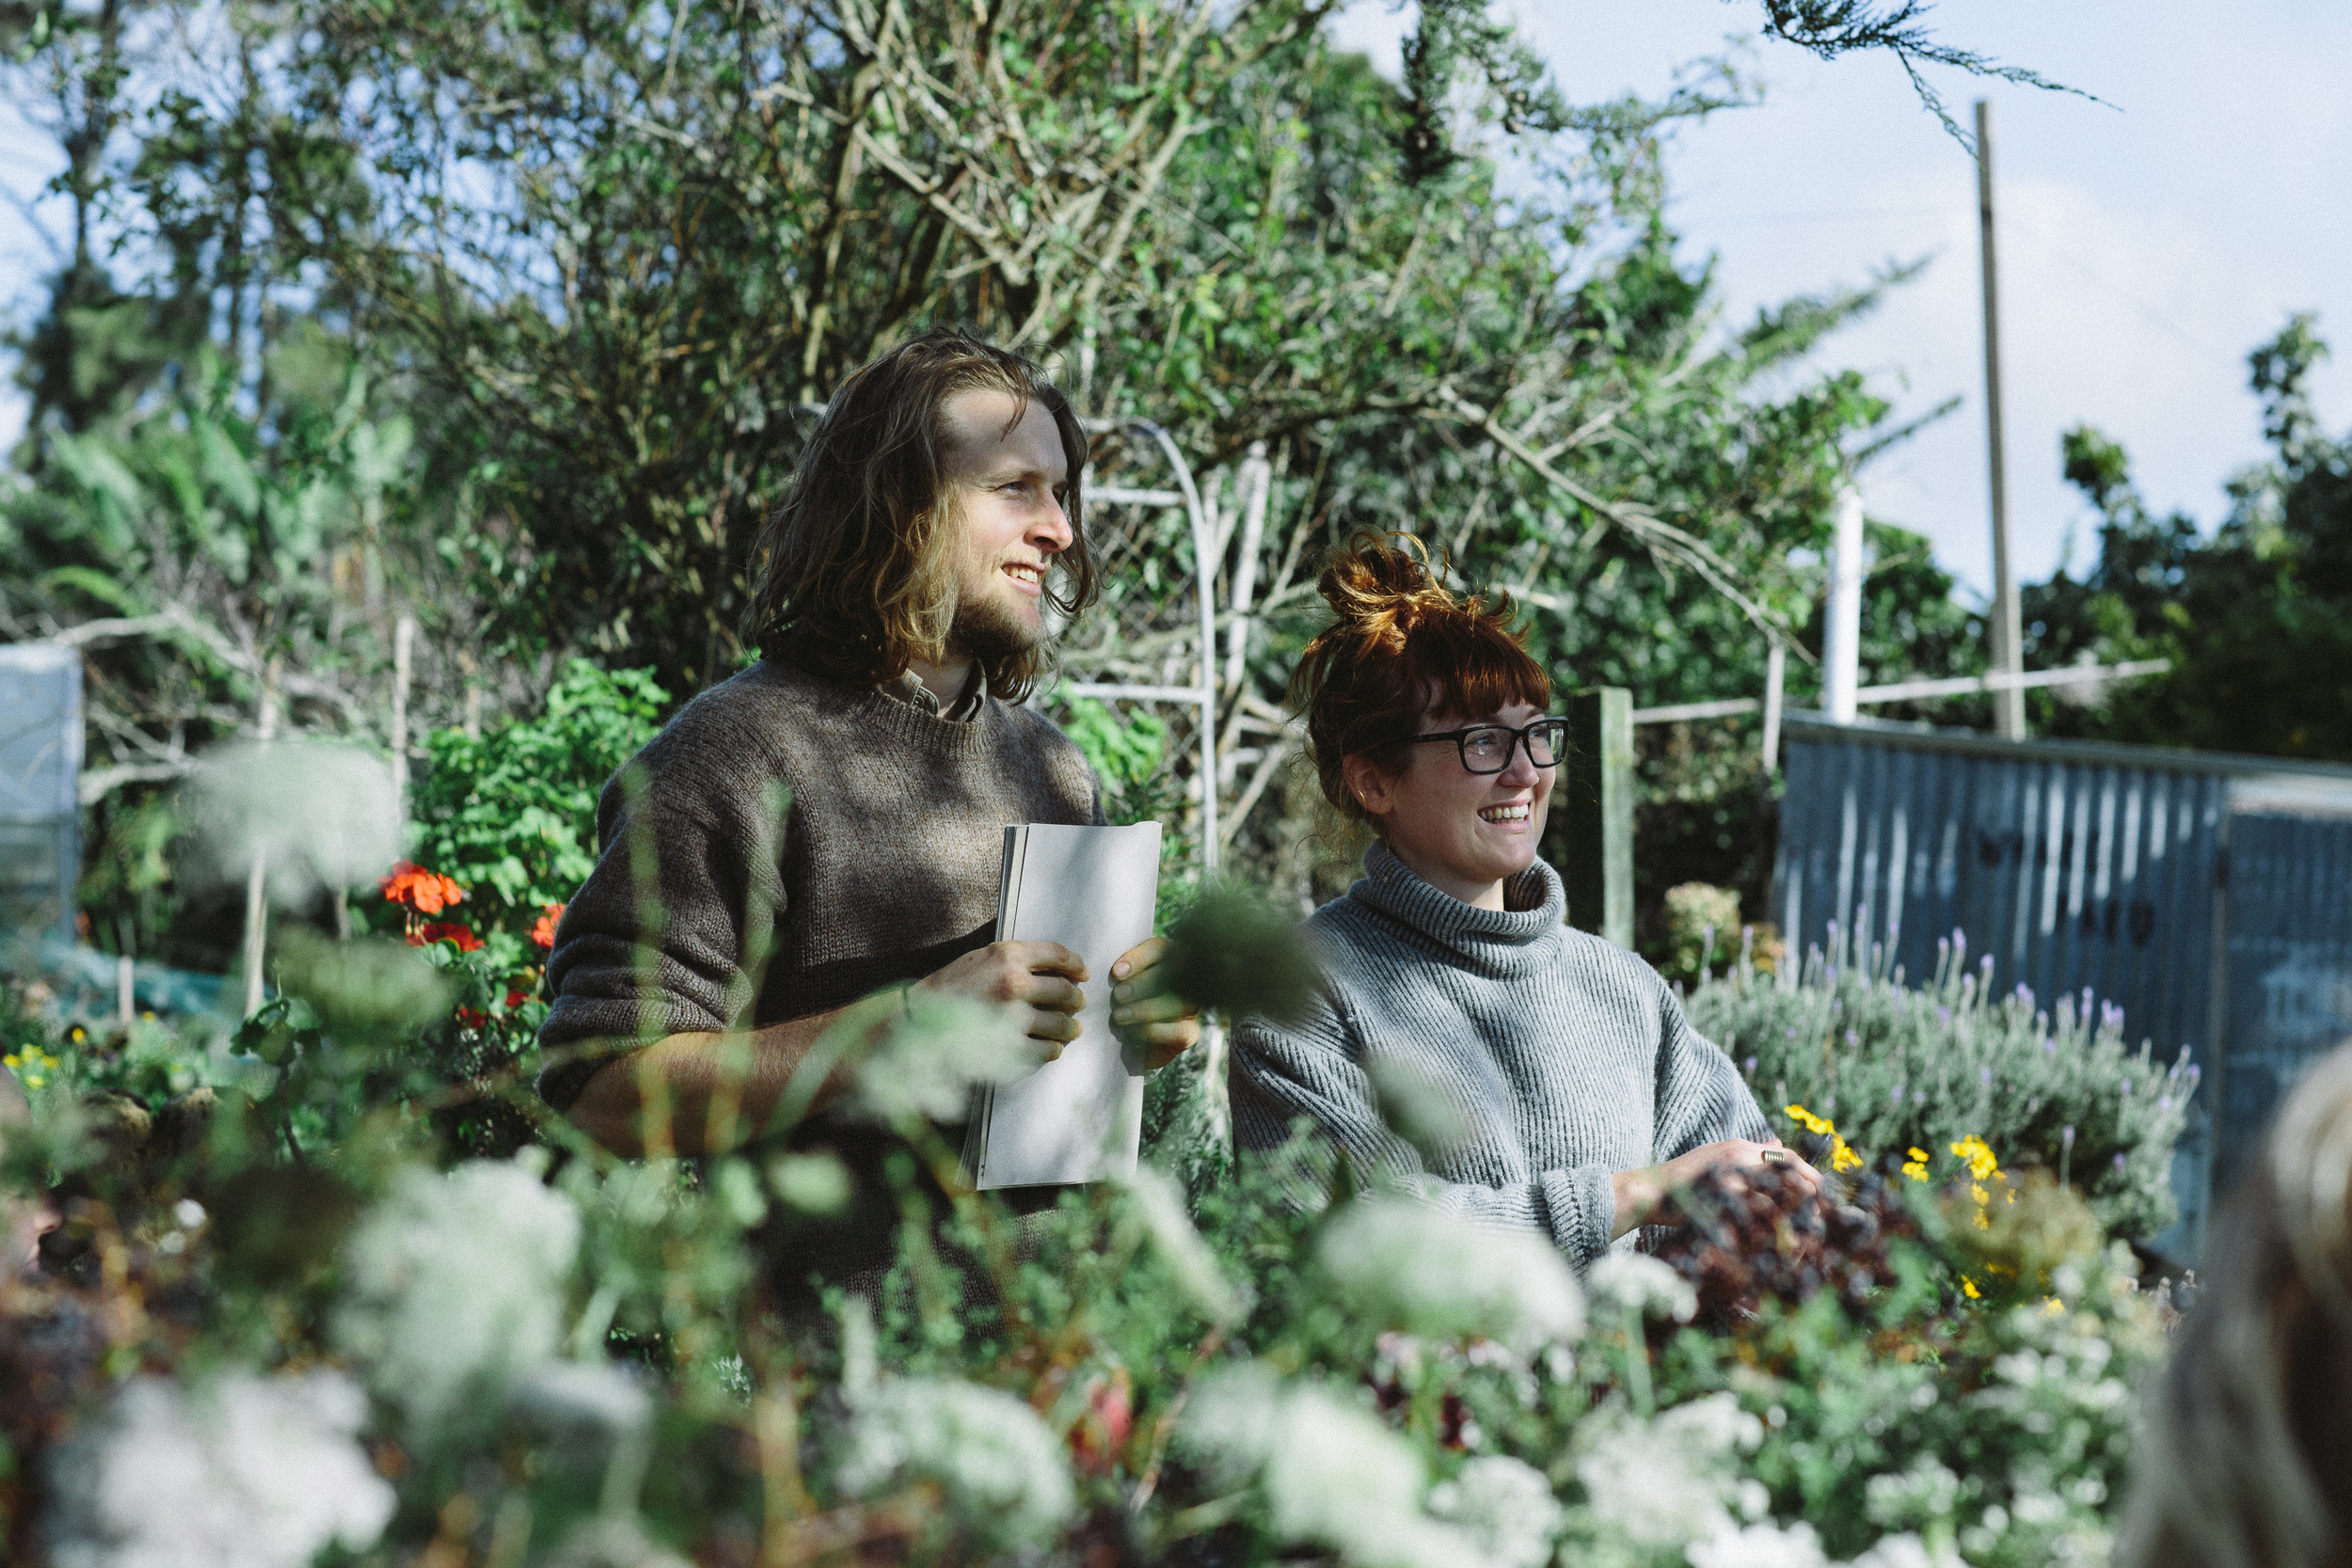
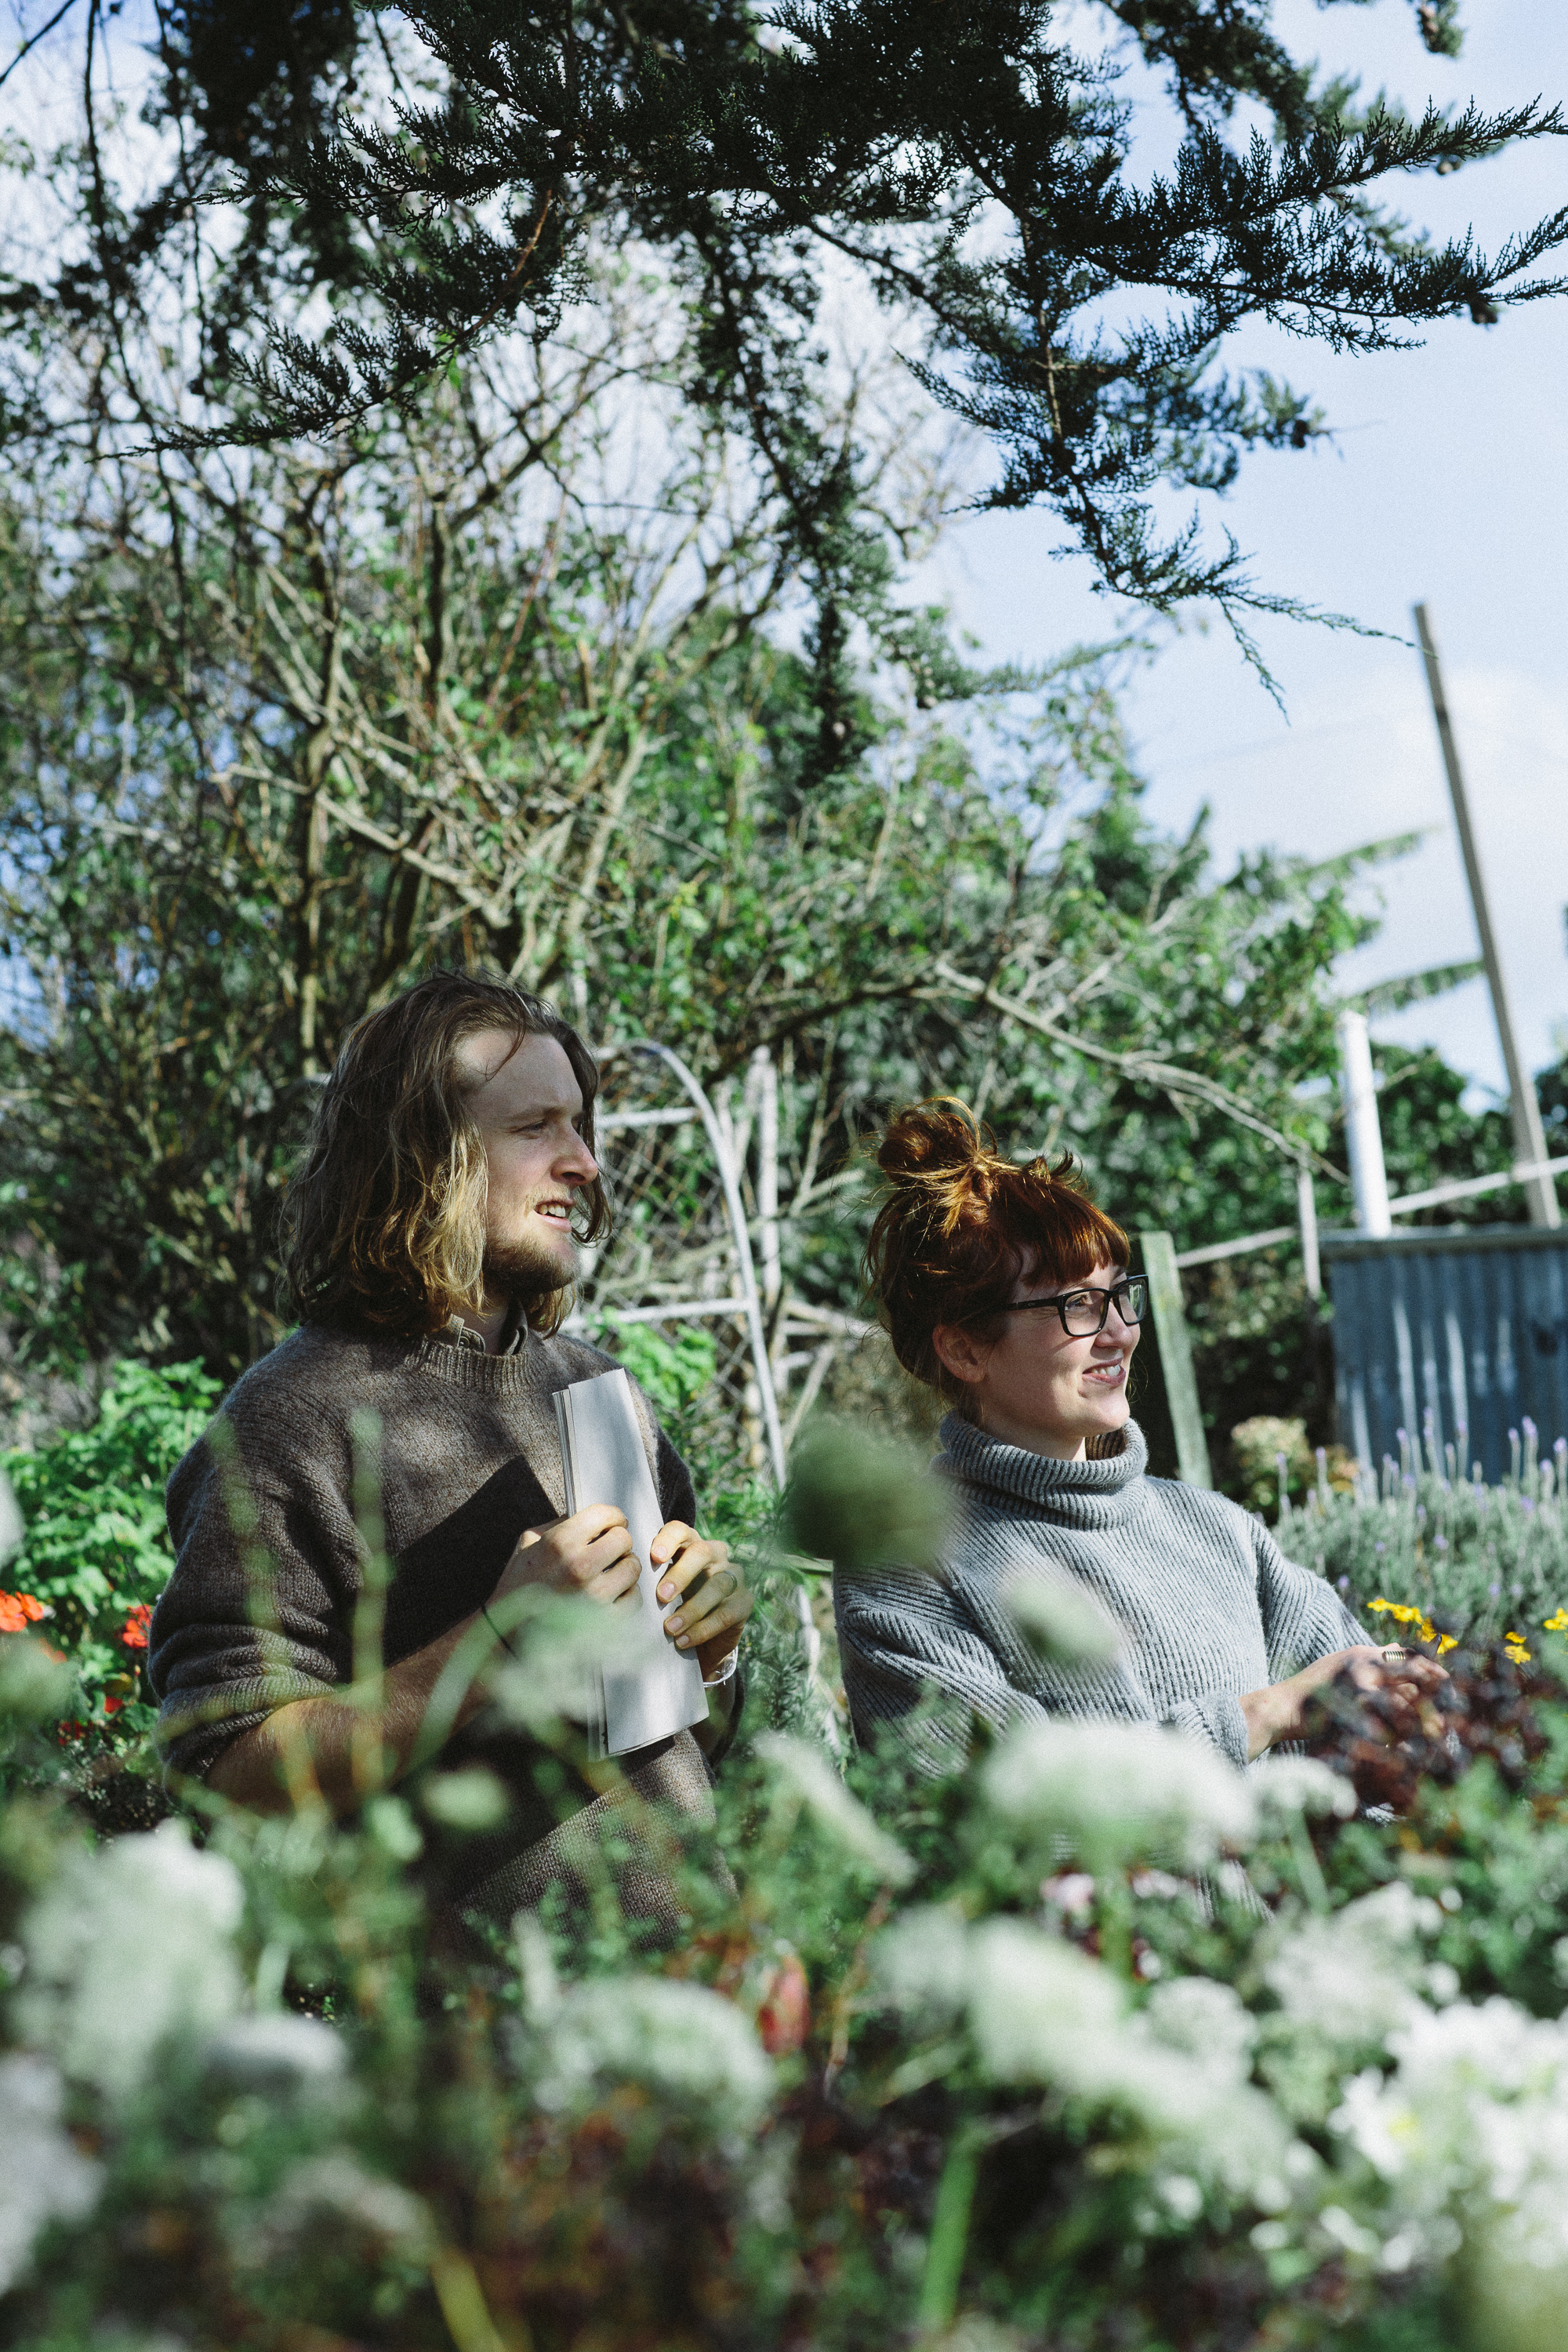
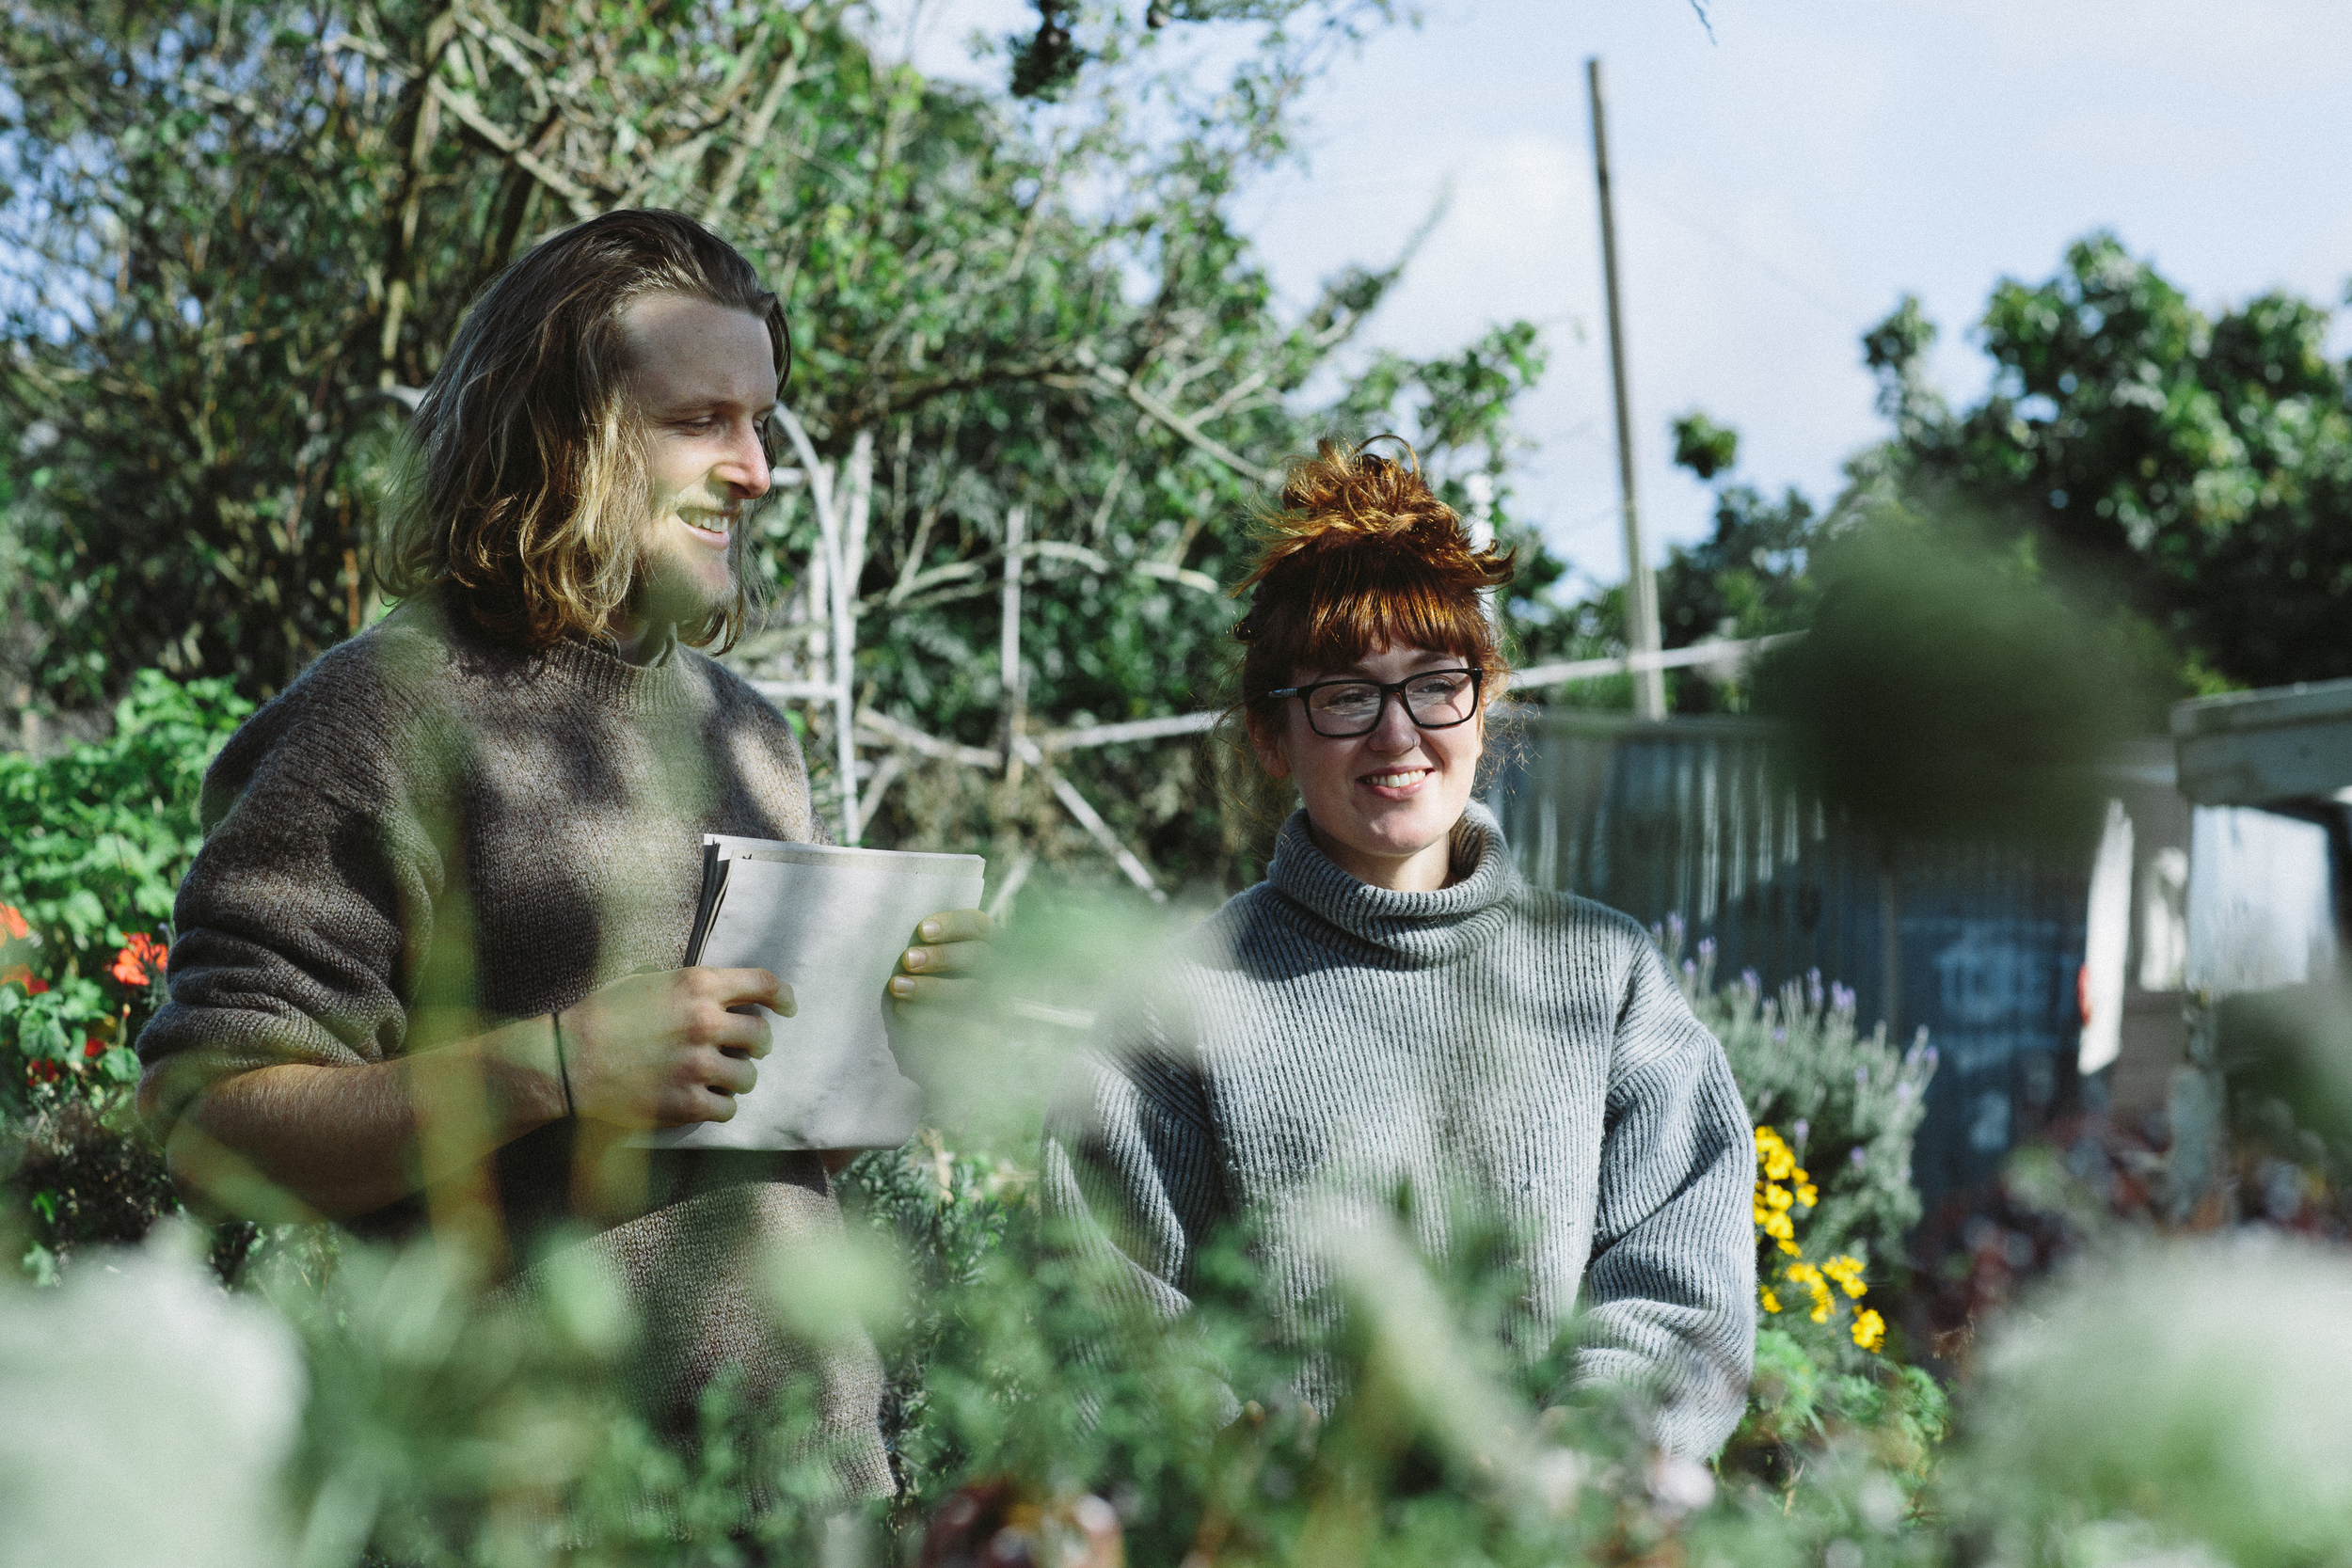
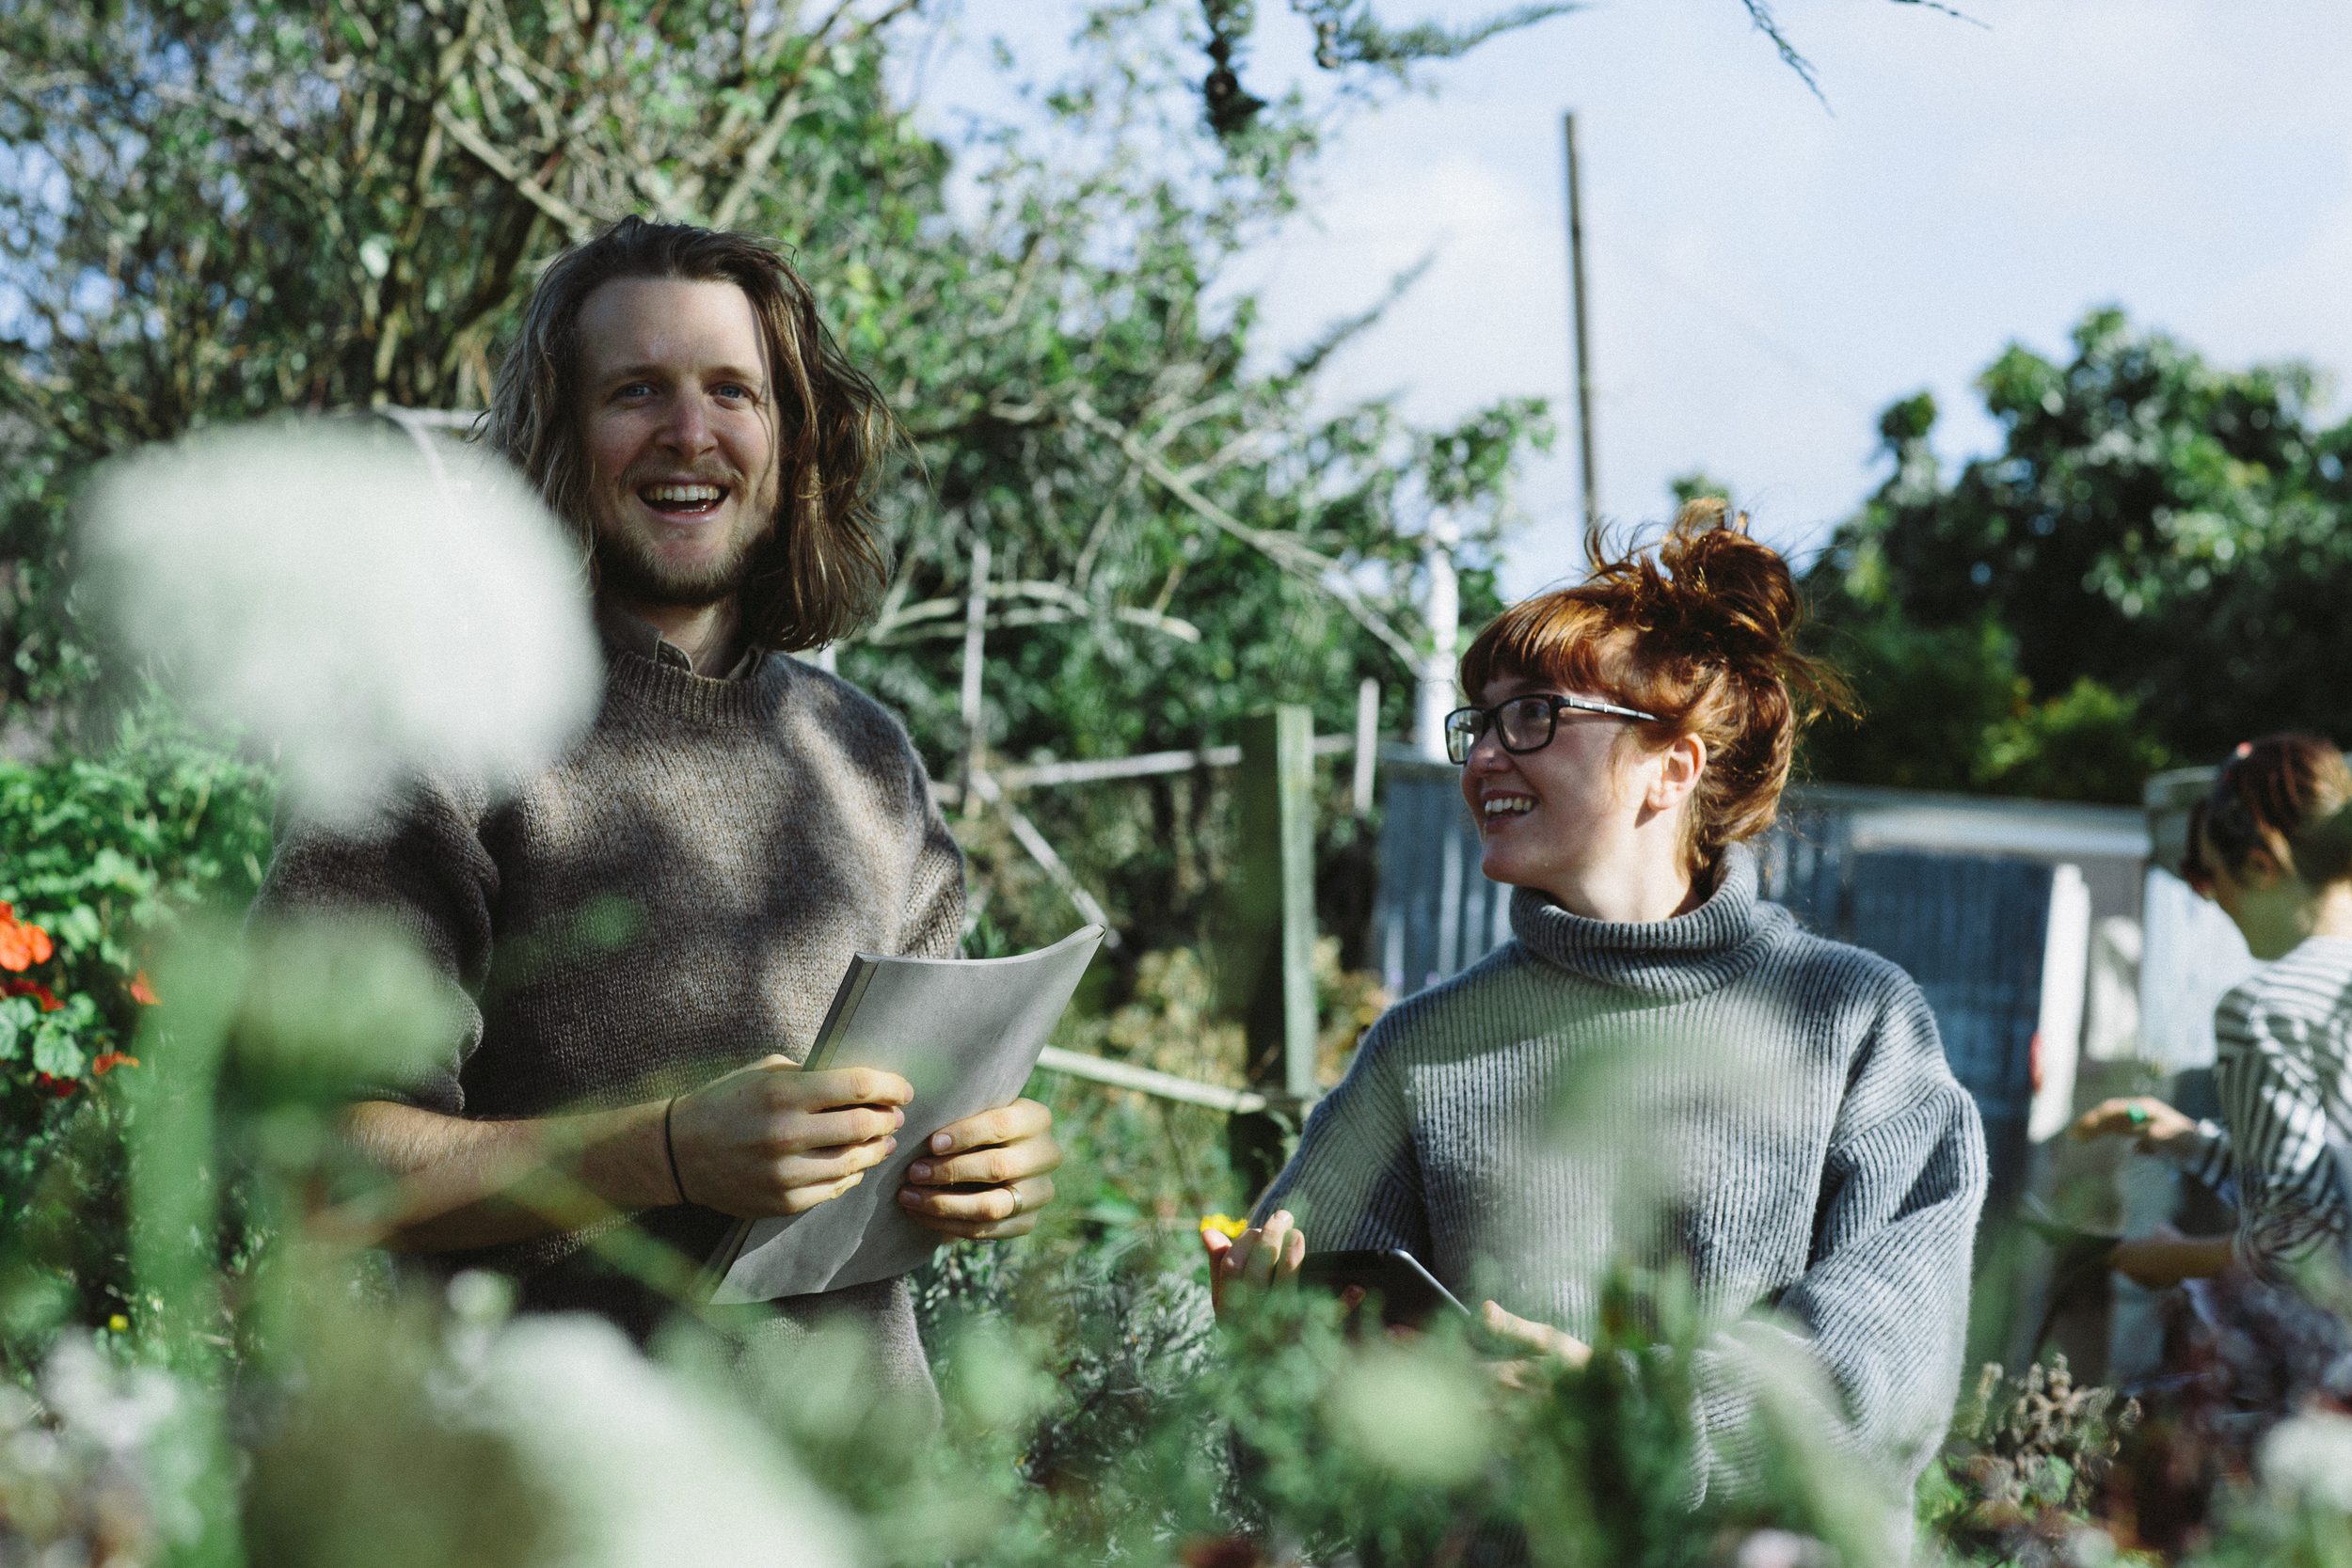


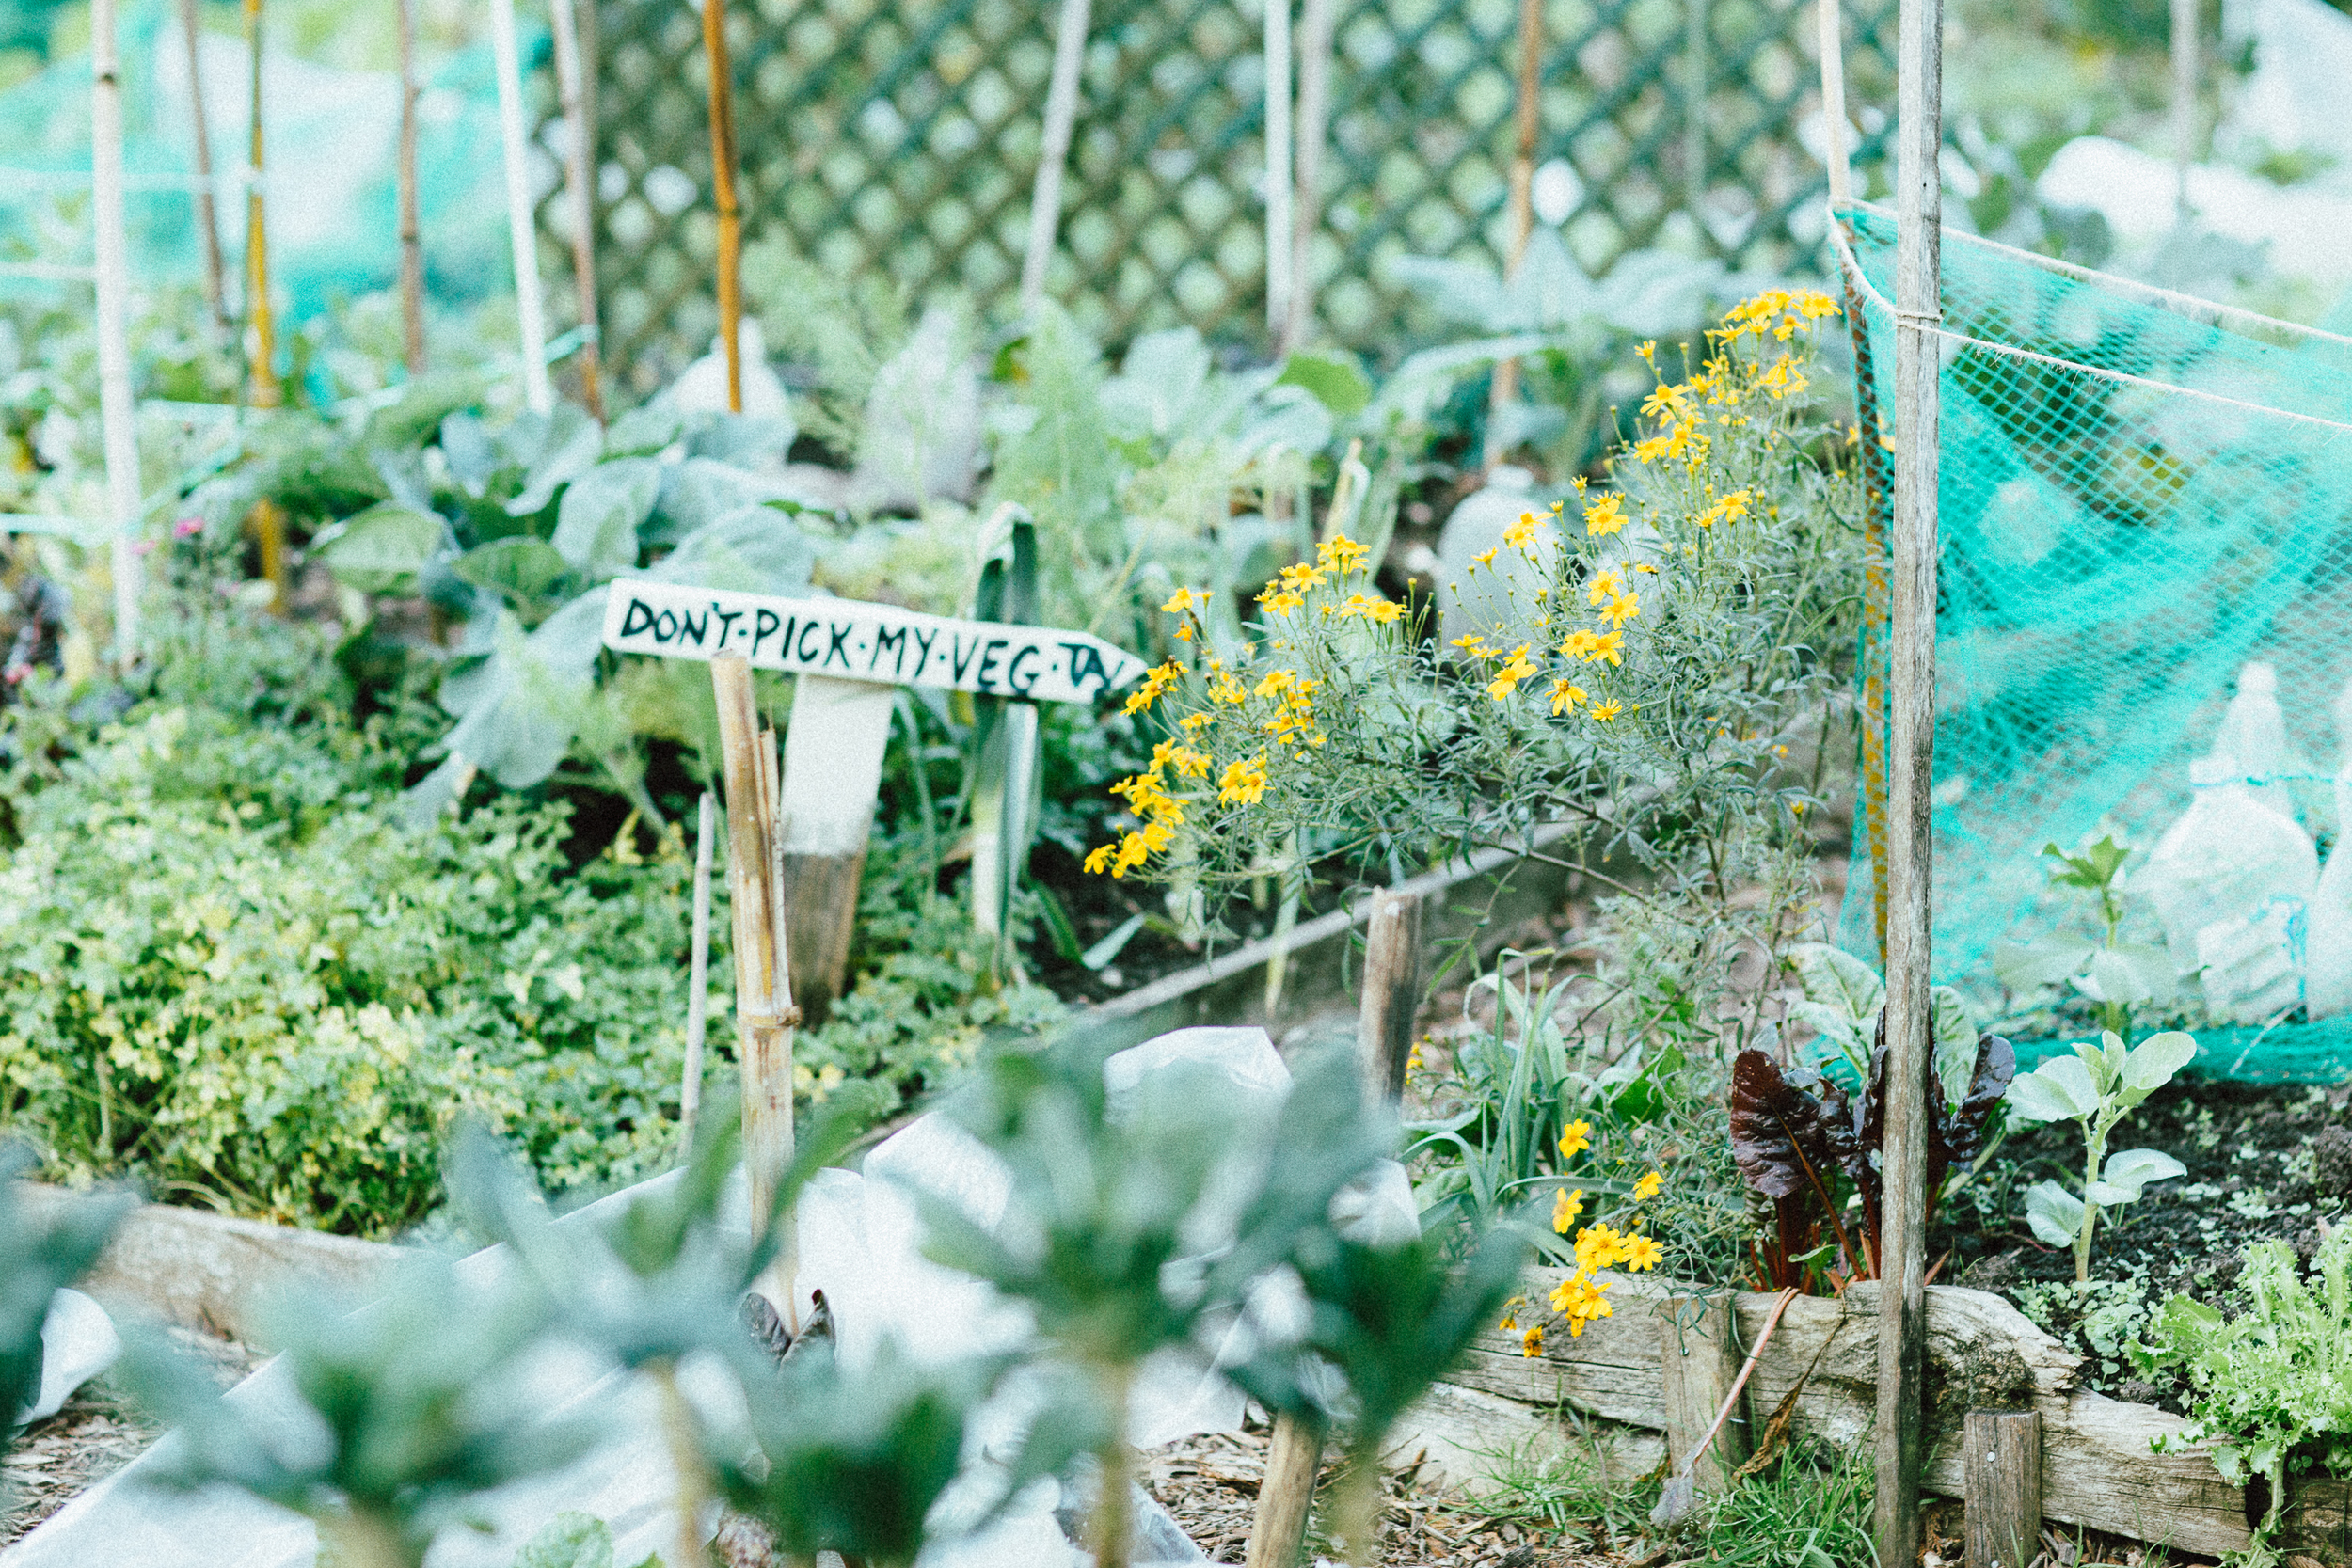
Following this, we walked with Matt and Lentil around the astounding 1 and half acre property of Kelmarna. Established in 1981, Kelmarna is a community garden and farm which has been organically managed for 32 years. Complete with a pony and cows, bee hives, chickens, worm farms and compost, native trees, and organic fruits, vegetables and herbs. Kelmarna is an amazing place and the perfect backdrop for Matt and Lentil to share their knowledge.
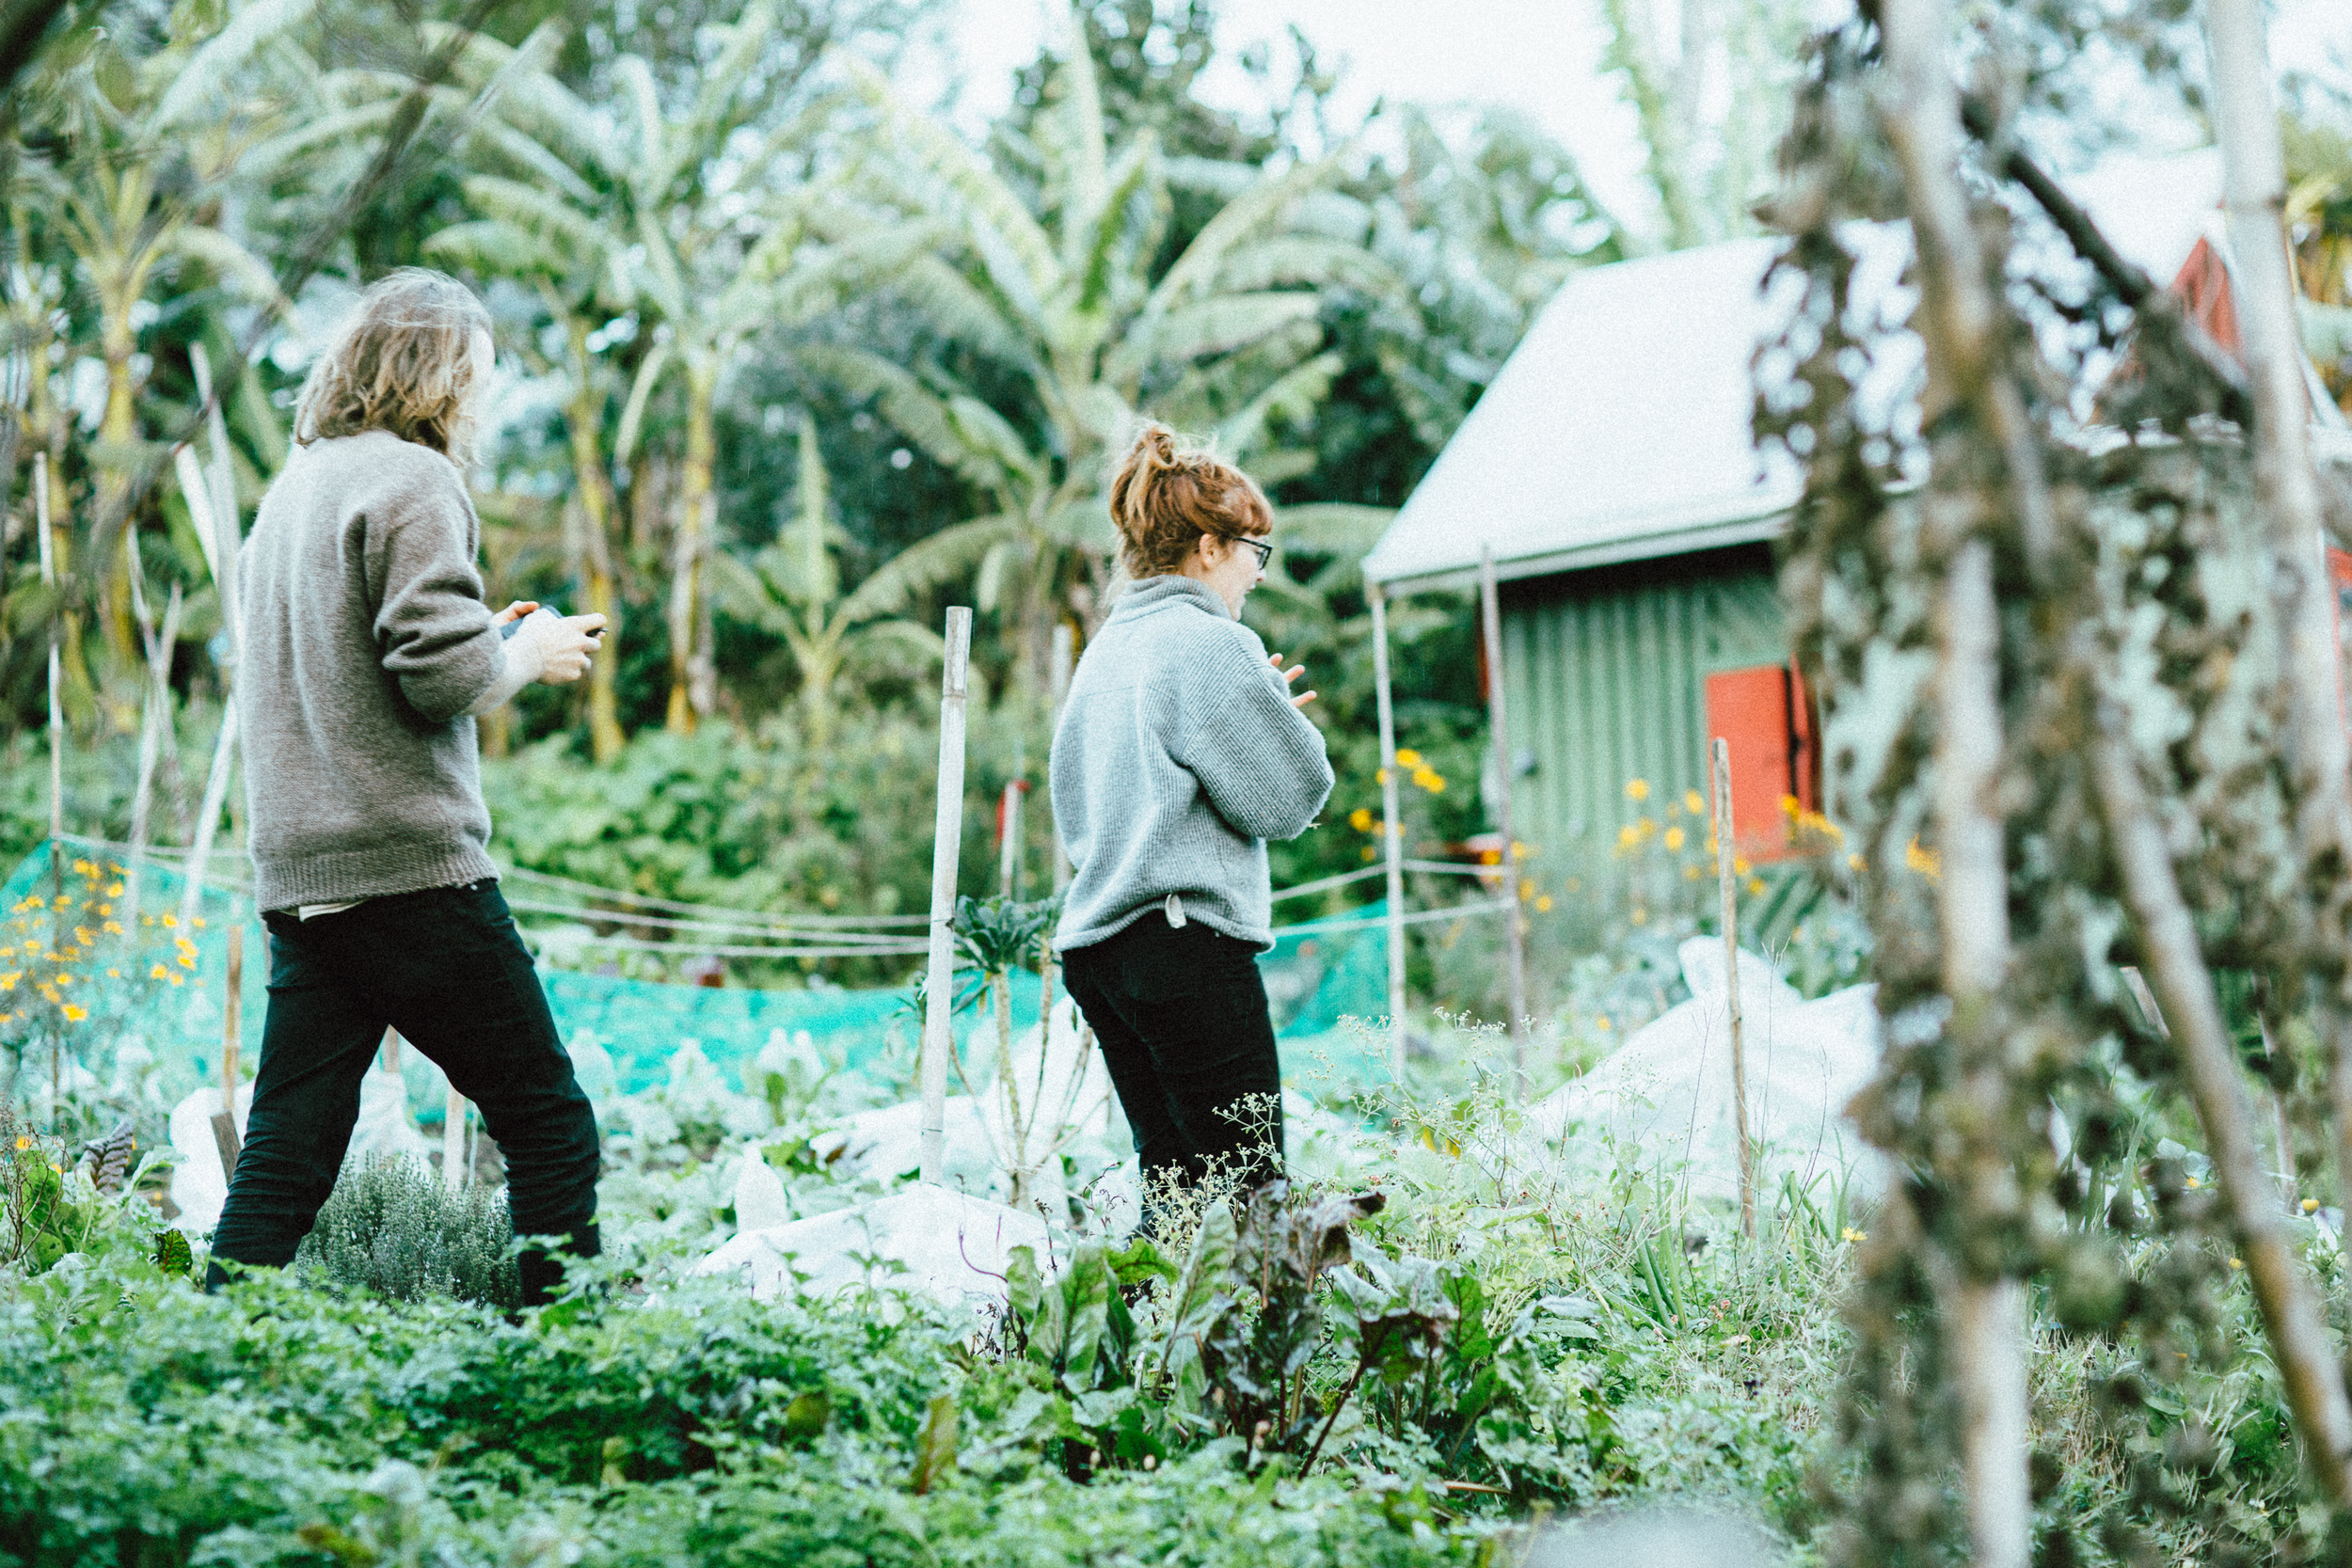
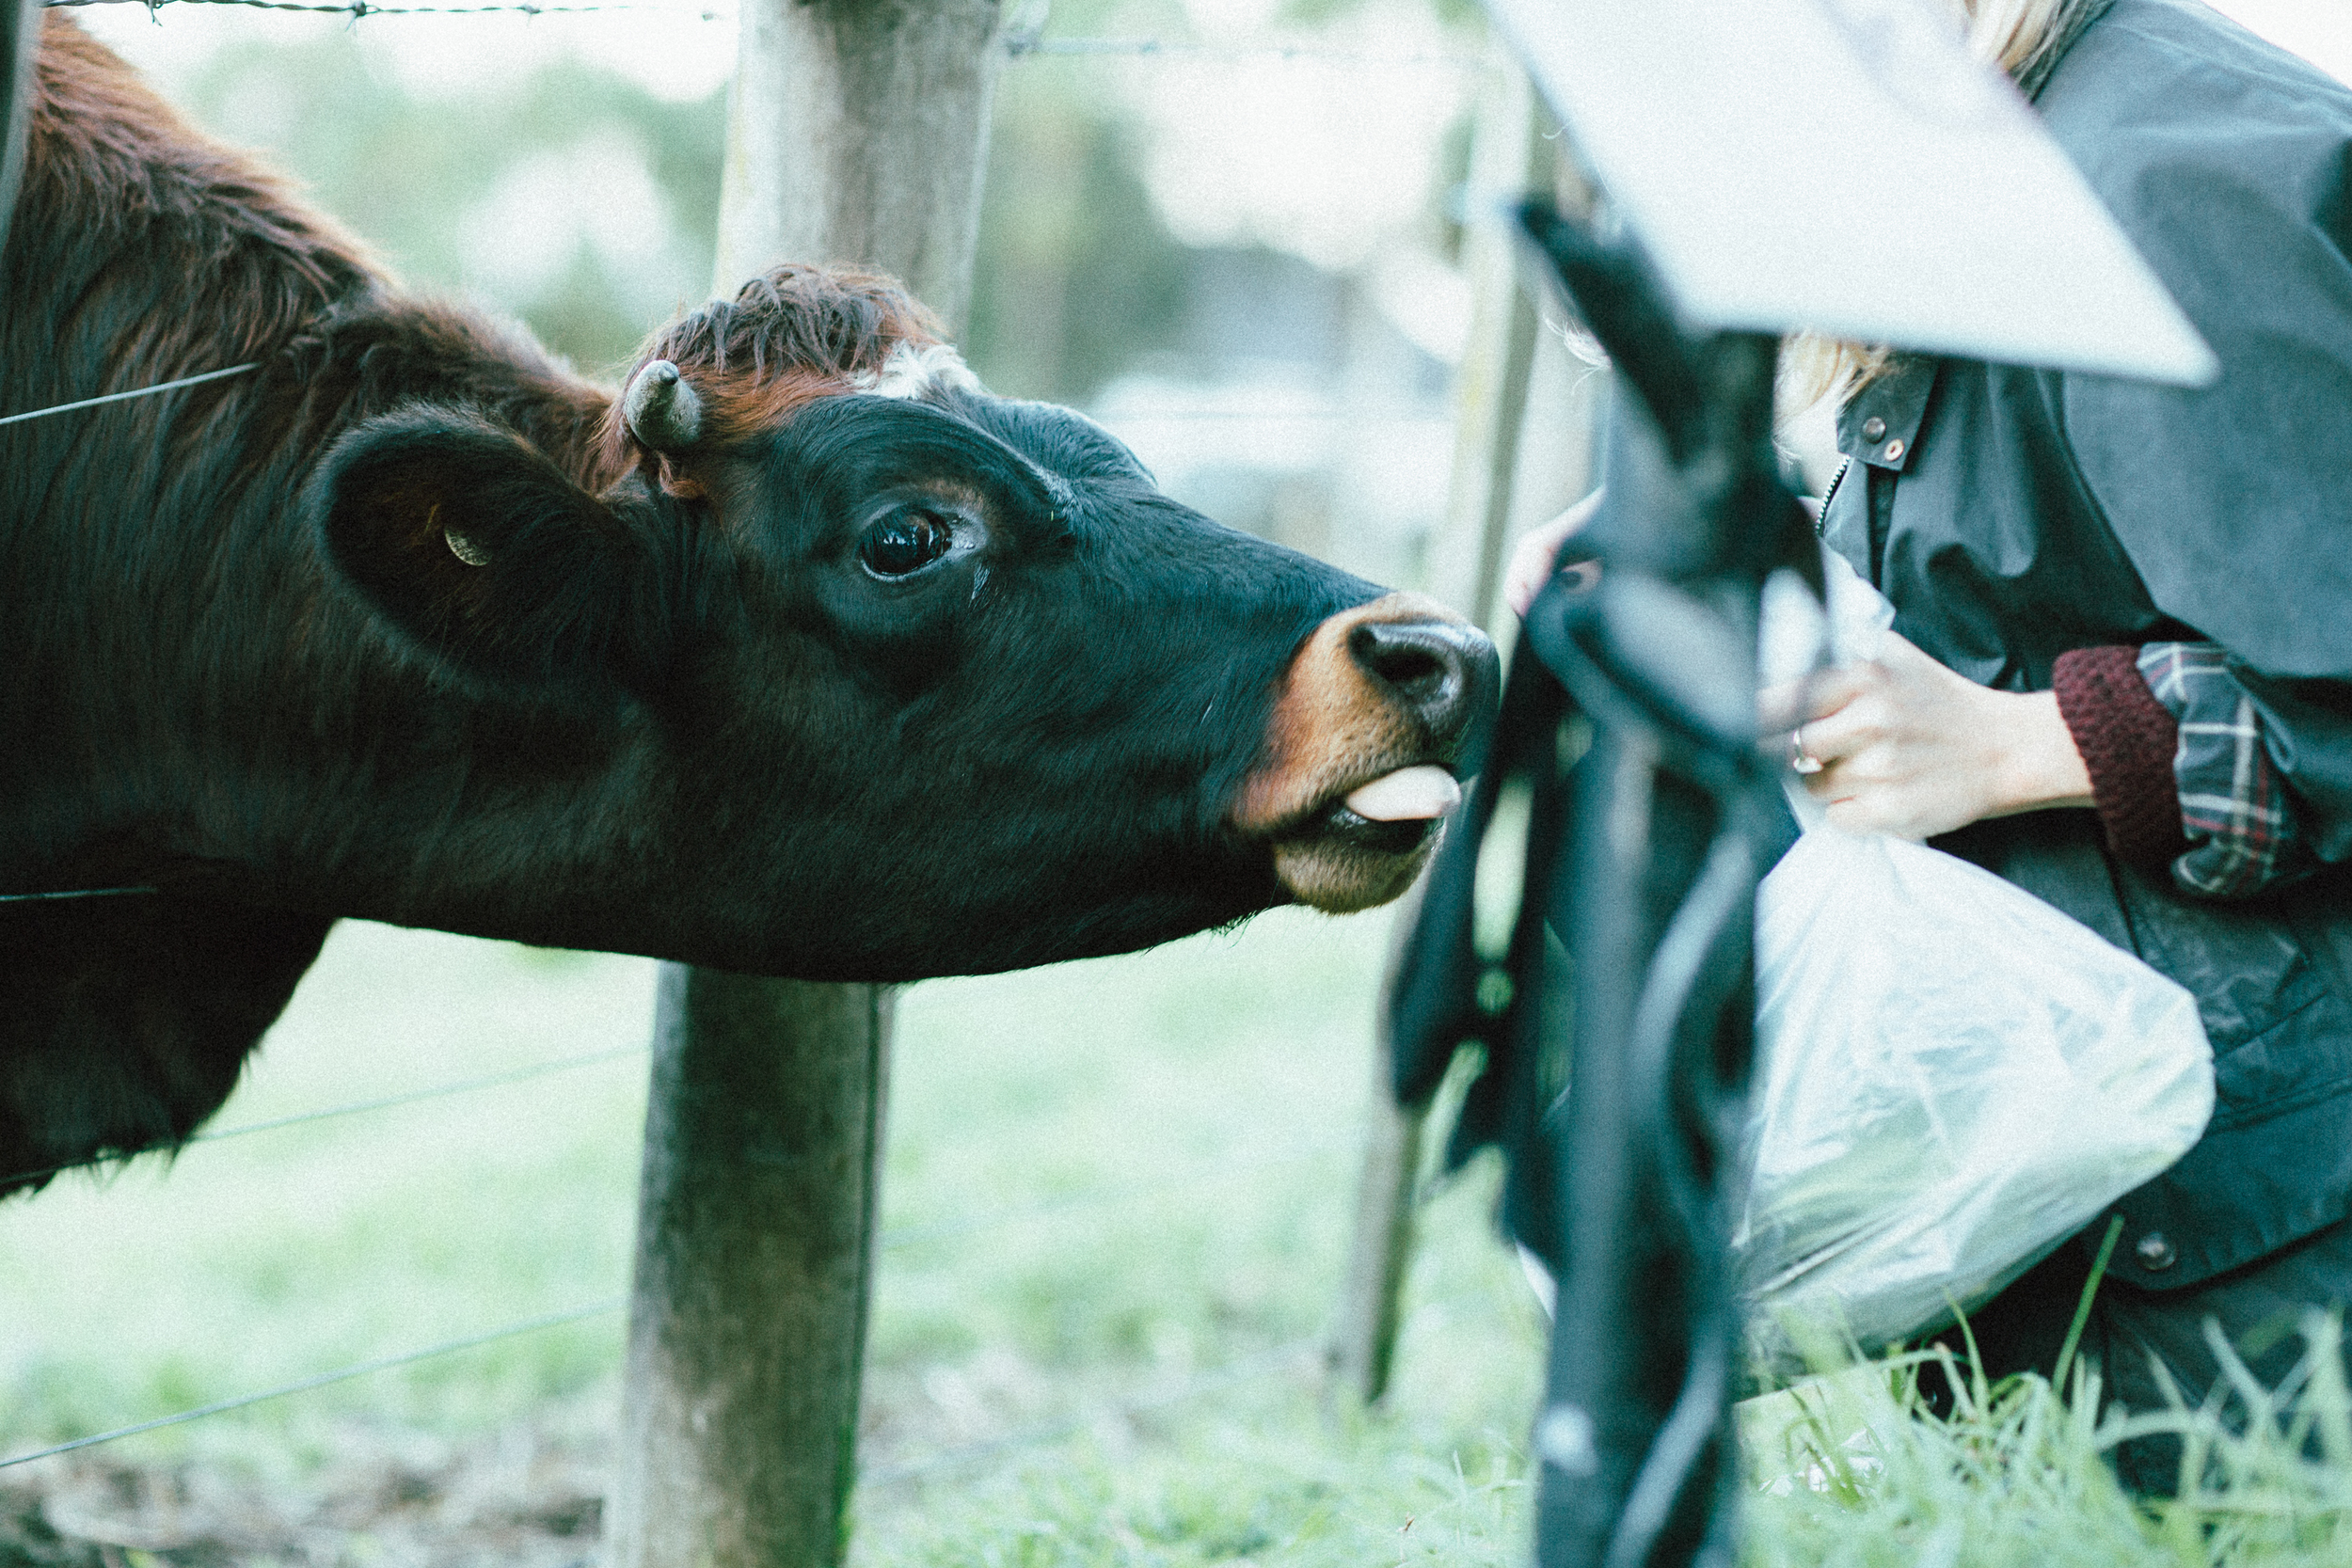

We learned about many things – taking care of herbs, bees, foraging, composting, harvesting and how to plant a new garden.


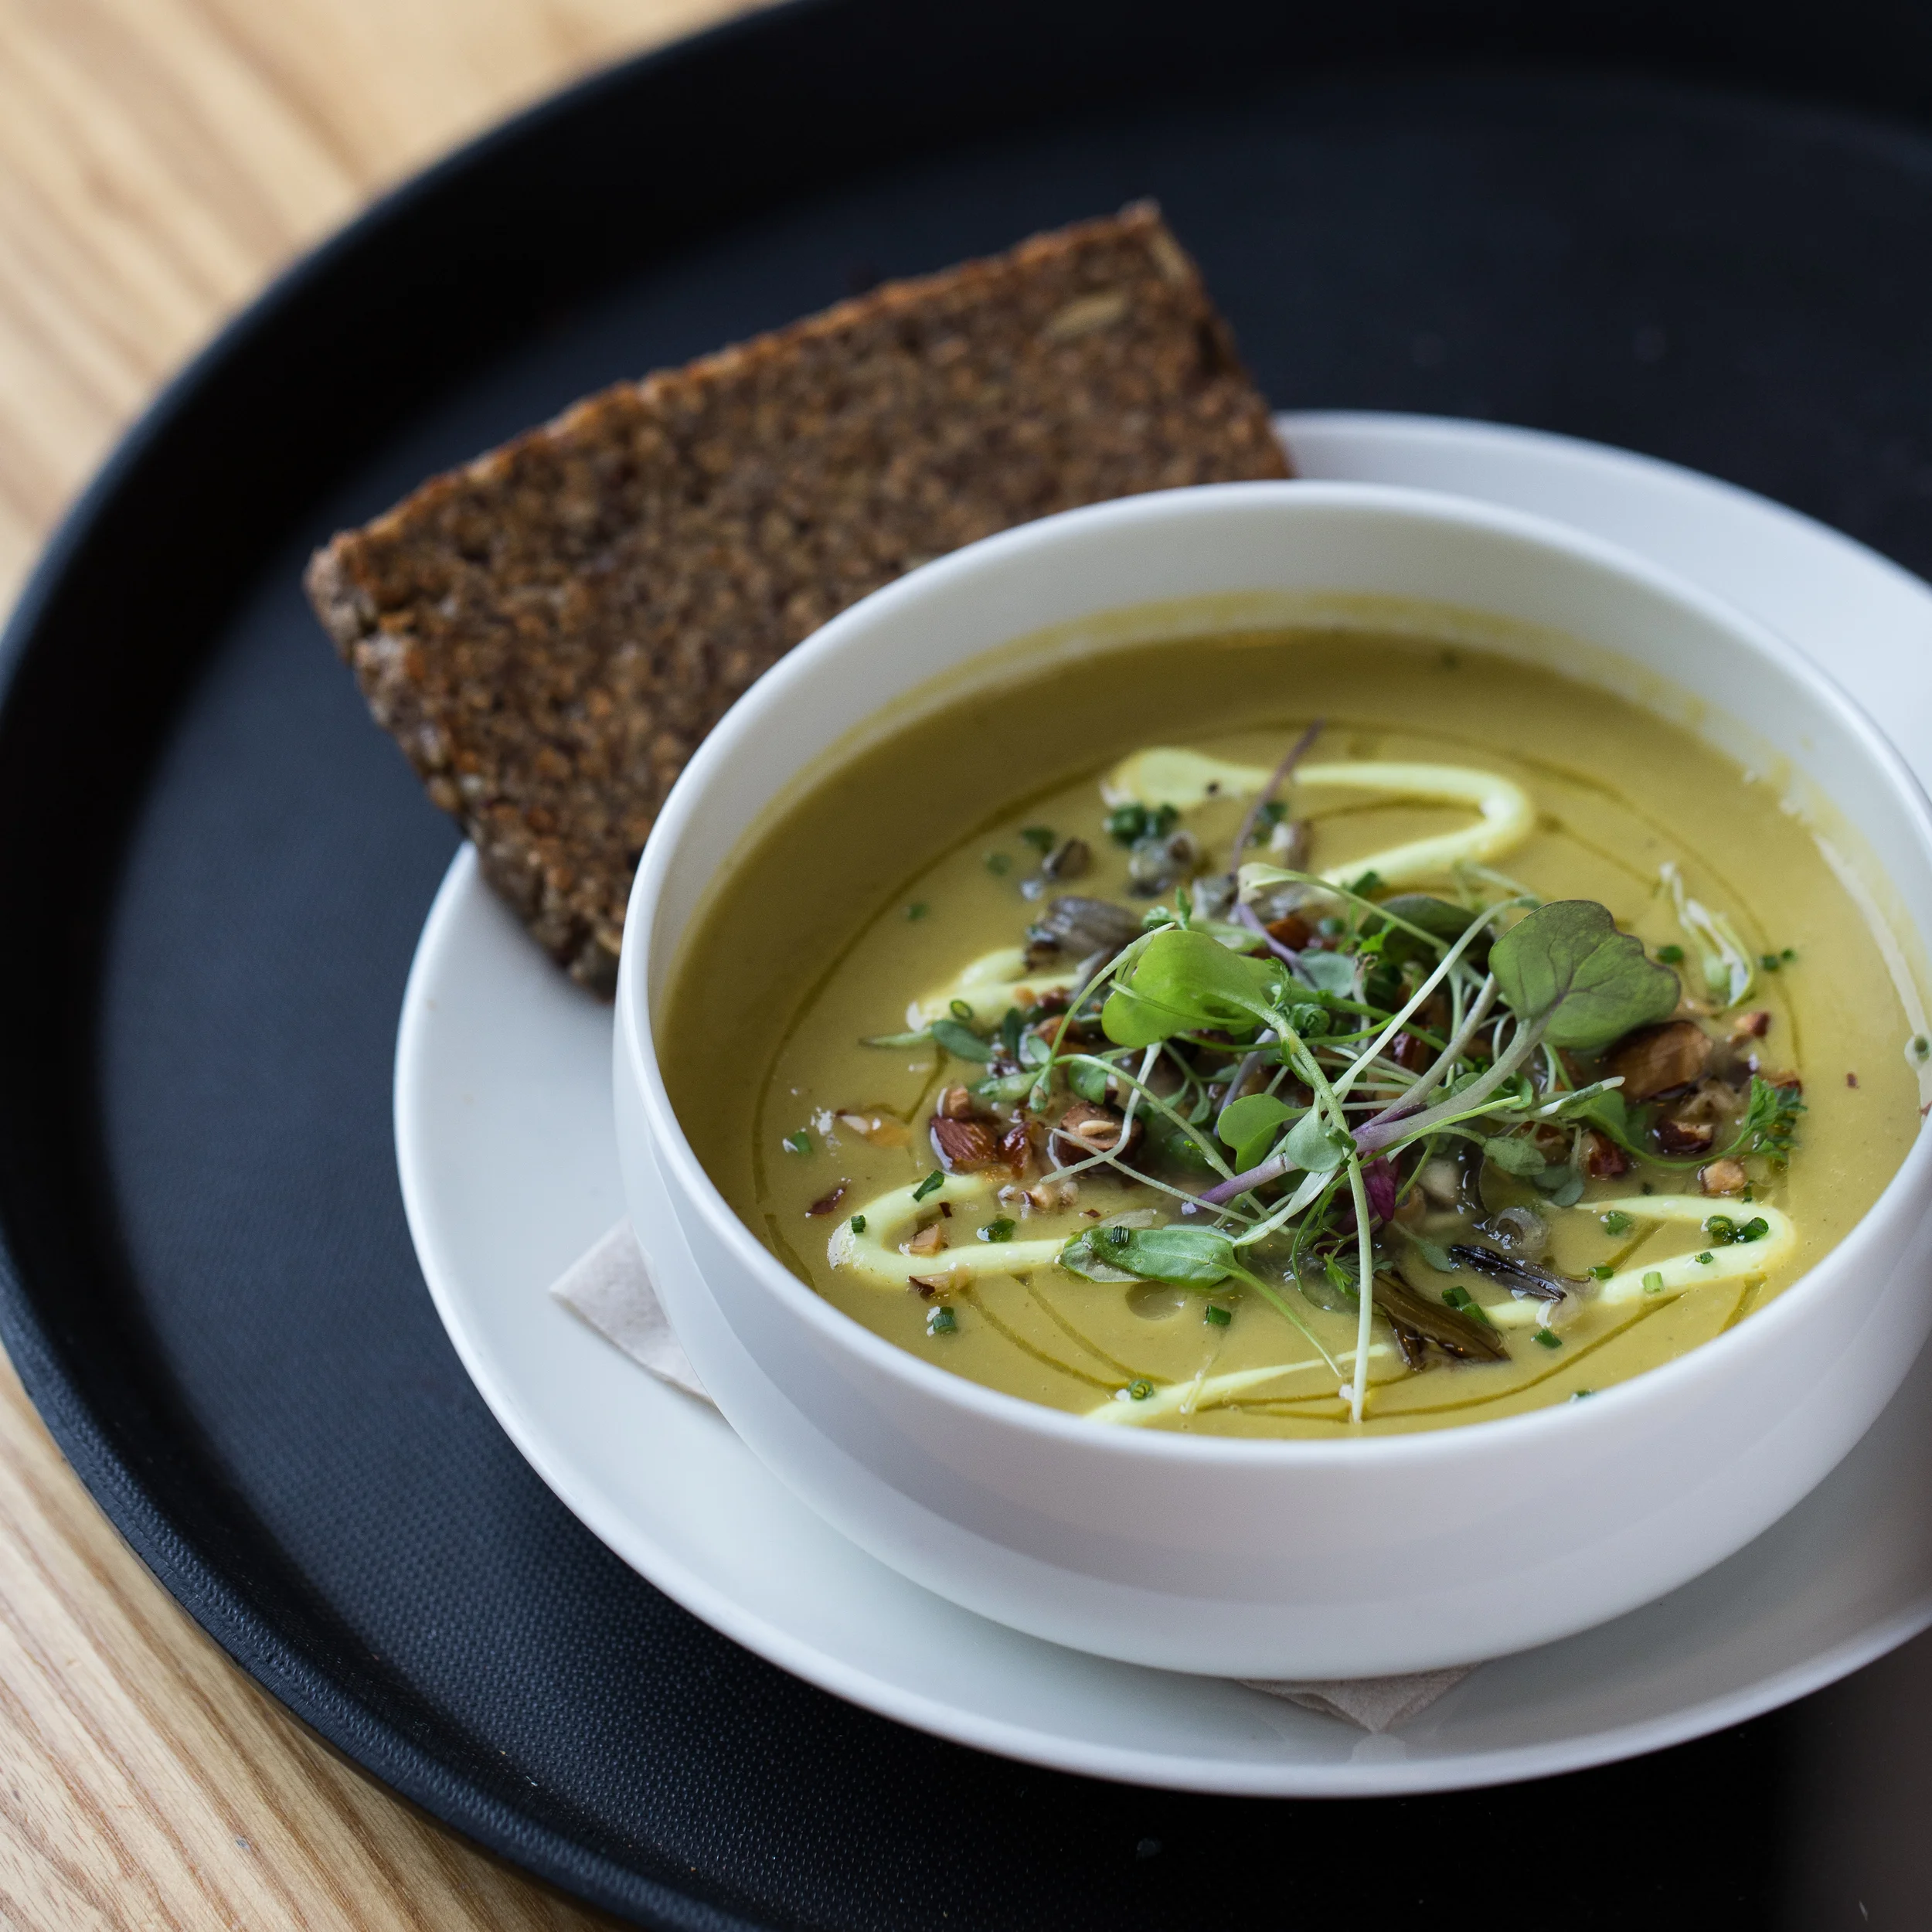
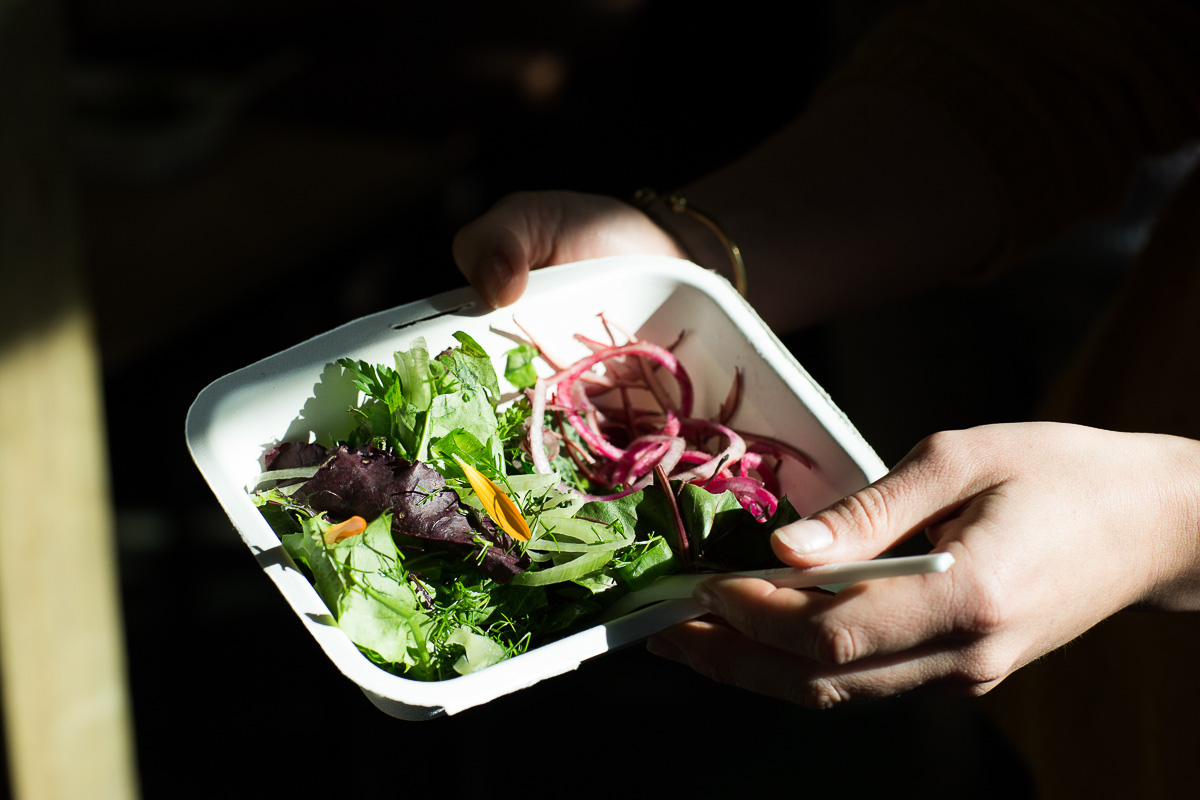
We drank teas made with fresh herbs and we ate salad and drank juice made by little bird, with vegetables harvested from the gardens.

To accompany this post, I have included a variation of little birds freshly harvested salad with chioggia beets. This was served at the workshop with a raw cashew cheese and their raw almond based crackers.
After living in Sweden, I have come to adore dill but you could substitute with a different herb such as parsley or chives in the recipe for the lemon cashew dip. The dip is also great as a snack on it's own served with crackers, carrot or celery sticks.
I've also included a basic pickled shallot recipe, as Matt and Lentil love pickling vegetables from their farm. Pickled vegetables are also something I miss from Sweden, so all the more reason to include them. Enjoy!

chioggia beet & greens salad with pickled shallot & lemon & dill cashew dip
- 1 large handful of organic leafy greens per person
- 1/2 medium chioggia or other type of beet per person, alternatively half a rainbow carrot
- 1 Tbsp cold-pressed olive or nut oil such as macadamia nut or hazelnut
- juice of half a lemon or a splash of quality vinegar (apple cider, red wine for e.g.)
- pinch of sea salt or himalaya mountain salt
- Mandolin the beet or carrot thinly on a mandolin.
- Toss the greens and beet in 1 Tbsp of olive oil a pinch of salt and
pickled shallot
- 2 medium shallots finely sliced on a mandolin
- 1 Tbsp red wine or apple cider vinegar
- 1/2 tsp agave syrup or raw honey
- pinch of sea salt or himalaya mountain salt
- Mix ingredients thoroughly and leave to marinate for 1/2 an hour minimum. Stir a couple of times while the mixture is marinating.
lemon & dill cashew dip
- 1 cup of cashew nuts, soaked in filtered water for a minimum of 2 hours
- 1/4 cup of lemon juice and zest of one lemon
- 2 Tbsp olive oil
- 1/4 cup filtered water
- 1 garlic clove
- pinch of cayenne pepper
- 1/2 tsp of sea salt or himalaya mountain salt
- 1 - 2 Tbsp finely chopped dill
- 1 - 2 Tbsp nutritional yeast (optional - this will give the cream a cheesier flavour)
- Rinse cashew nuts in filtered water.
- Blend all ingredients excluding the dill, in a high speed blender, until smooth.
- Stir in finely chopped dill.
We recommend enjoying this salad combination together with a raw cracker or bread.
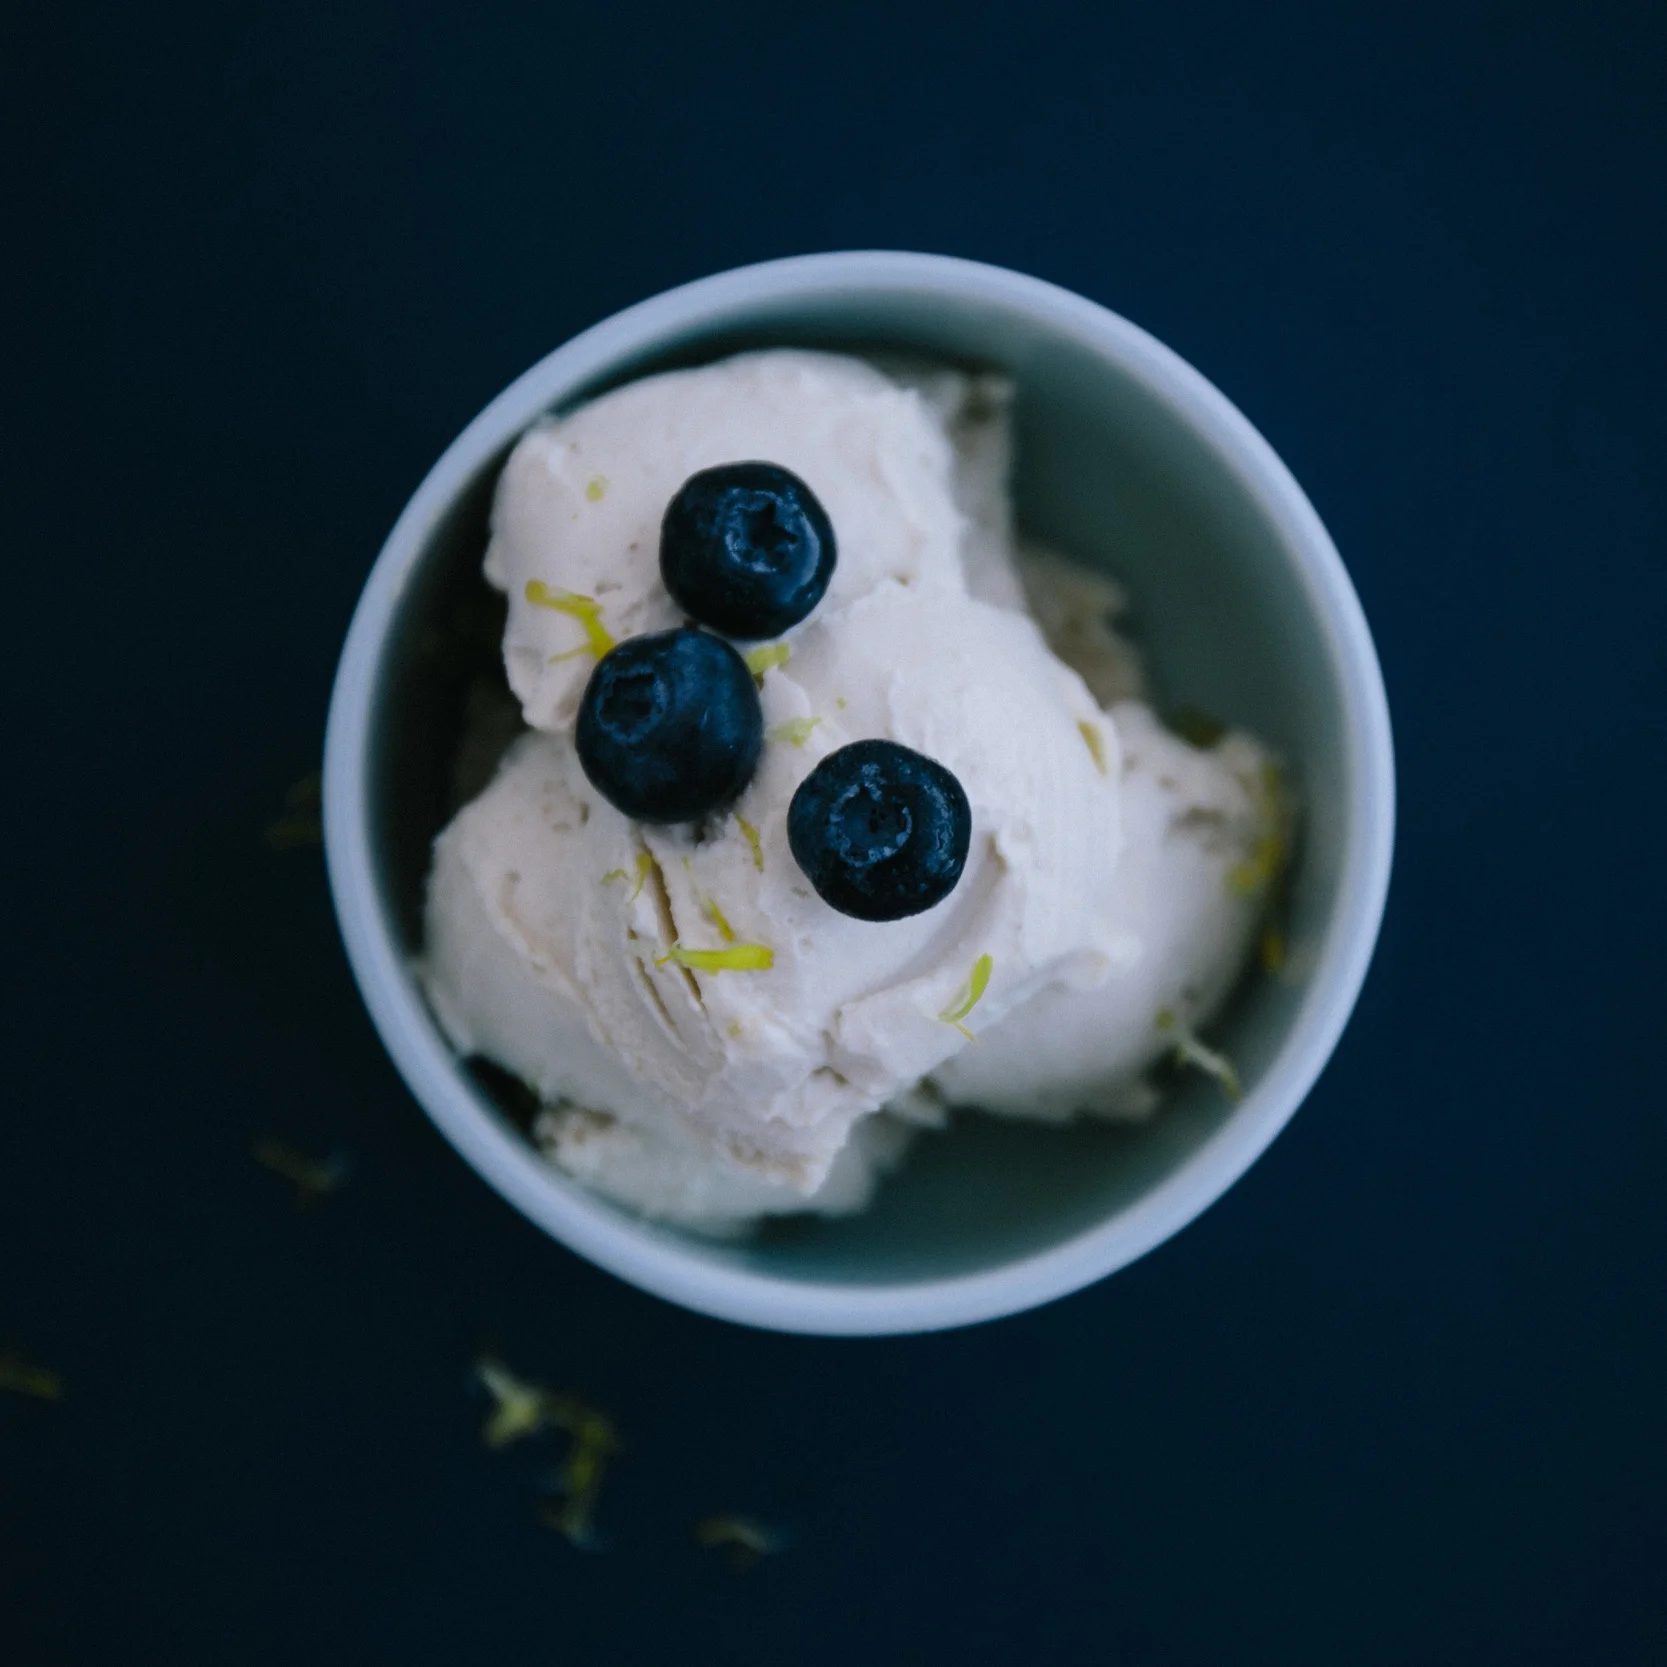
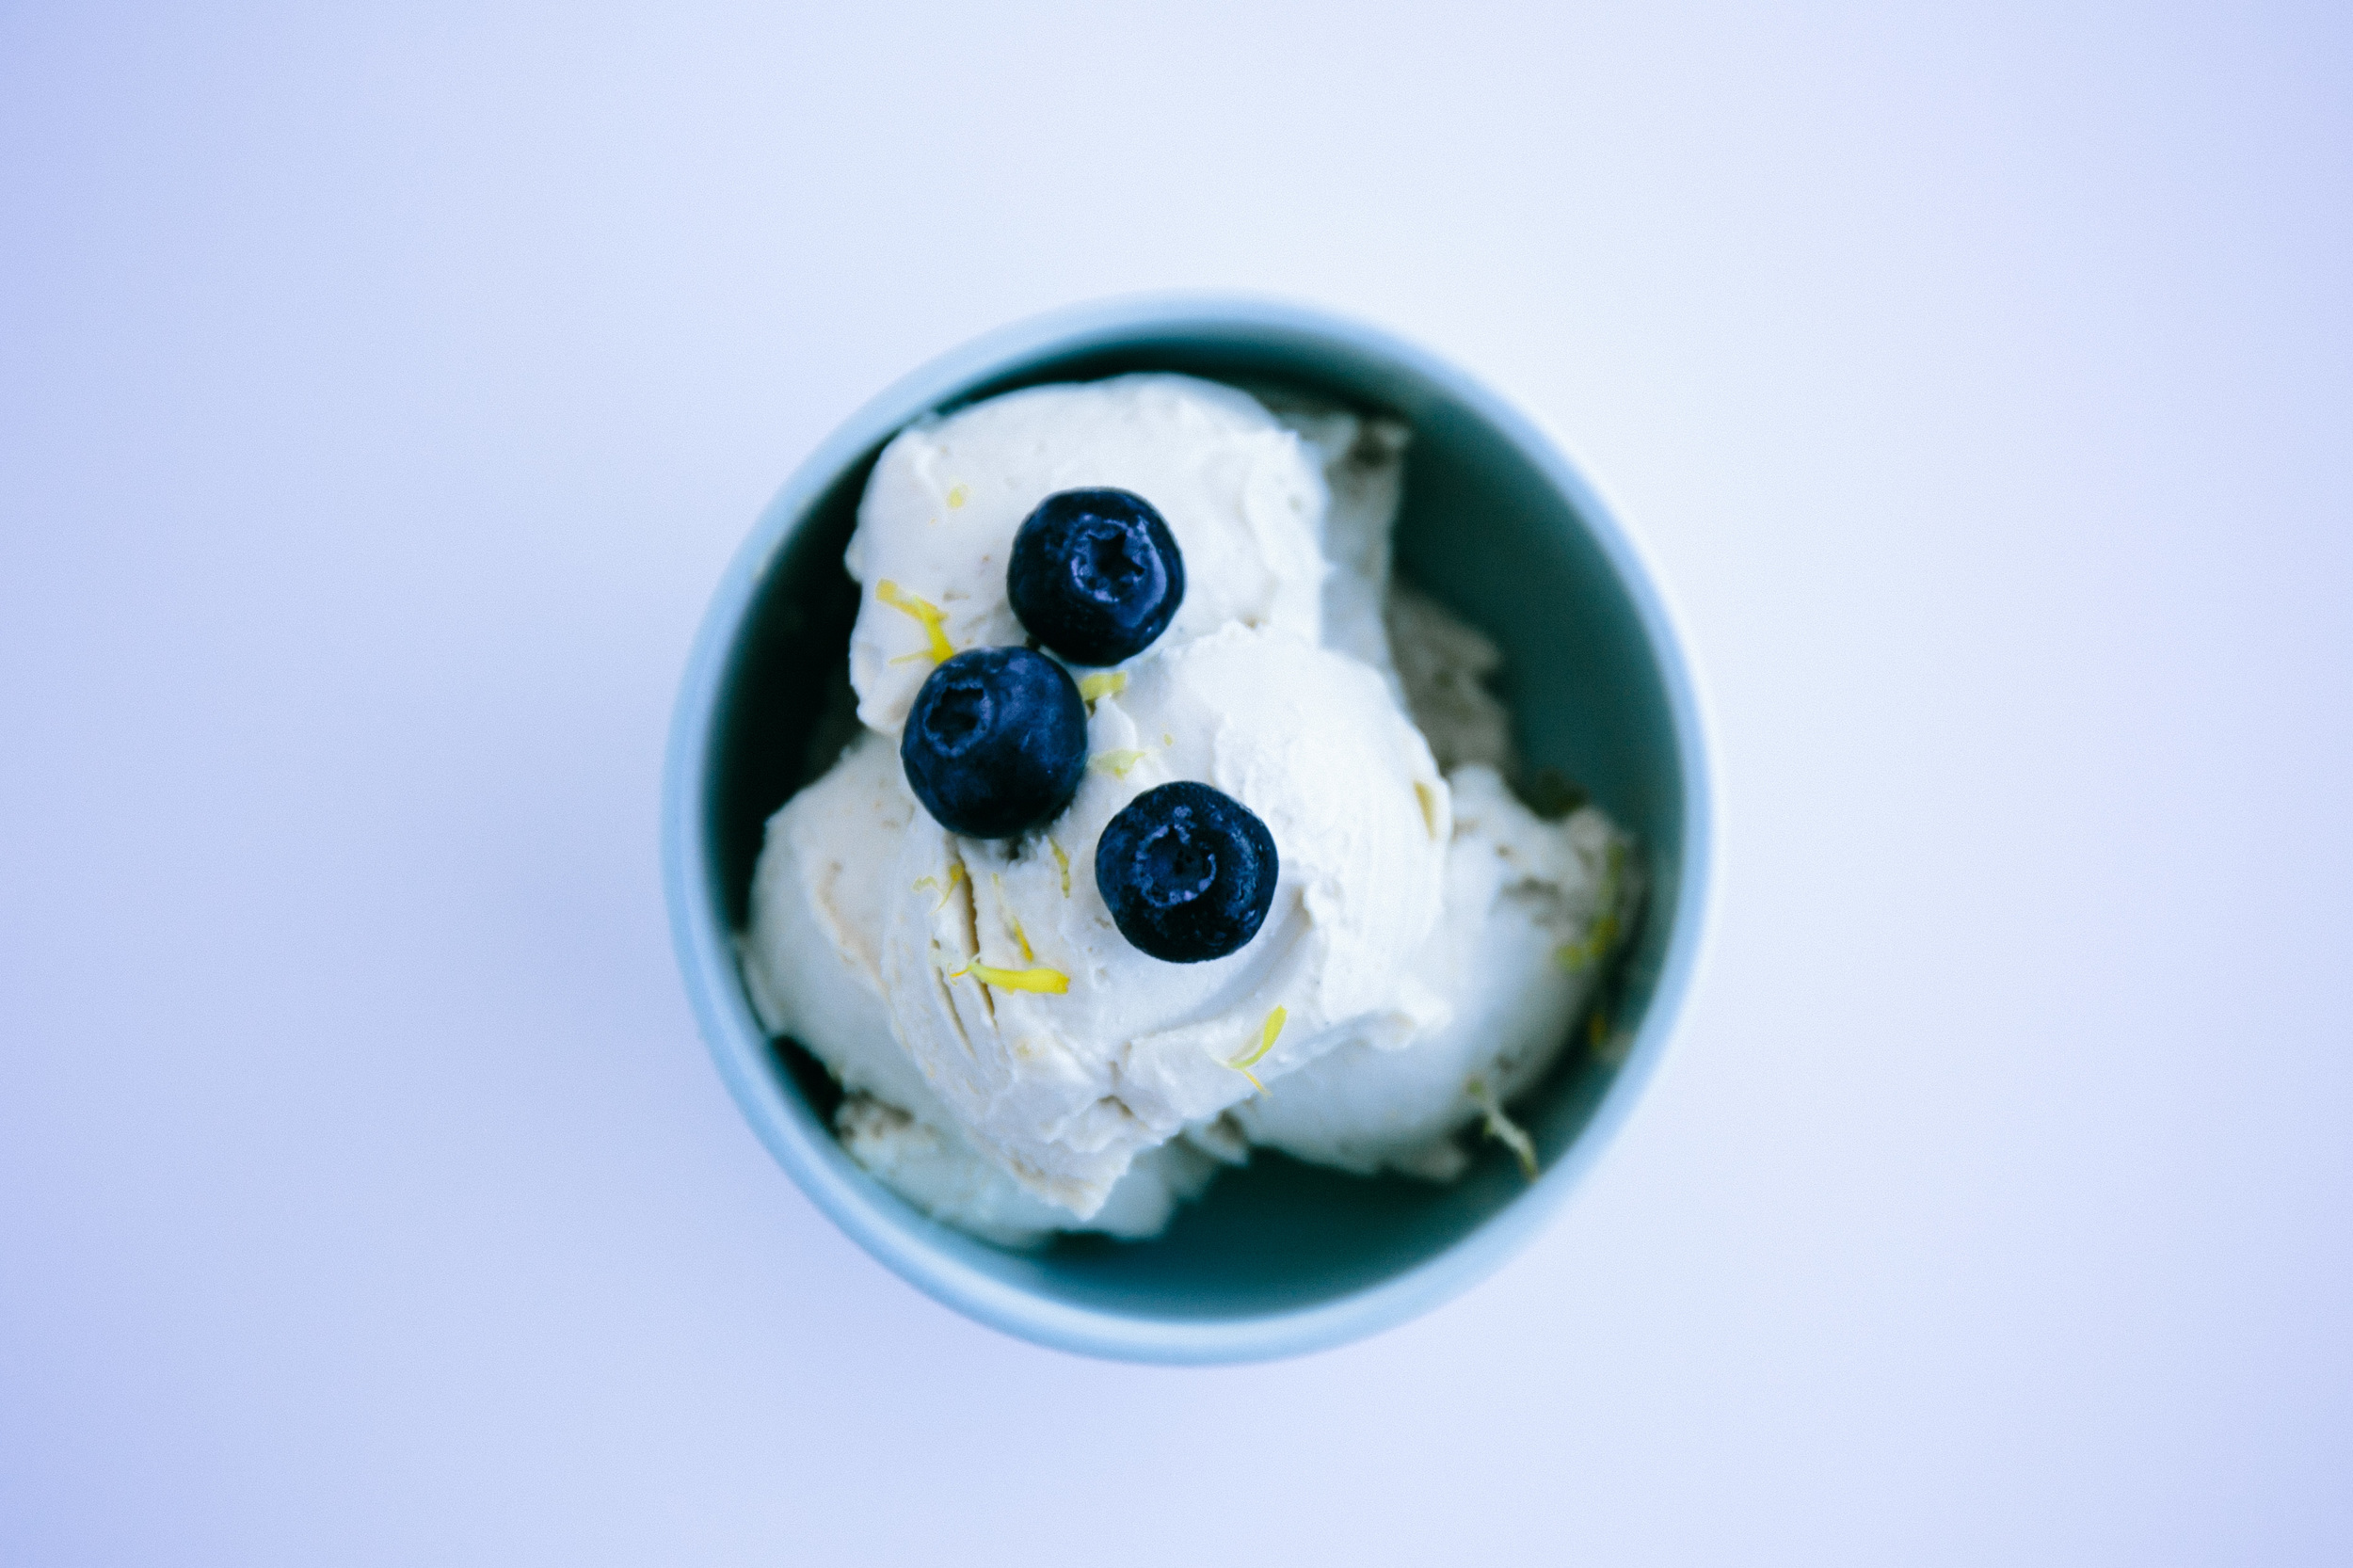
meyer lemon & 'cream cheese' vegan ice cream

The present moment:
What is photography? For me, I think it is a reflection of what I see through my soul... if my soul had eyes.
The words below I wrote a couple of days ago, and now 2 days later the feeling inside is different. More confident. Happy. I sat so nervously waiting to hand my photographs over to Christina Force for her opinion on my photography portfolio. But the outcome was beyond 'hope'. I struggle so much with my lowly self-confidence. Find it so hard to take on board praise without thinking people are just being kind. It's something deep inside that I've come to live with but it can be so debilitating at times. But as Christina looked through my photographs, I got that cliched feeling that time slowed down. She said that my photographs were 'beautiful'. She said that she loved them and could put them on her kitchen wall. I had been so afraid of the opposite reaction that when those comments met my insecurities it really did feel like a dream - an answer to all those moments when I wonder who I am and what I am doing. Like the reassuring feeling of letting out a long held breath.
Tuesday morning:
The fog is starting to clear - hurrah! That's what it feels like at least. The past few months have been incredibly hectic but i'm finally starting to feel that my scattered brain is slowing... Tonight I'll be showing my work to one of the founders of a prominent photography agency here in New Zealand - the final test on the final night of my scholarship at Kingsize studios. My photographs are all printed and ready to go, so now i'm just waiting nervously for some feedback...

And a flashback which we never ended up posting:
This vegan 'cream cheese' ice cream was originally intended for some carrot cake cup cakes I was intent on making. The process takes a little bit of time, because first you have to soak (“activate”) the cashews, blend them with probiotics and allow them to ferment overnight which allows the “cream cheese” flavors to develop. Unfortunately yesterday in the midst of a photography catastrophe, I needed a pick-me up (as can happen), in order to ease my frustration. So the cream cheese icing (which was waiting patiently in the freezer for its cup cake compadraes), instead turned into this bowl of ice-cream. And it was divine… just what was needed. This change in direction also resulted in the best photos we have taken (we are just learning you see!). Just another reminder that sometimes when you intend on things happening in a certain way a twist of events can change the direction of our paths. And while this may result in something completely different, it may be even better!
Note: This recipe is from last summer in New Zealand, just after we bought our camera. Fredrik and I were so happy with these photographs as they were the first ones that actually looked good in the back of the camera! (There were a lot of fails back then!). The base of the recipe we made was fermented cashew nuts. In order to simply the recipe however, we've removed this process and added nutritional yeast as a substititute. Nutritional yeast is often used in raw cuisine to make tree-nut cheeses and in other recipes to add a cheesey flavour. It is a source of B12, an important vitamin the levels of which can be hard to maintain on a vegan diet. So in short - get your daily dose of B12 (or a part of it!), by eating this ice-cream. Yum!

lemon & cream cheese vegan ice cream
Serves 4
- 1 cup of cashew nuts soaked for 2 hours
- 1/2 cup of coconut meat
- 1/2 cup of agave syrup
- 1 1/4 cups of almond milk
- 2 Tbsp of meyer lemon juice and zest of 1/2 to 1 meyer lemon (adjust according to taste)*
- 1 Tbsp nutritional yeast
- 1 Tbsp vanilla extract
- 1/4 tsp sea salt or himalaya mountain salt
- 1/4 cup of coconut oil melted
* can be substituted for normal lemon
how to:
- Melt coconut oil over a water bath.
- Blend all ingredients except for the coconut oil and lemon zest, until smooth in a high speed blender.
- While blender is running on low speed, slowly pour in the coconut oil.
- Fold in lemon zest and place in freezer.
- During the freezing process, stir the mixture a few times which will improve the consistency.
- Prior to serving remove the ice-cream from the freezer and leave to soften for 10 minutes or more. Raw ice-creams become really hard so another good idea once softened, is to pop the mixture back into the blender and blend until you reach a smooth ice-cream texture.
garnish
With blueberries and additional lemon zest. Enjoy!

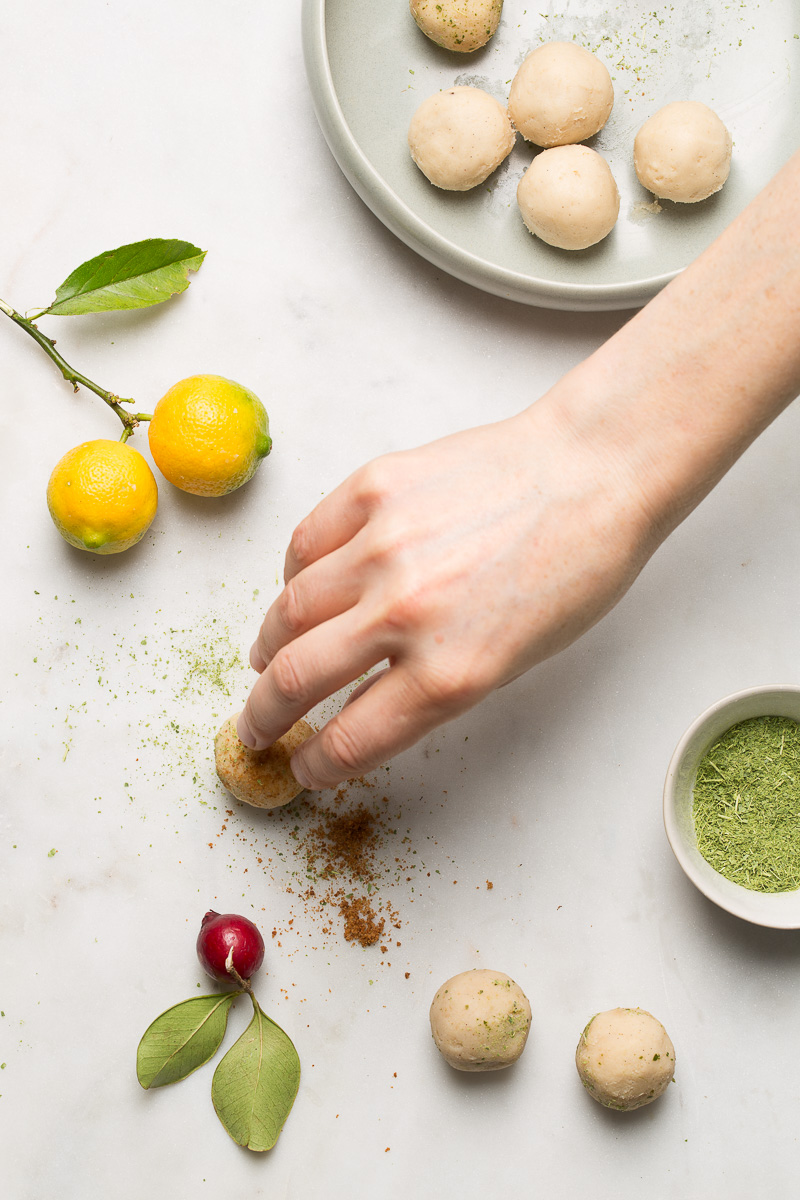
raw white chocolate & citrus truffles

We've been talking a lot about styling and 'finding' your own style at Kingsize recently. It's something a lot of us find difficult.

When I think about my own style I know that there are certain styles that speak to me. Certain photographs that capture my eye (whether it be the styling of food on a plate, or a piece of furniture in a room), while others go by unnoticed. Photographs that reach out and touch me and convey a feeling in an understated way. In the hunt for my own individual style it s about capturing these same emotions I am drawn to, yet injecting a piece of me to the recipe. Words that come to mind when I think about this aspiration, are organic, simple and beautiful. Even elegant in a sense, but in a rustic, not overly styled way. Just a few components. Sometimes I achieve this, but many times not =).

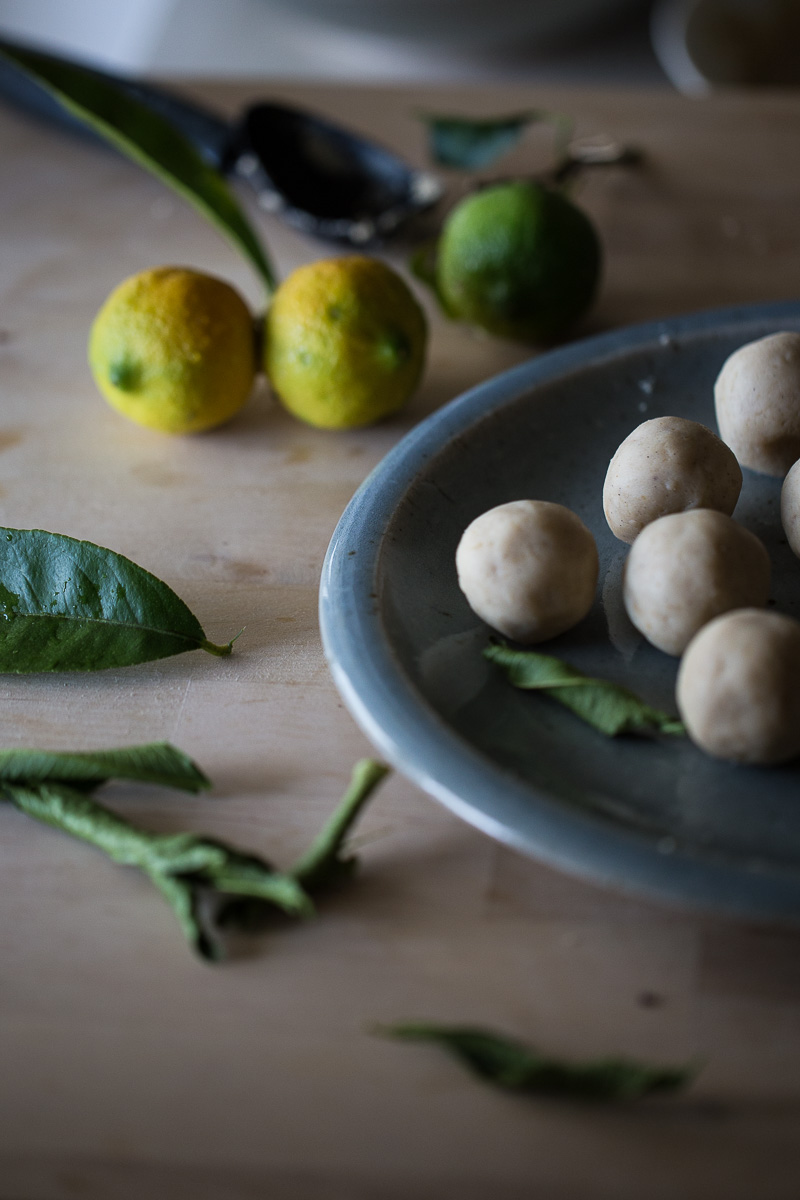
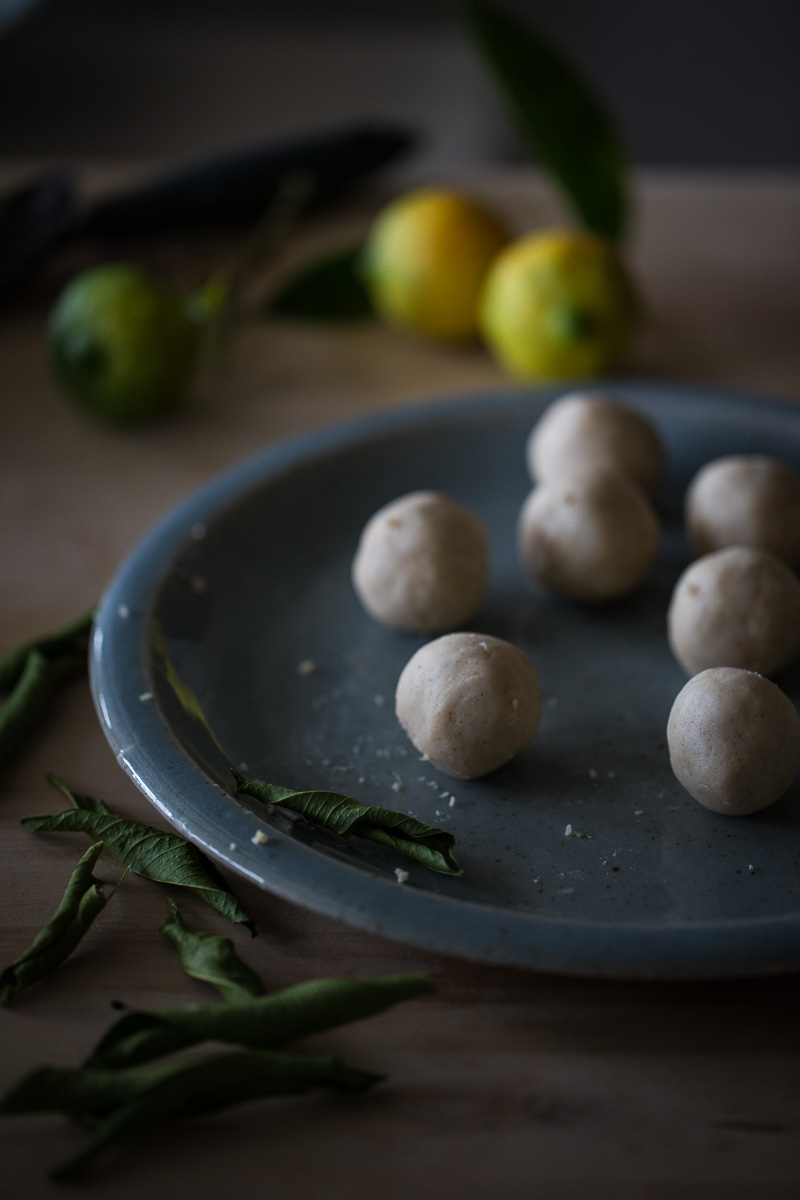
In relating these words to this post, I made these raw white chocolate truffles for a photography project at Kingsize. Throughout the course of the assignment I took a number of shots of these truffles in different settings, with the aim of also being able to use them in my blog. In natural light after I made them, and stylised as if in a magazine in the studio. The shot that I chose as the main shot for this post, is from the studio, on an old wooden board before changing to my marble slab. It was one of the first few shots I took (the third one actually). One of those shots when you're not thinking - just setting up the camera. It's funny because this has happened to me many times before. I'll take a lot of photos, moving the plate a cm to the left, to the right, up and down, trying to style things just right. Often though, when looking at the camera roll, I'll find that the ones I like best are those first 'unthinking' ones (making me wish I put the camera down an hour earlier!). I guess this little reality is a a subliminal message to just go with it and not 'over think' things in life too.

I find social media an interesting thing too as I can find that the photographs I am least proud of (but post anyway for want of filling a void), are those that can be the most liked. It is a challenge not to be swayed by this - to keep pursuing your own vision.
At the end of the day though, and what I've often heard, is to pursue and photograph what you love. Which essentially is what this blog is all about. By keeping true to this, I'm sure my style will just 'happen'. My hope is that it it will evolve in a way that encapsulates my both my visions and those emotions that speak to me from the great artists I admire and the subjects I find beautiful. Have a lovely week x
raw white chocolate & citrus truffles
Makes approximately 12 truffles
- 1 cup of cashew nuts (soaked for a minimum of 2 hours in filtered water)
- 1/2 cup of maple syrup
- 1 1/2 tsp vanilla extract
- 1/2 a vanilla bean scraped
- 1/4 cup of coconut butter
- juice of 1 lime
- 1/4 tsp himalaya mountain salt or sea salt
- 1/2 cup of cacao butter melted
- 1/4 of raw coconut butter
- 1/4 cup of coconut oil melted
- 1 Tbsp coconut sugar and zest of 2 limes for garnish
- Rinse soaked cashew nuts before blending with maple syrup, coconut butter, lime juice, vanilla extract, vanilla beans and salt. Blend until smooth.
- Melt cacao butter and coconut oil and slowly add to the mixture while blending on a low speed.
- Once blended, stir in 1 Tbsp of coconut sugar for added texture.
- Pour mixture into a bowl and refrigerate for 1/2 an hour or until the mixture is firm enough to mould.
- Scoop mixture with a small ice cream scoop or spoon and roll into small balls.
garnish
Roll balls in lime zest and a sprinkling of coconut sugar.
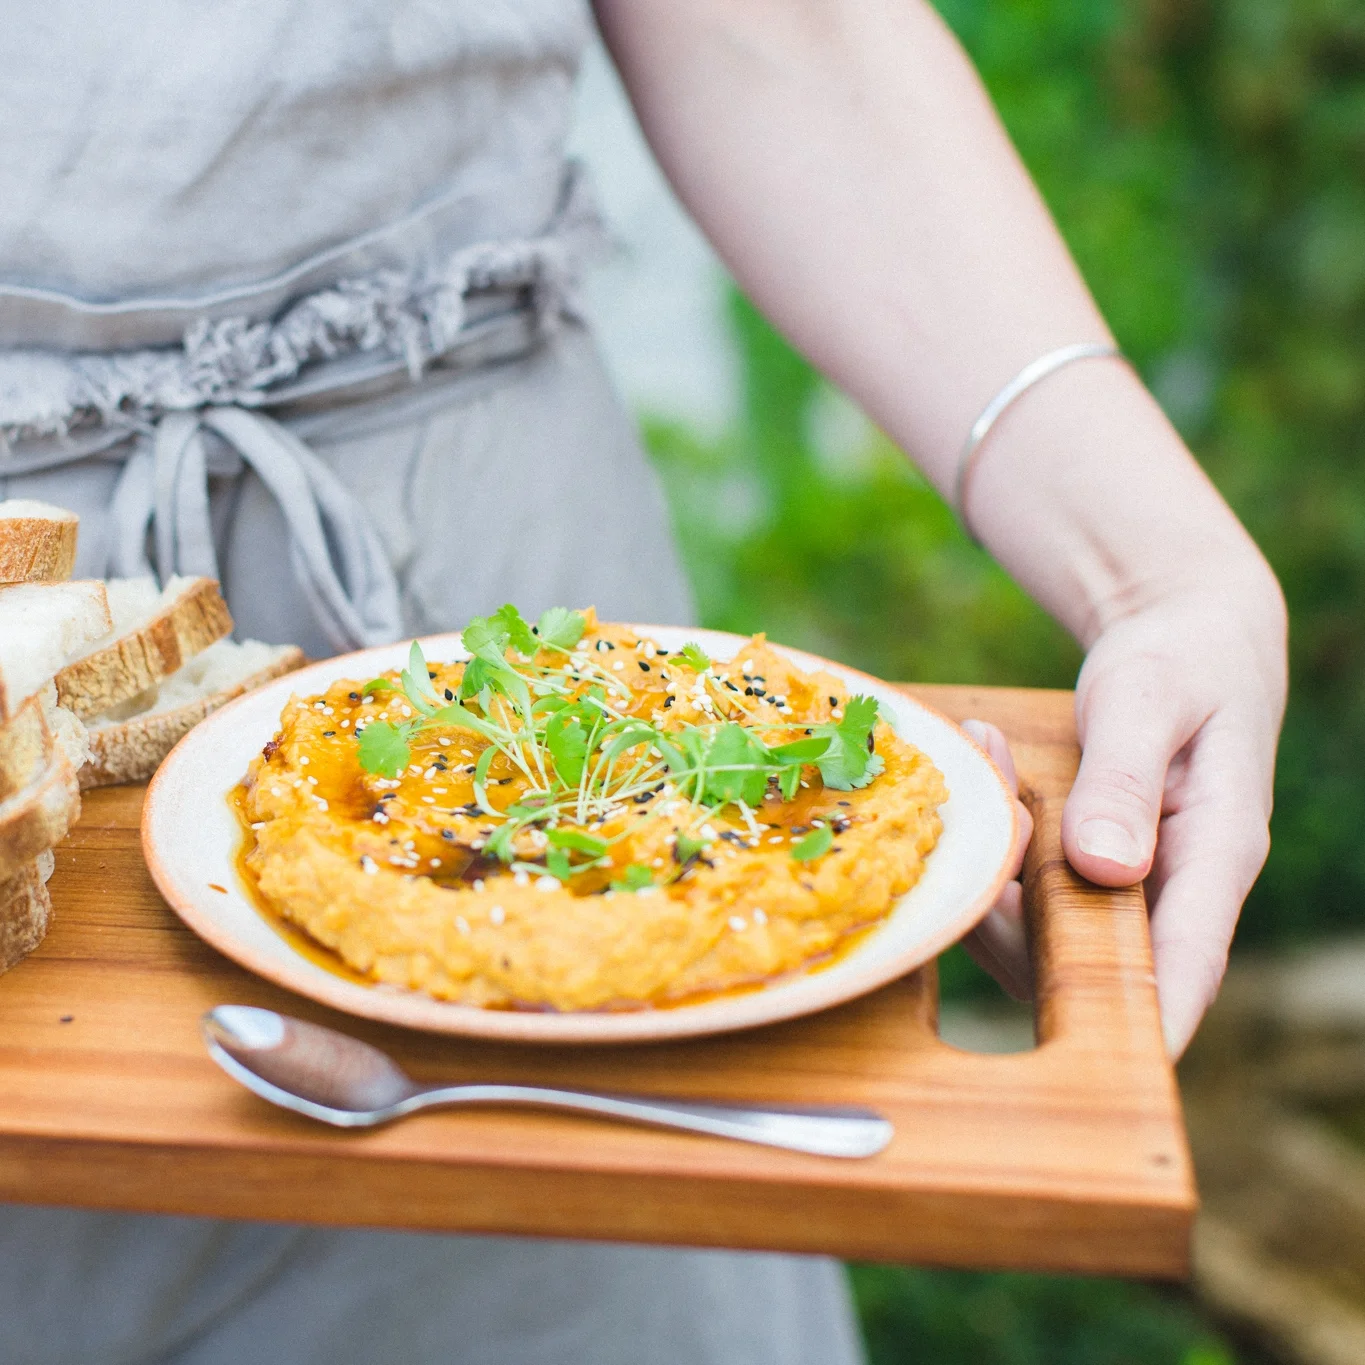
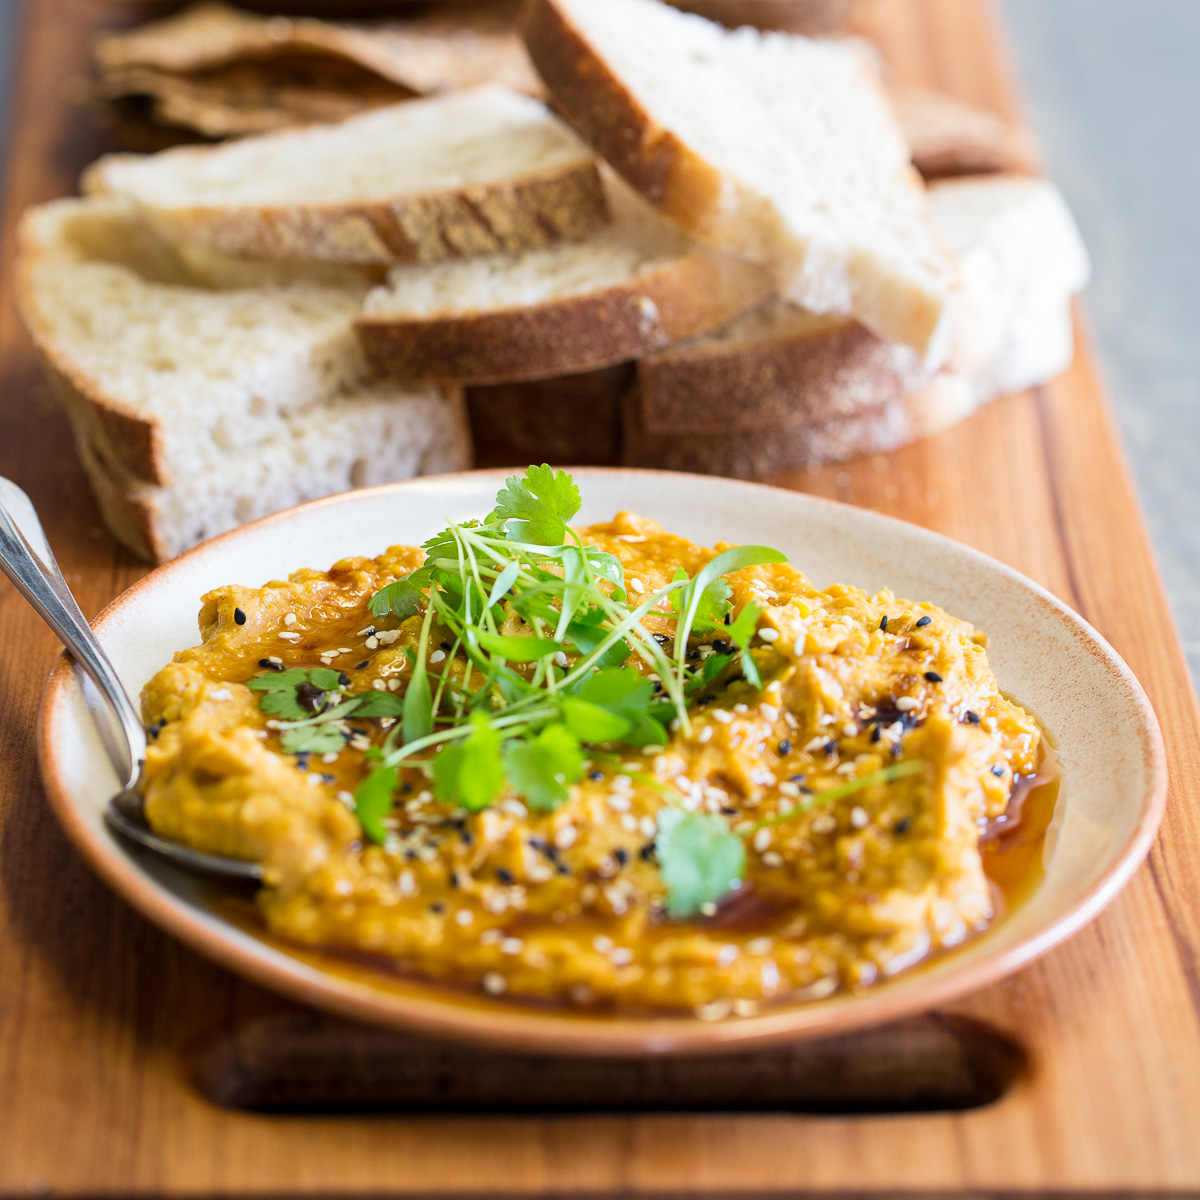
kinfolk part II, jerusalem style butternut dip

Welcome to part II of my Kinfolk 'Beneath the surface' gathering series. In this post I'm sharing my version of Ottolenghi's 'Jerusalem' butternut squash dip which was similar to that which Nadine of Devour served as a starter at Kinfolk. One key change is that I have made this delicious dip accessible to a vegan diet.
As with Kinfolk part I the beautiful imagery has been taken by Steph and Robin from Bubblerock (plus some of my own photos which I managed upon sneaking from the kitchen!). I really admire Steph and Robin's work - they are both so gifted in capturing feeling and emotion through a lens. After meeting them I'm inspired to start learning film too!! (If you love photography and haven't checked out Steph and Robin's website yet, then I suggest you do!).
In terms of serving suggestions, enjoy this dip with a bread option as above, or as a main dish side. My favourite is to include it alongside a kale or mixed vegetable salad, with carrot stick dippers... or on it's own with a spoon from the food processor!
Have a lovely week xx


A peek inside Shaye from On My Hand's table setting (shot by me). Shaye was the host for this event.

'Jerusalem' style butternut dip - part of the menu designed by Nadine of Devour Catering..

Ataahua garden venue provided a stunning background for a Kinfolk gathering.


'Dandelion root' main (dandelion & parsnip puree, steamed baby carrots & leek, beef cheek, red wine jus, nasturtium and micro sorrel
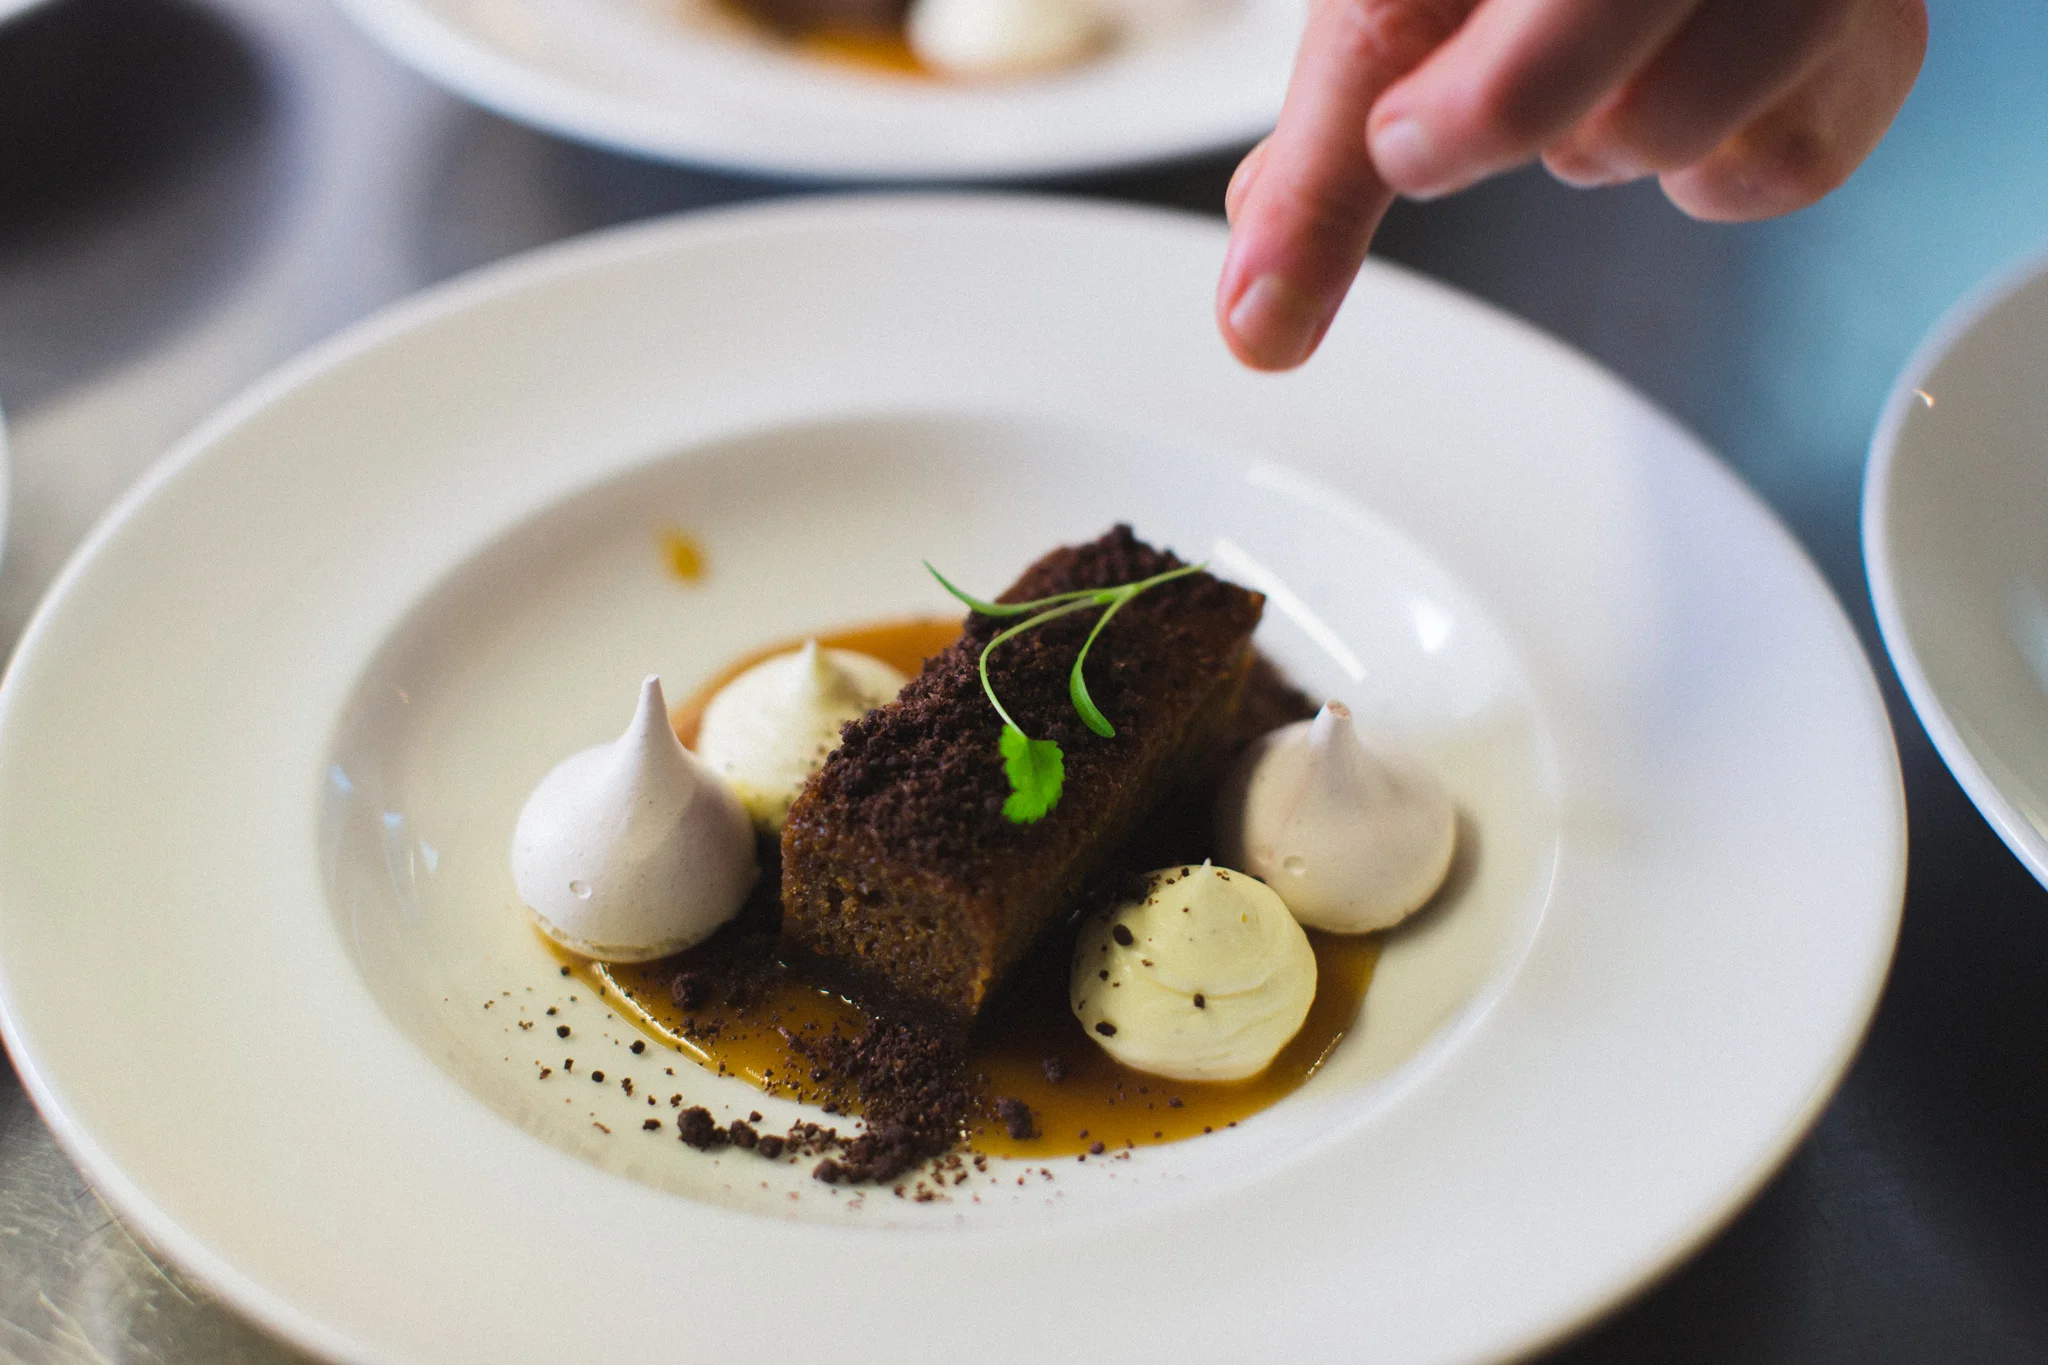

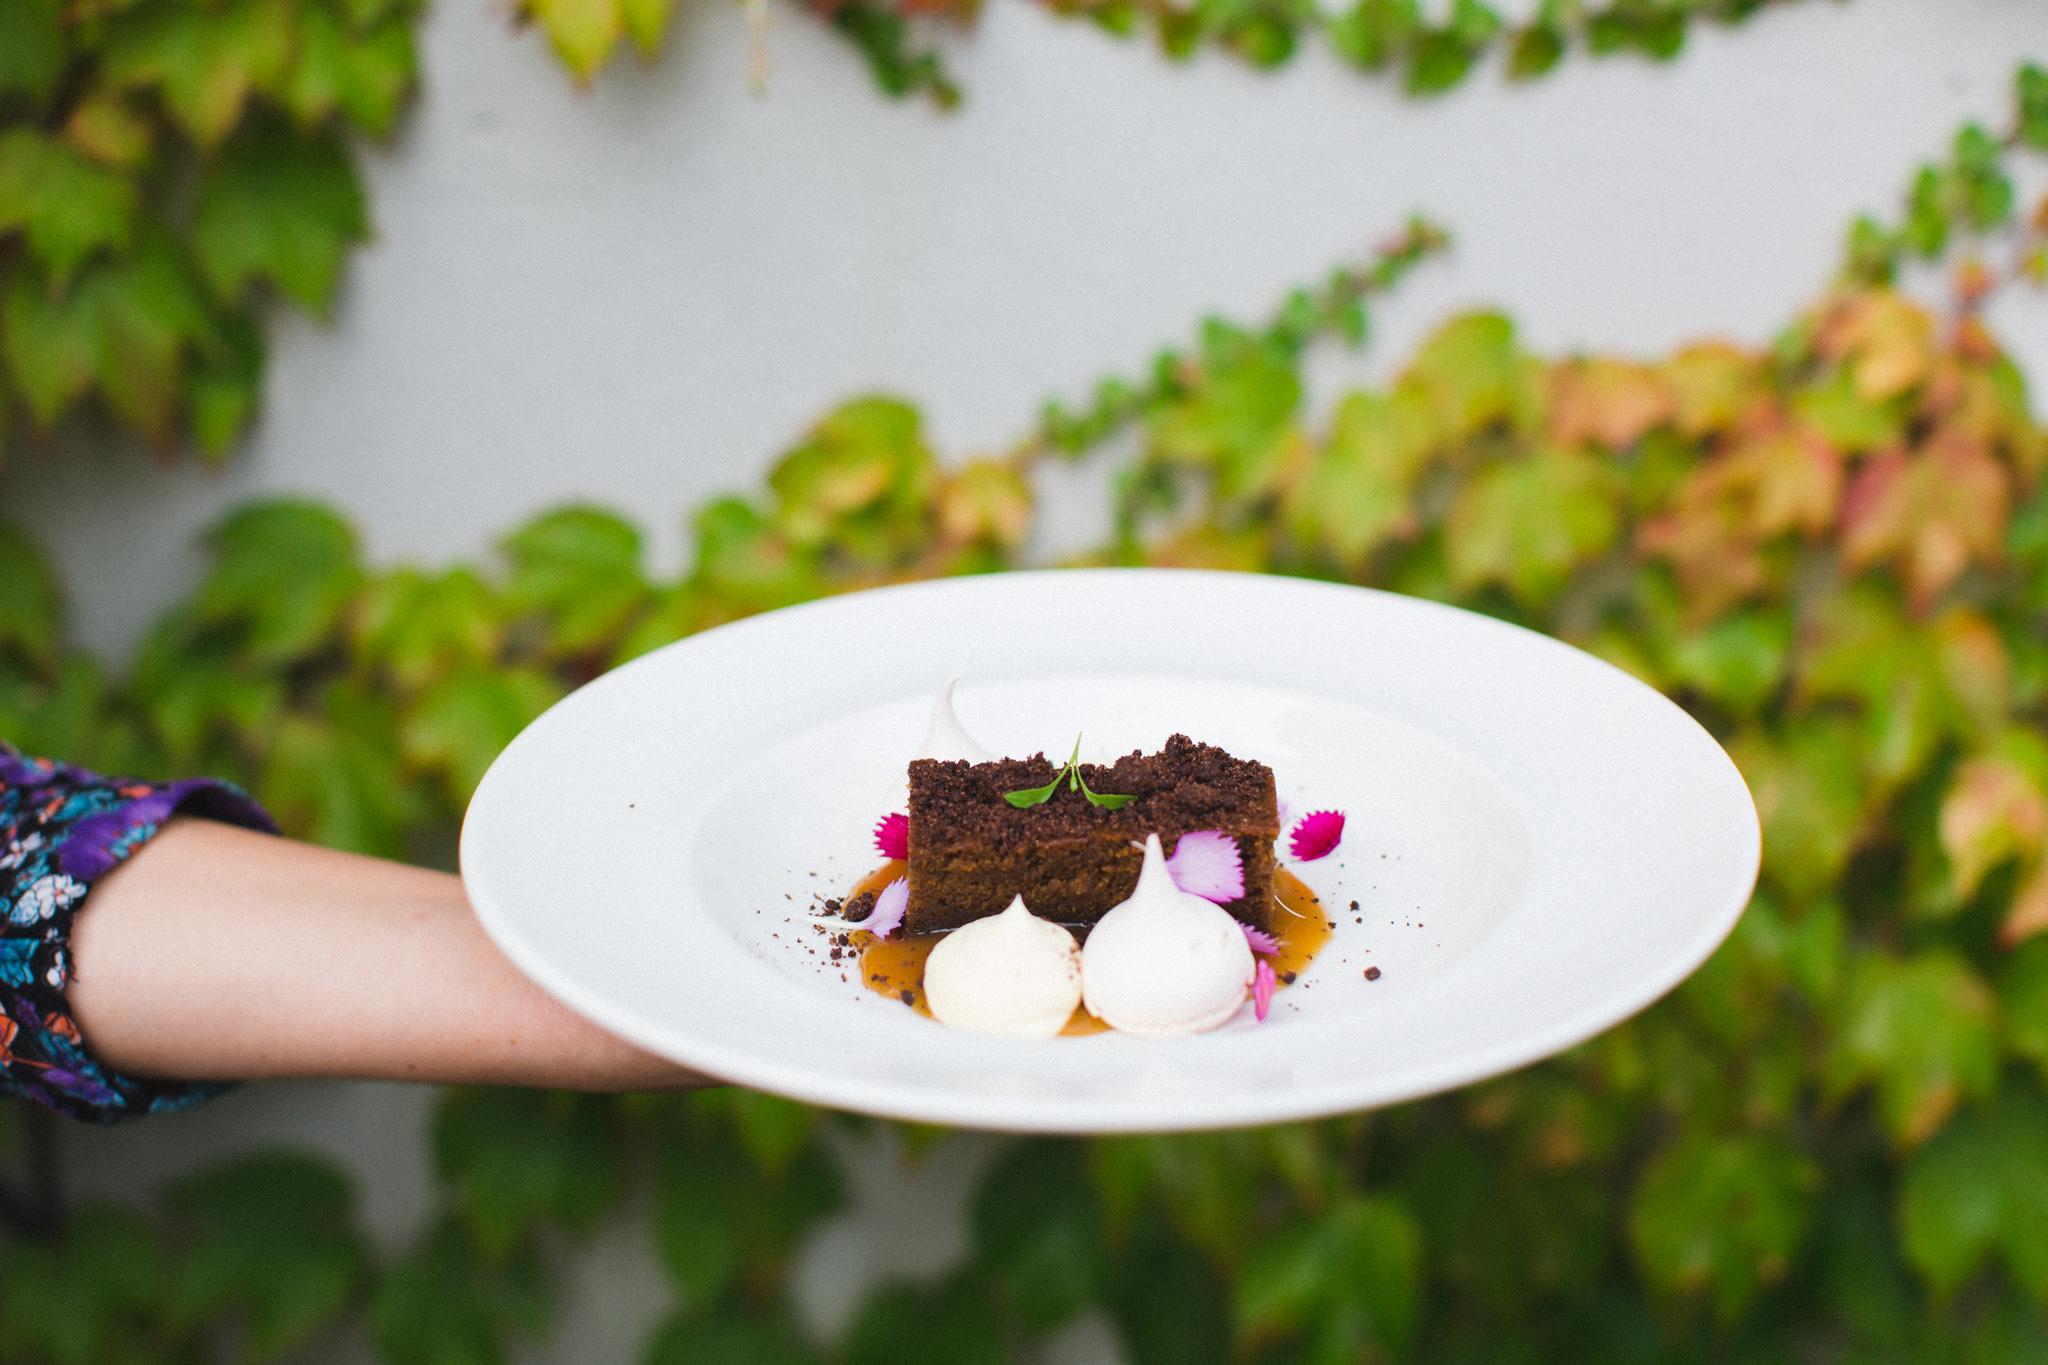
Ginger beer cake dessert with butterscotch sauce and beetroot meringues by Danielle Cubis of 'Spongedrop'. Yes - I did say beetroot meringue! The recipe for these is featured on NZ Design Blog.
'jerusalem' style butternut dip
Makes 2 bowls of dip
- 1 large butternut squash (approx 1 kg when cut )
- 2 Tbsp olive oil (for roasting)
- 1 Tbsp cinnamon
- 2 pinches of salt
- 2 garlic cloves crushed
- 3 Tbsp maple syrup (plus extra for garnish)
- 1/2 cup cashew soaked for 2 hours
- 3/4 cup water
- 4 Tbsp tahini
- juice of half a lemon
- 2 Tbsp olive oil
- 1/2 large shallot, chopped
- 1/2 tsp himalaya mountain or sea salt
- cracked pepper
- coriander, maple syrup and sesame seeds for garnish
how to:
- Soak cashew nuts in filtered water for 2 hours.
- Chop butternut squash into cubes and drizzle over 2 Tbsp olive oil. Sprinkle over 1 Tbsp cinnamon and 2 generous pinches of mountain or sea salt.
- Roast at 180 degrees celsius in the oven, for approximately 1/2 an hour or until soft.
- Rinse cashew nuts and blend in a high speed blender with the 3/4 cup of water, until smooth.
- Mix roasted pumpkin, cashew blend, and remaining ingredients in a food processor.
- Place dip in bowls and garnish with drizzled maple syrup, coriander and sesame seeds.

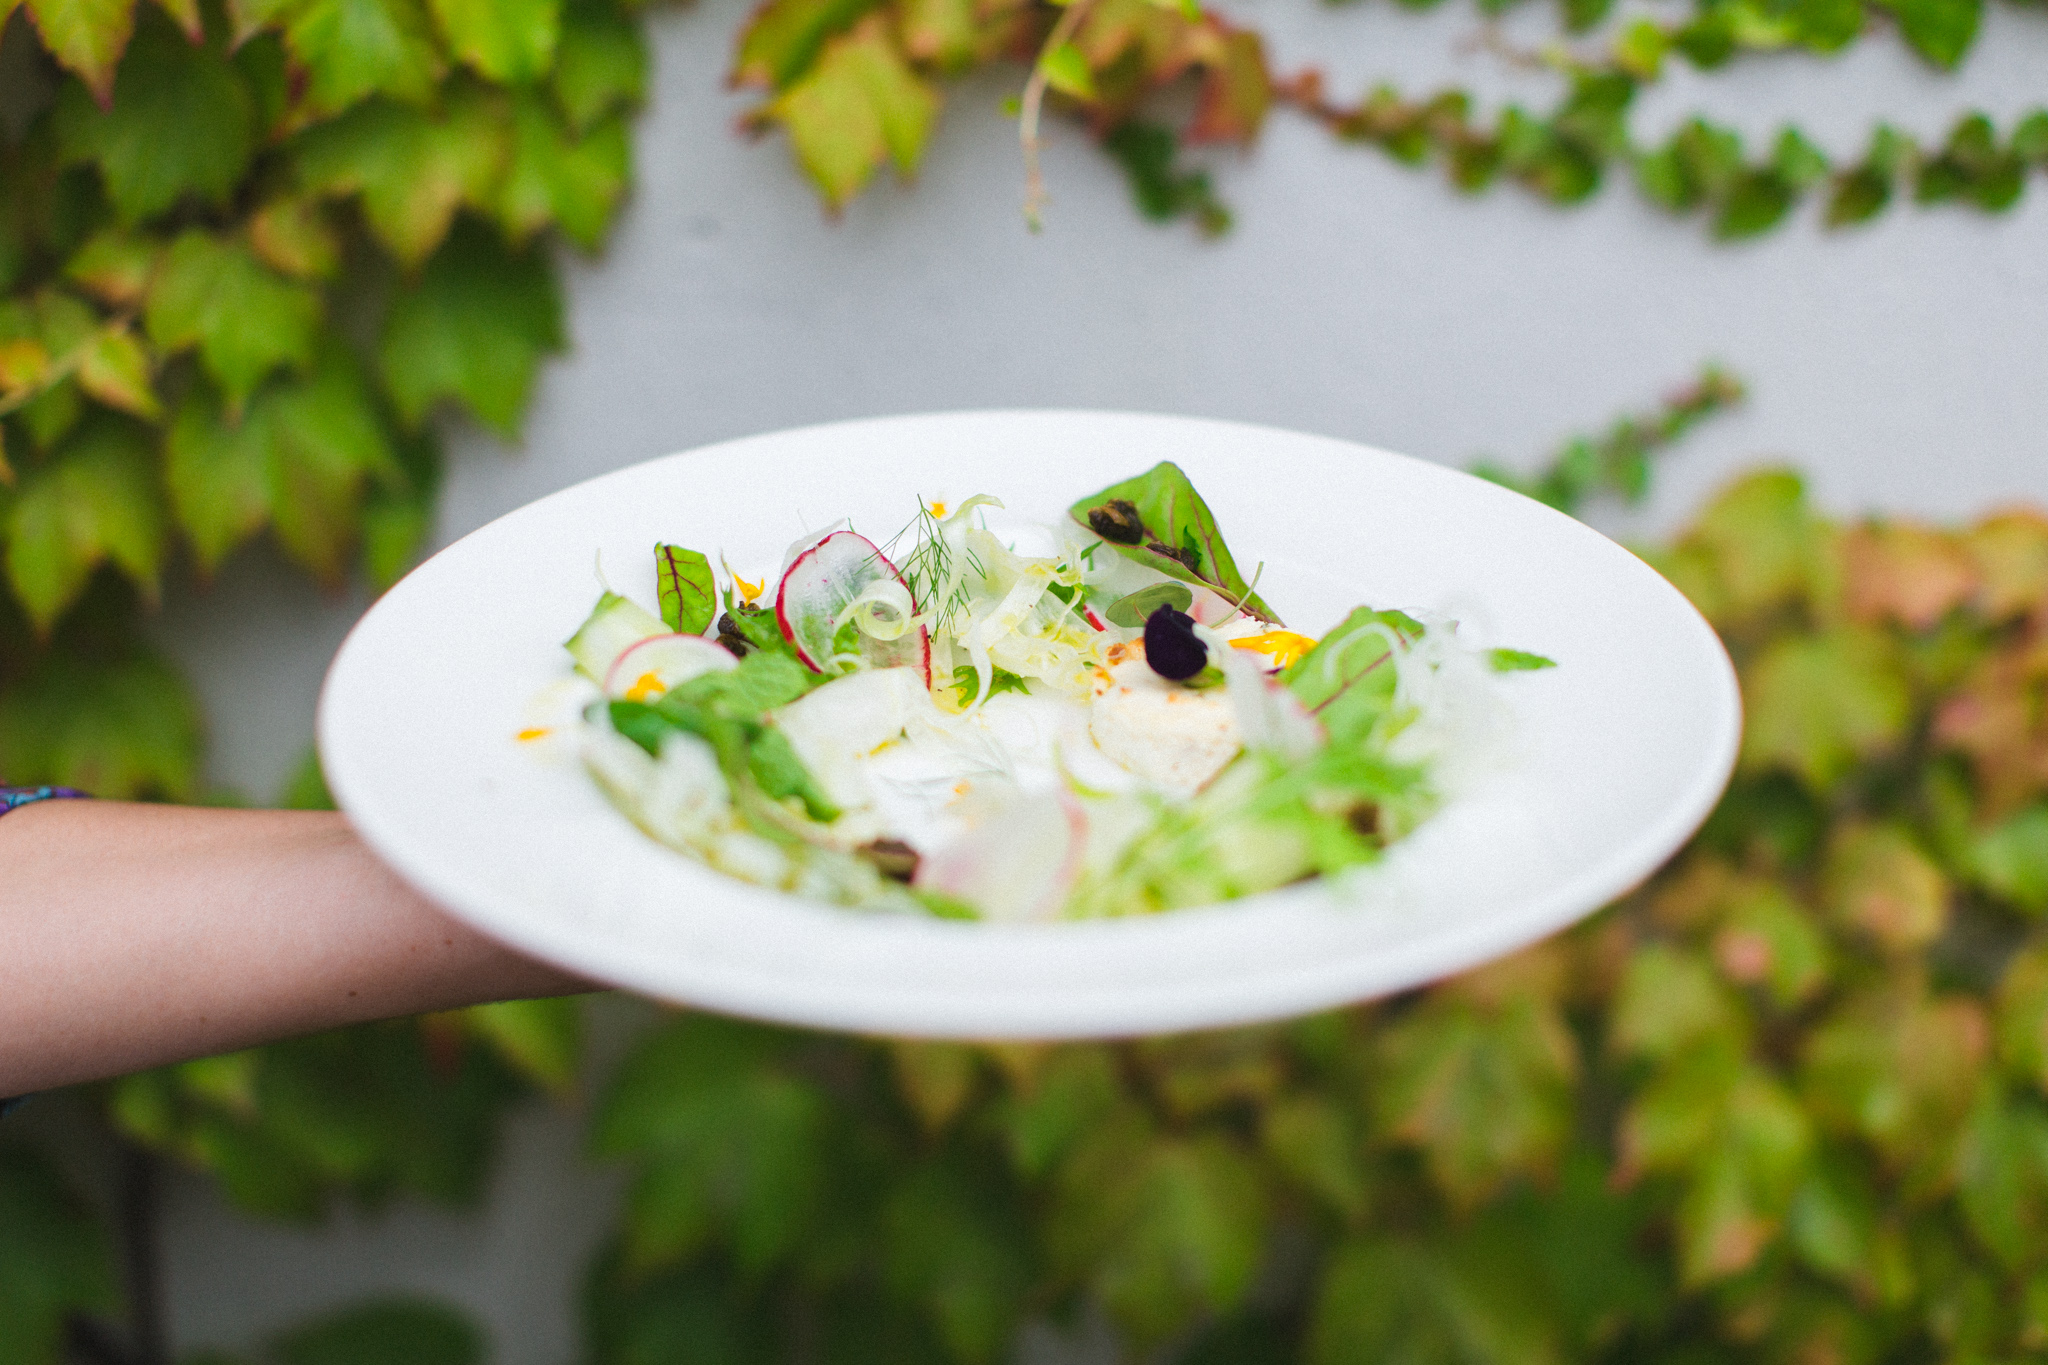
kinfolk, fennel & radish
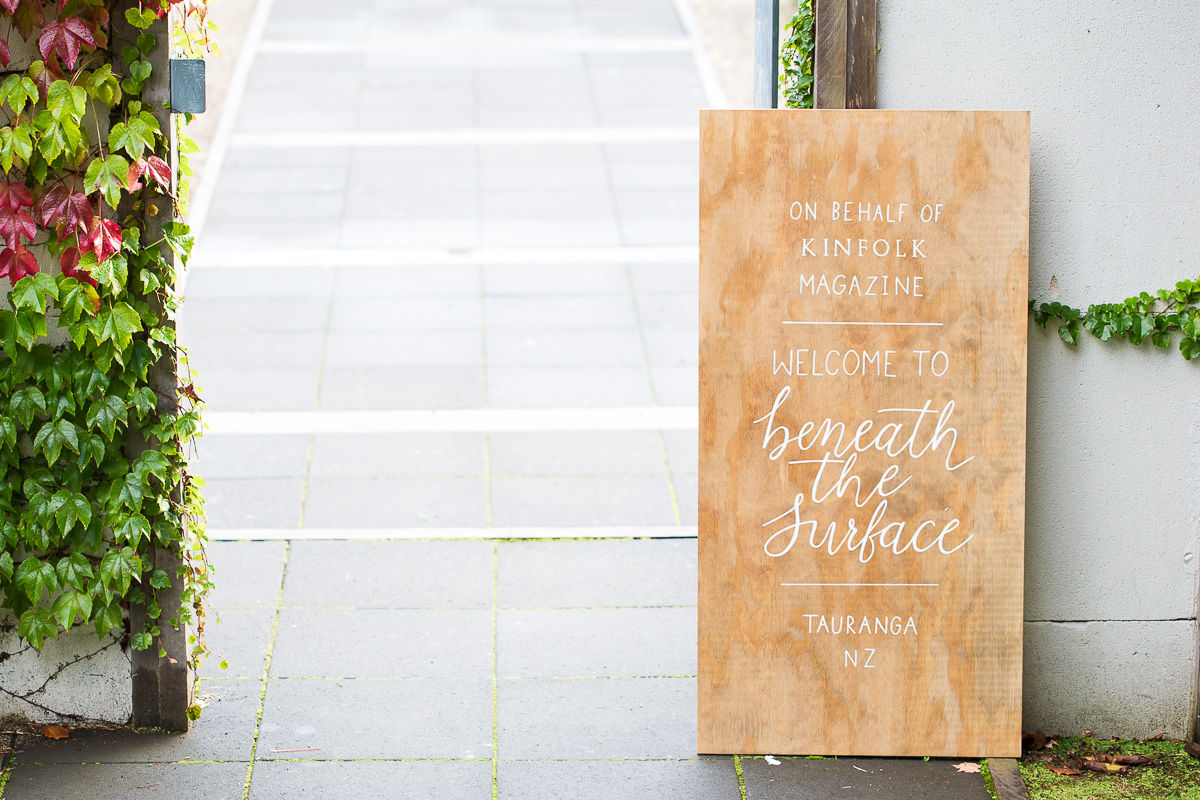
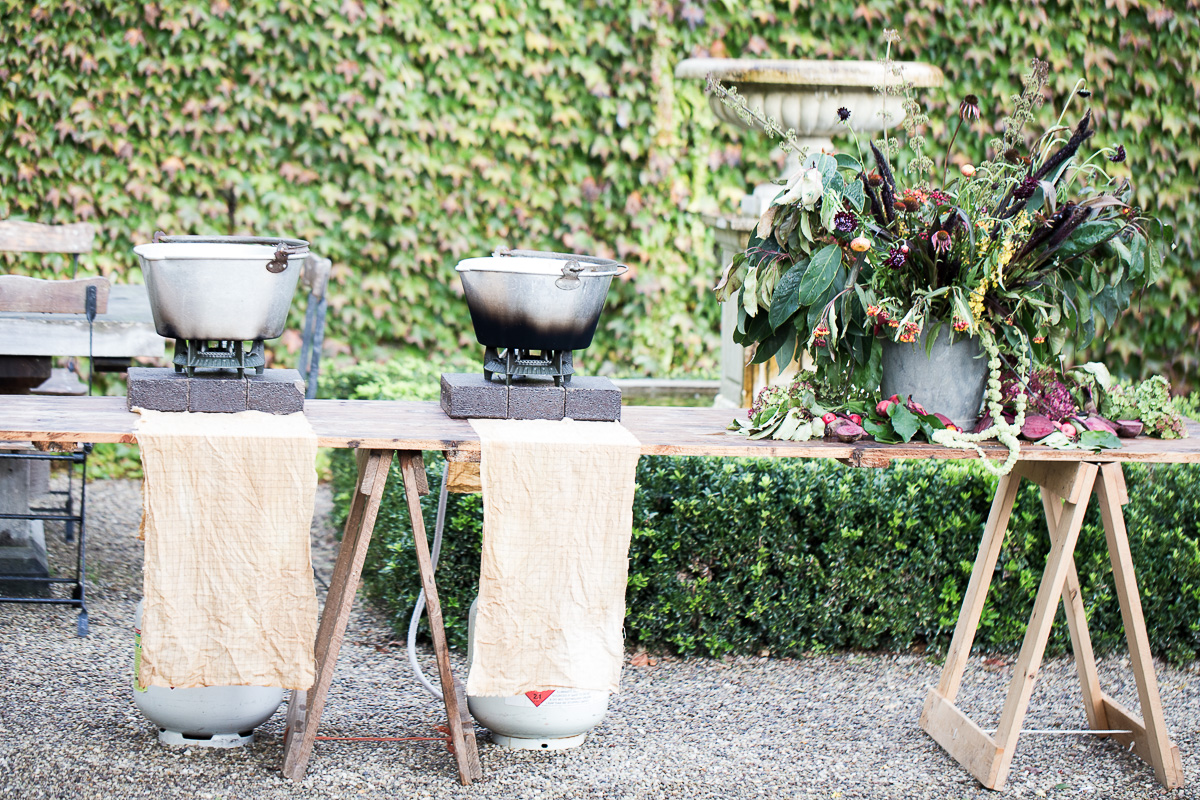
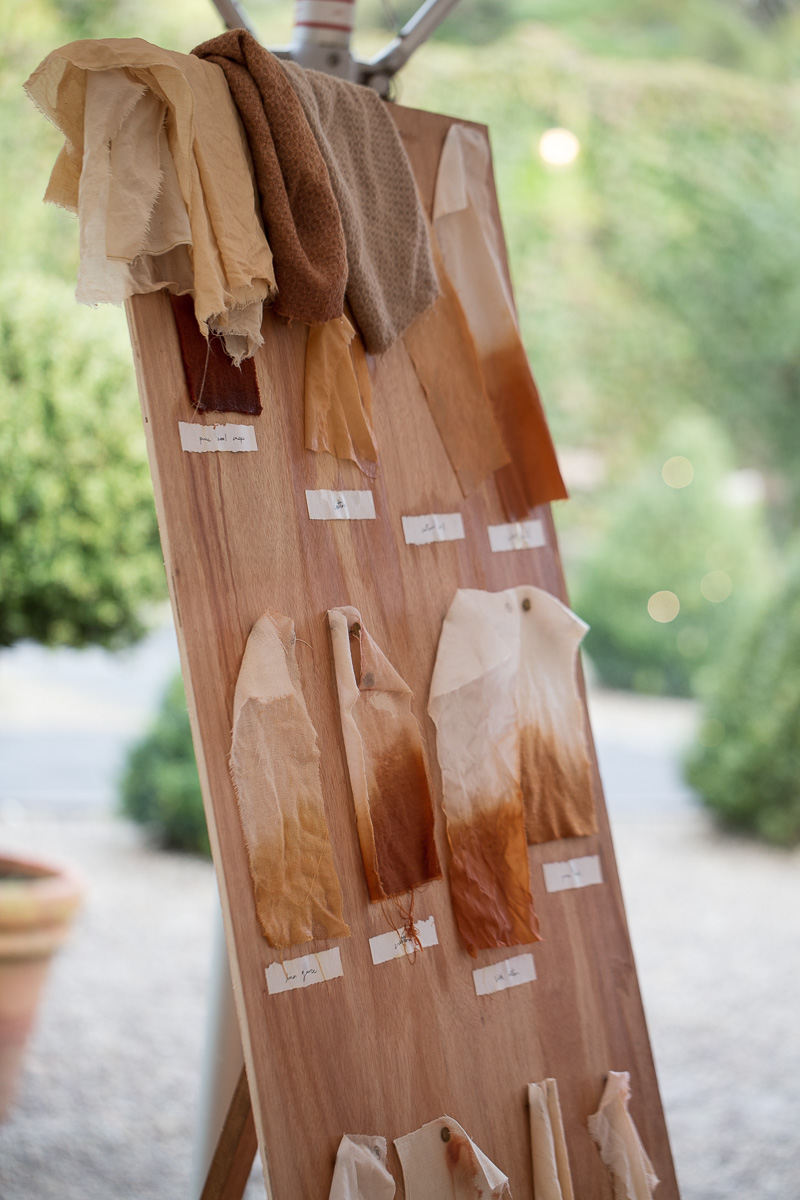
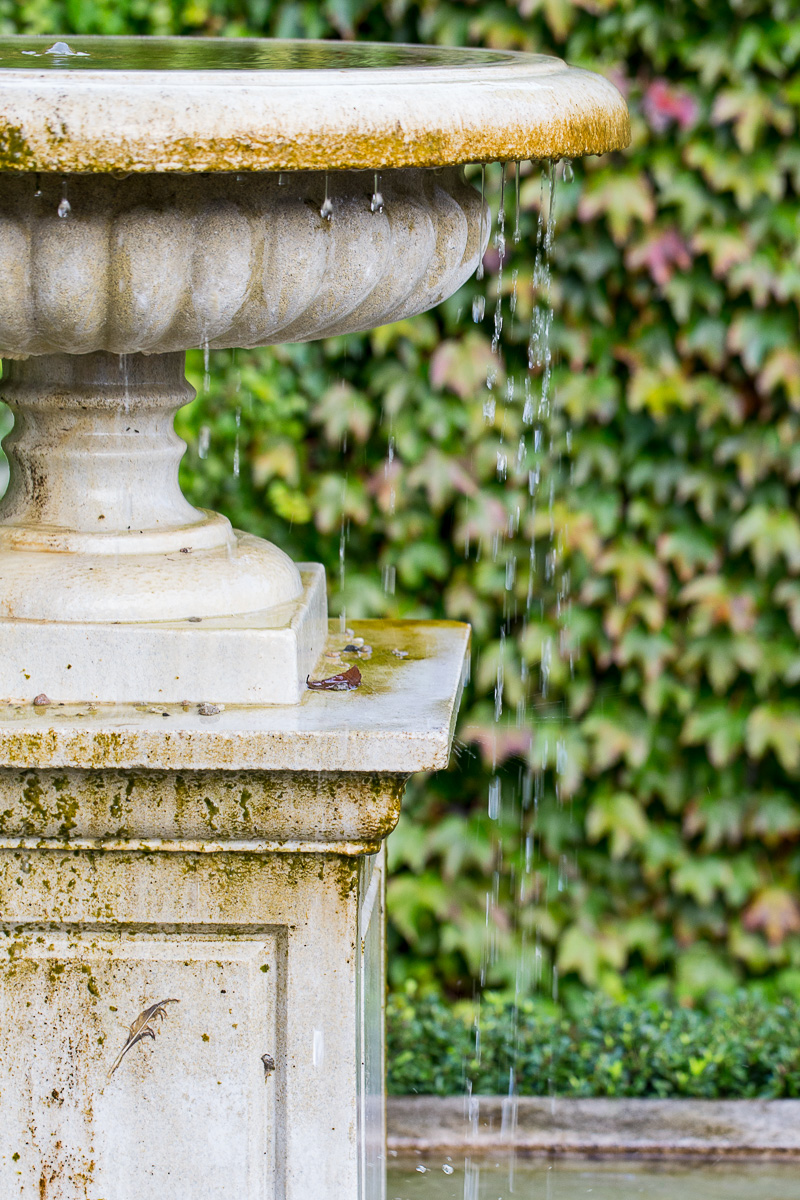
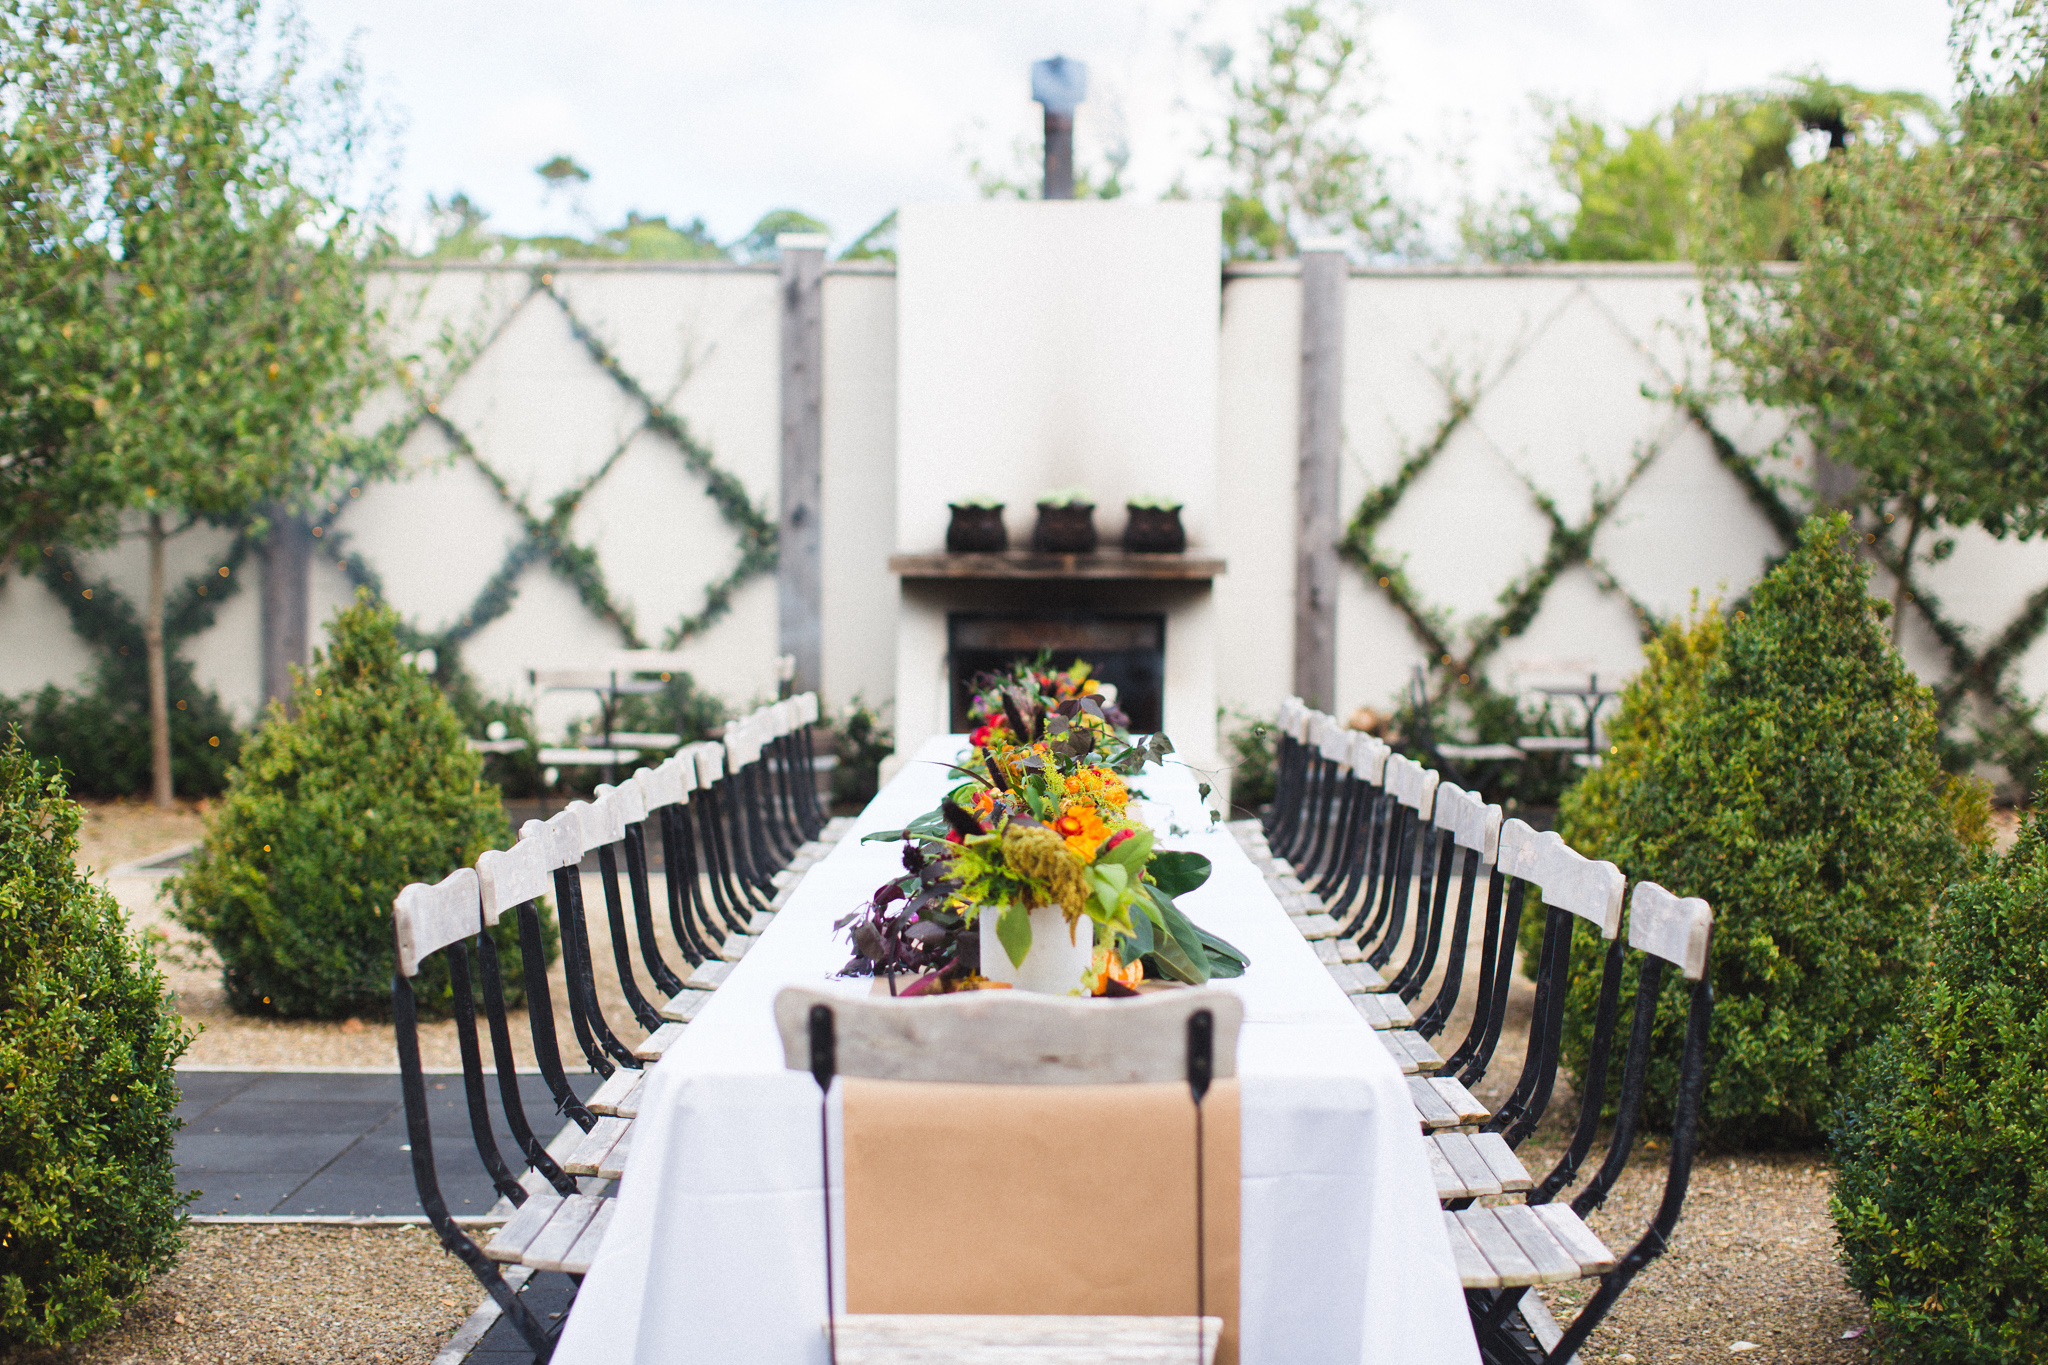
A celebration of all things "Beneath the surface". Here is some beautiful imagery (provided by talented Steph and Robin of Bubblerock, plus a few of my own), and a recipe from the Tauranga Kinfolk gathering at Ataahua Garden Venue a few Sundays ago. The gathering came together as a collaboration of talented creatives headed by the beautiful Shaye of 'On my hand' (also responsible for the stunning table styling). I styled four of the five course menu put together by Nadine of Devour Catering, while Dannielle of Spongedrop provided the lavish gingerbeer dessert. Blackbird Gem put on a fabric dying workshop using onion skins between courses. Oh what a day it was!


I'm so incredibly grateful to have been a part of all that you see in these stunning photos. Kinfolk came about when times were low, and I am honest in saying that it was in part my saving grace. A week before the event I suffered a misscarriage. Following this I spent the ensuing days sat on our living room floor with a plate from Houston Design co, planning how to style the radish salad and dandelion root main. Taking the time for myself to create something beautiful with ingredients I love, couldn't have been a better comfort to take my mind away from the circumstances.

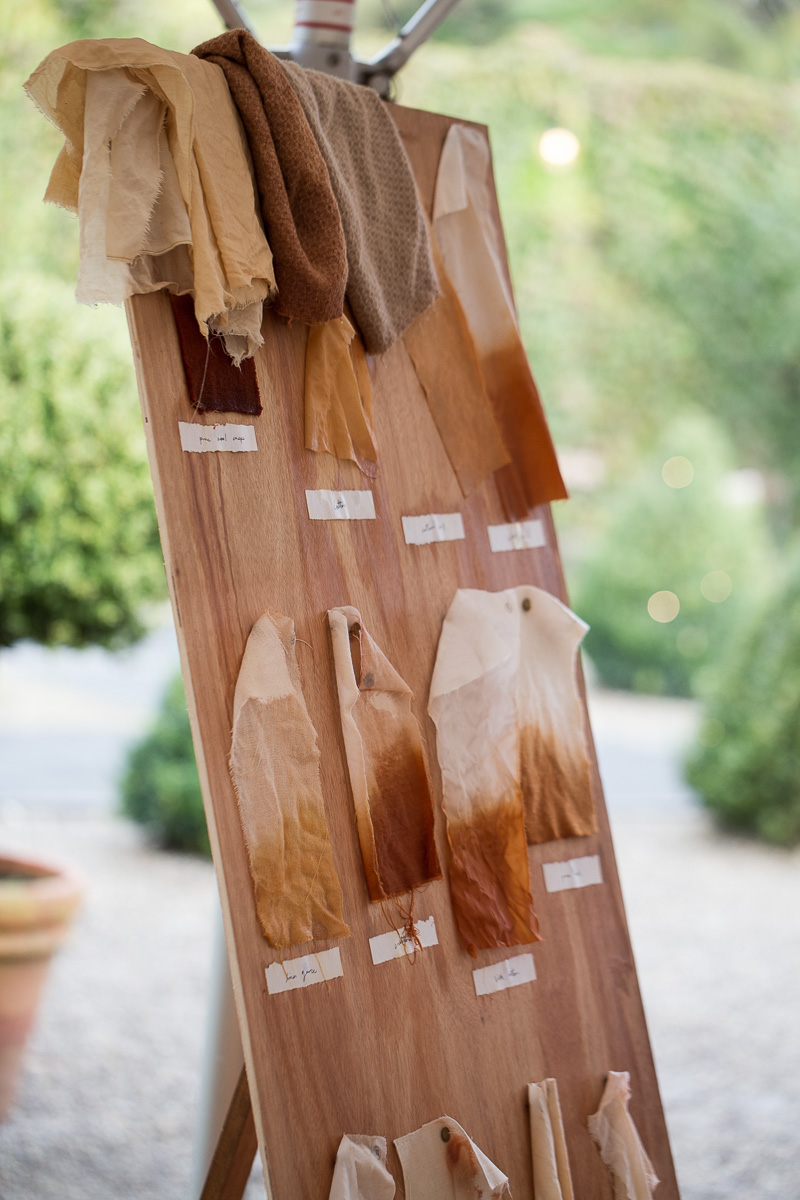


Working together with the ladies I've mentioned above, was also an experience I will cherish. There is nothing quite like the power of a combination of passions coming together to create something special. I'm still starting out in my food adventure and so establishing new contacts, and making new friends.gave me a sense of belonging and confirmed that this is something I want to keep doing . Yay!

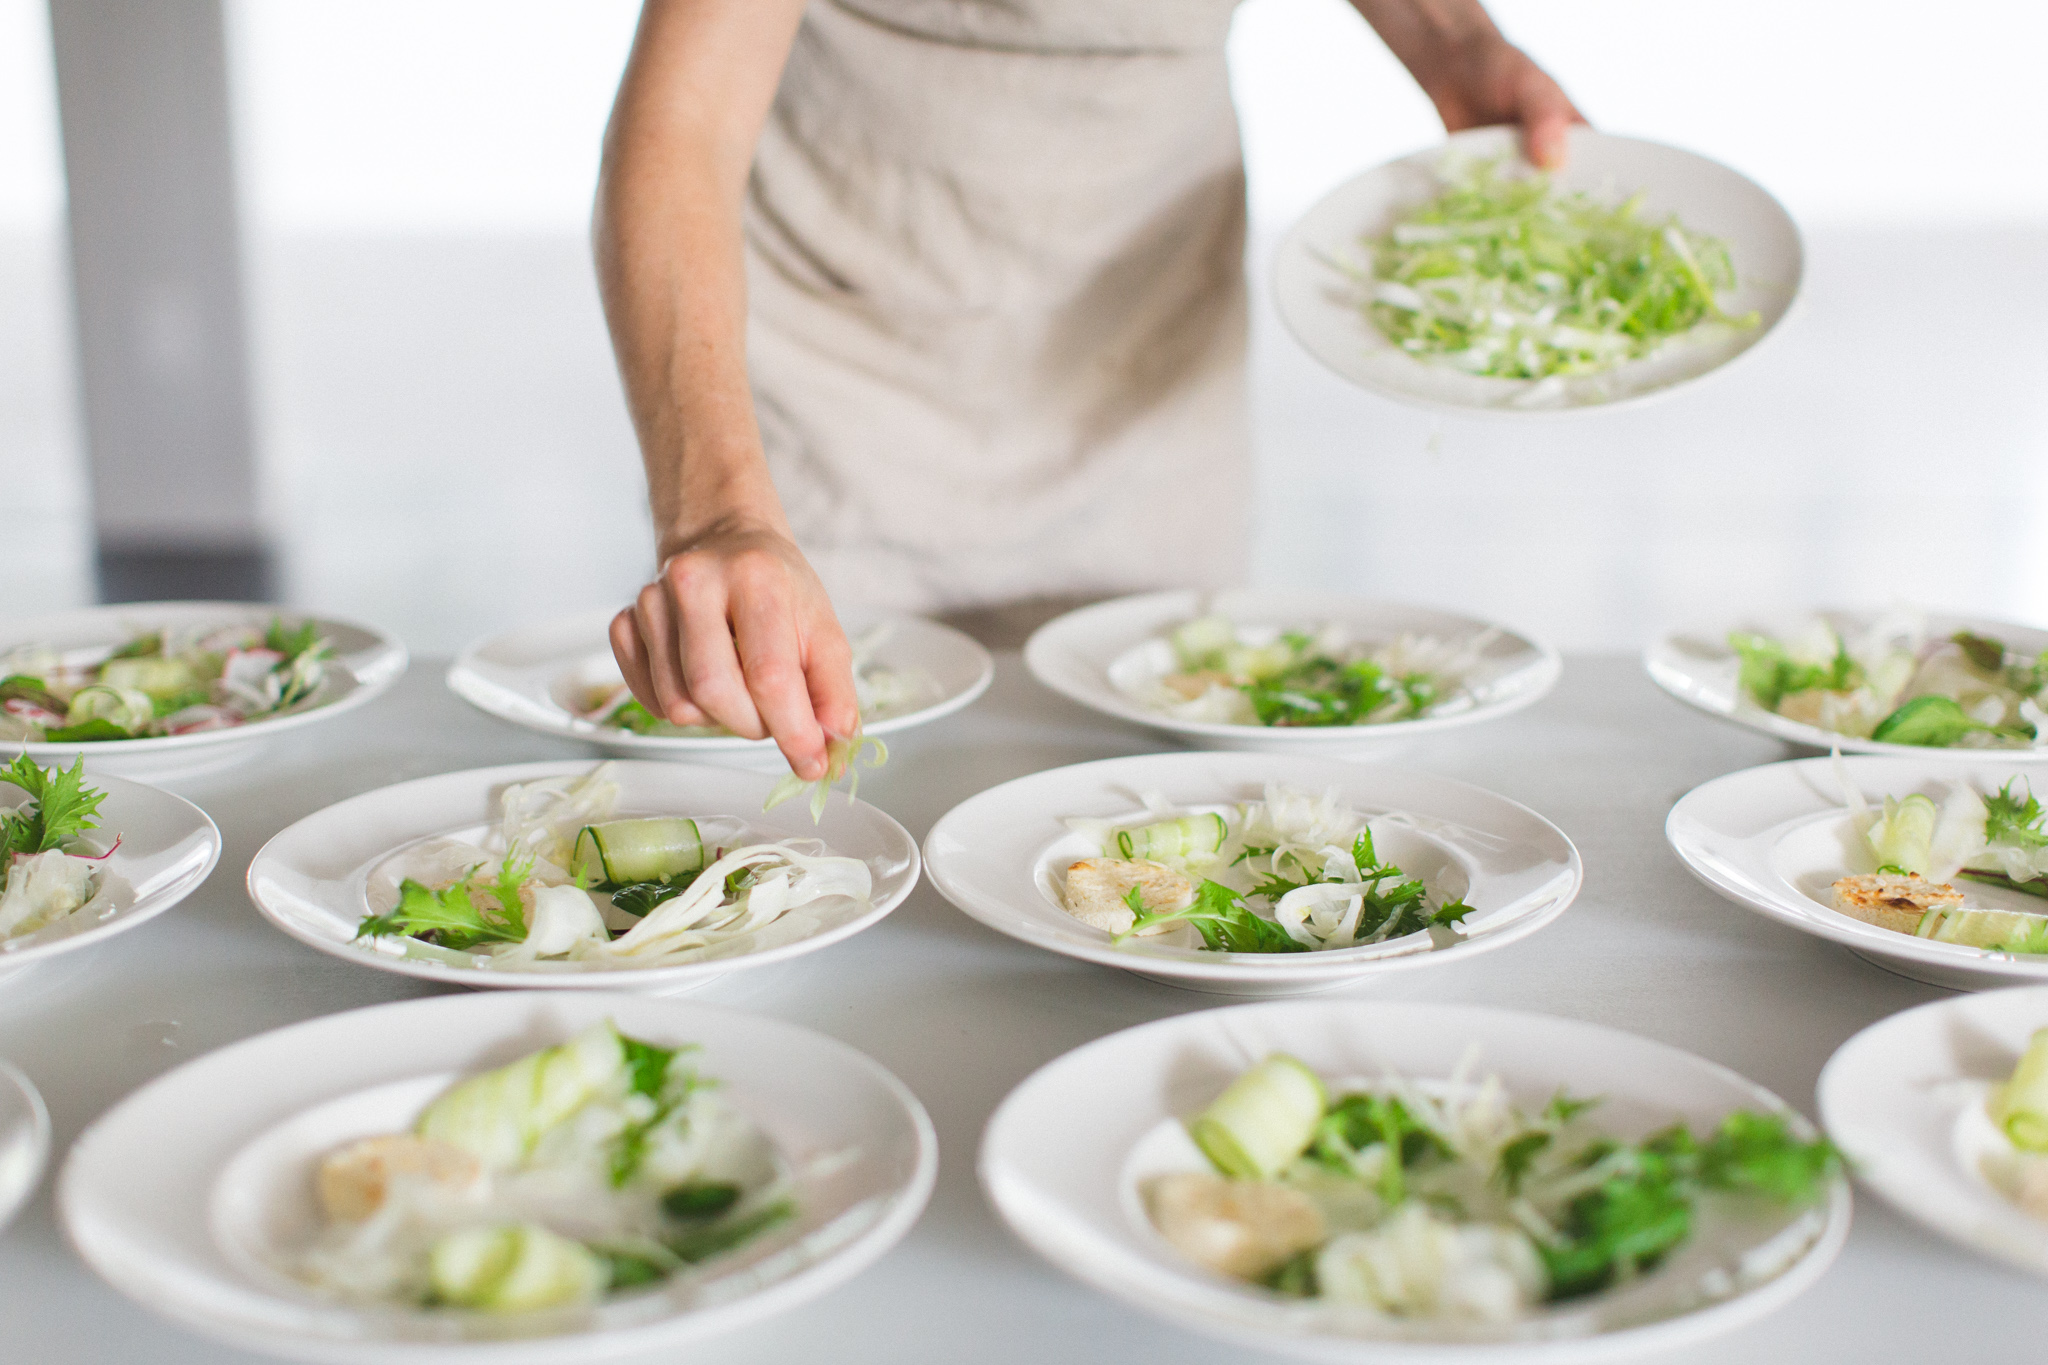
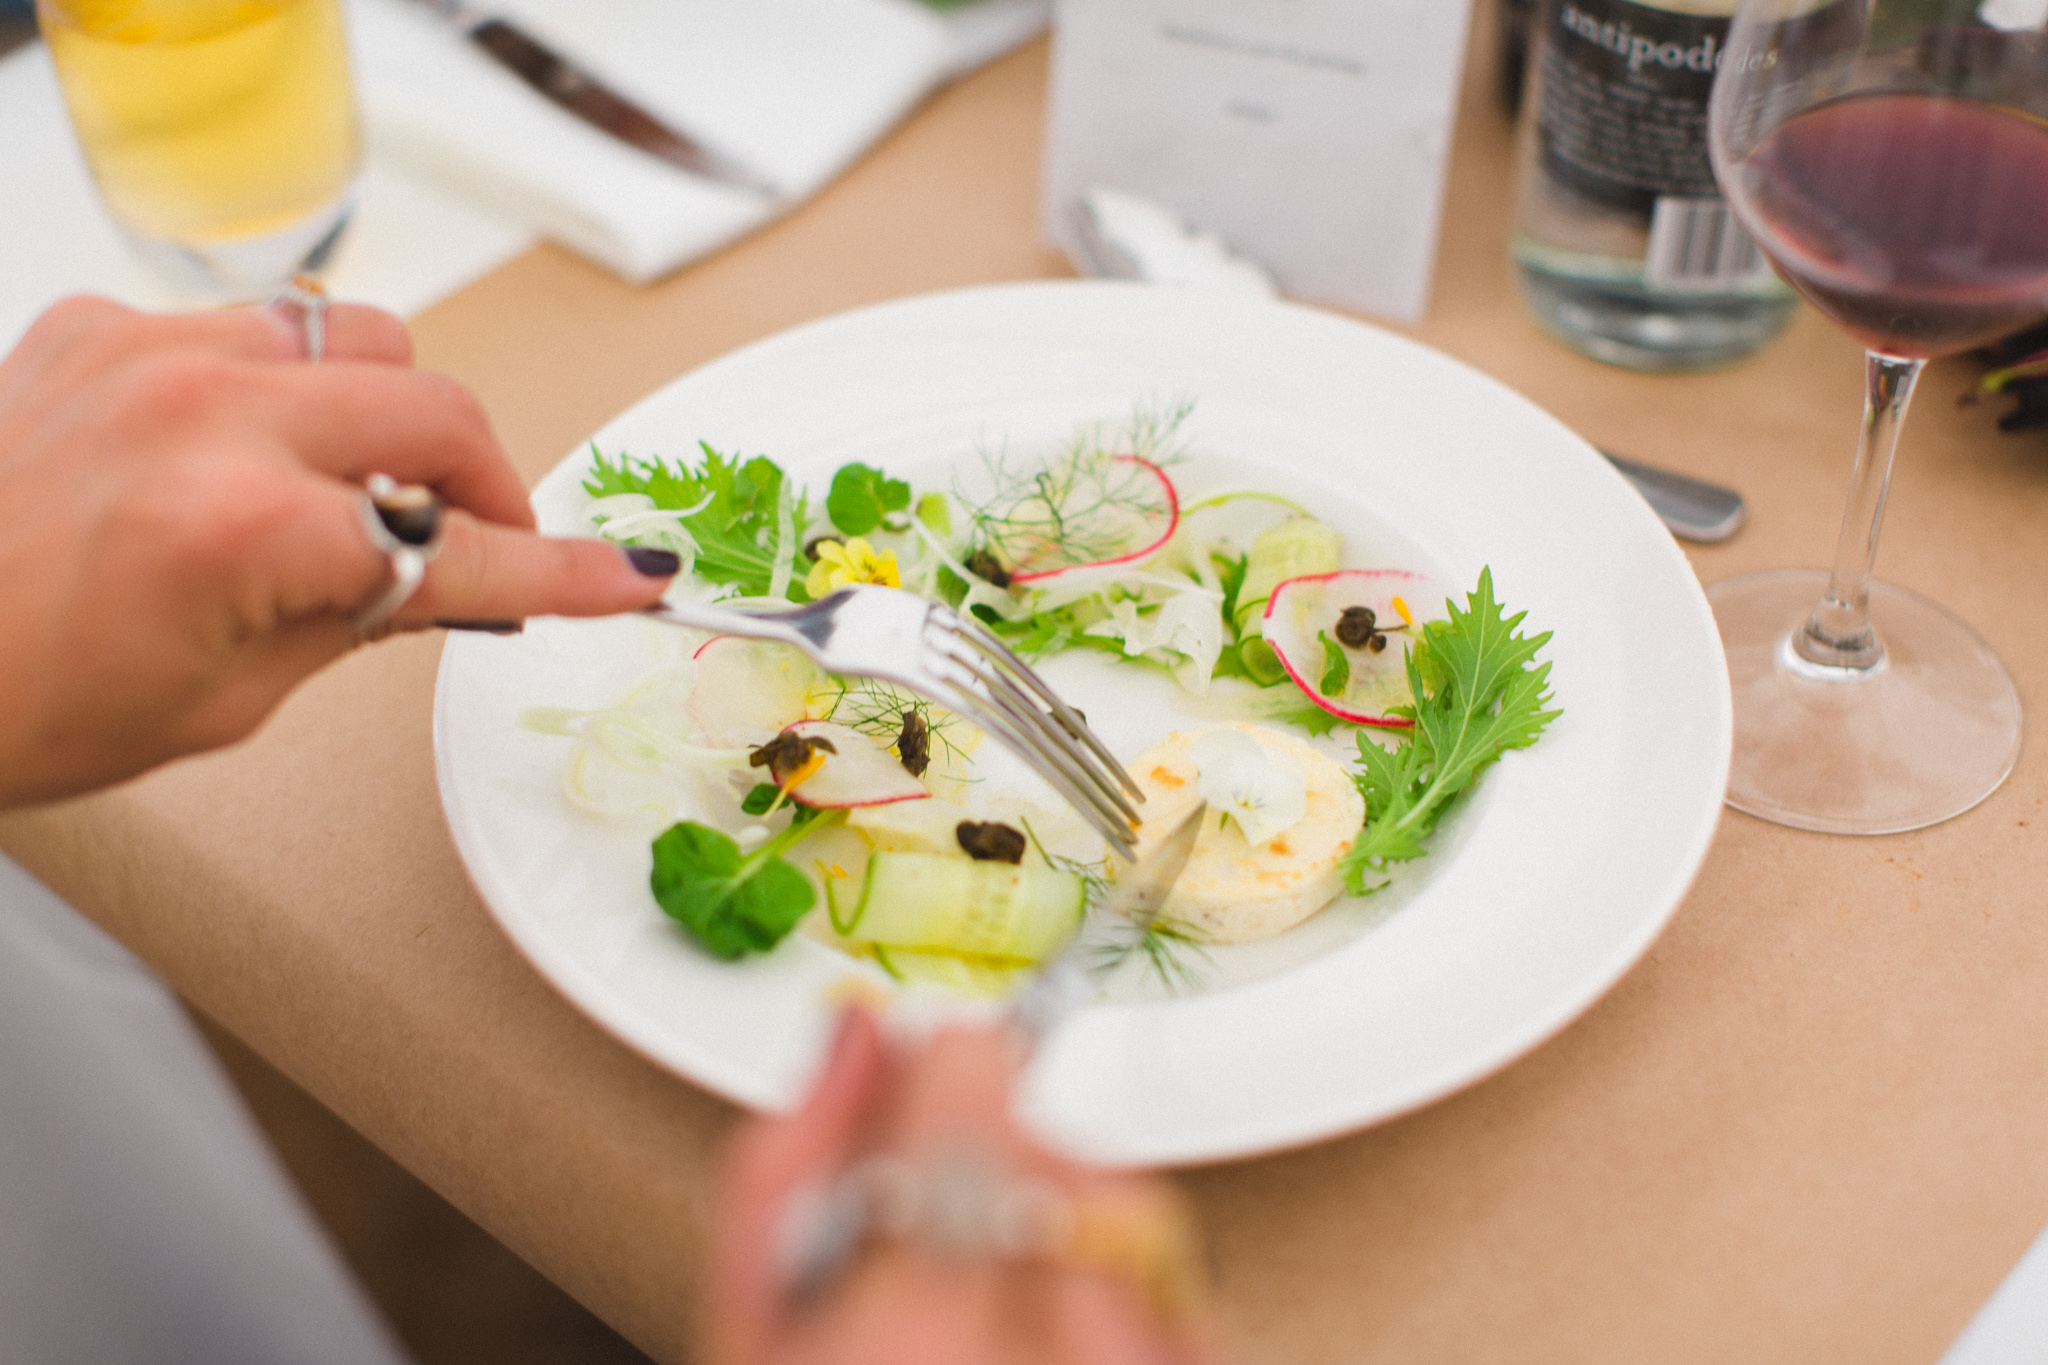
The salad I am compiling here and sharing with you is called 'radish'. It was the third course and chef Nadine's intention was for a light, refreshing palate cleanser between the main event 'dandelion root' and the scallop and kombu broth (pictured above). She captured this well with the cooling flovours of the radish, fennel and cucumber, married withthe zingy citrus dressing
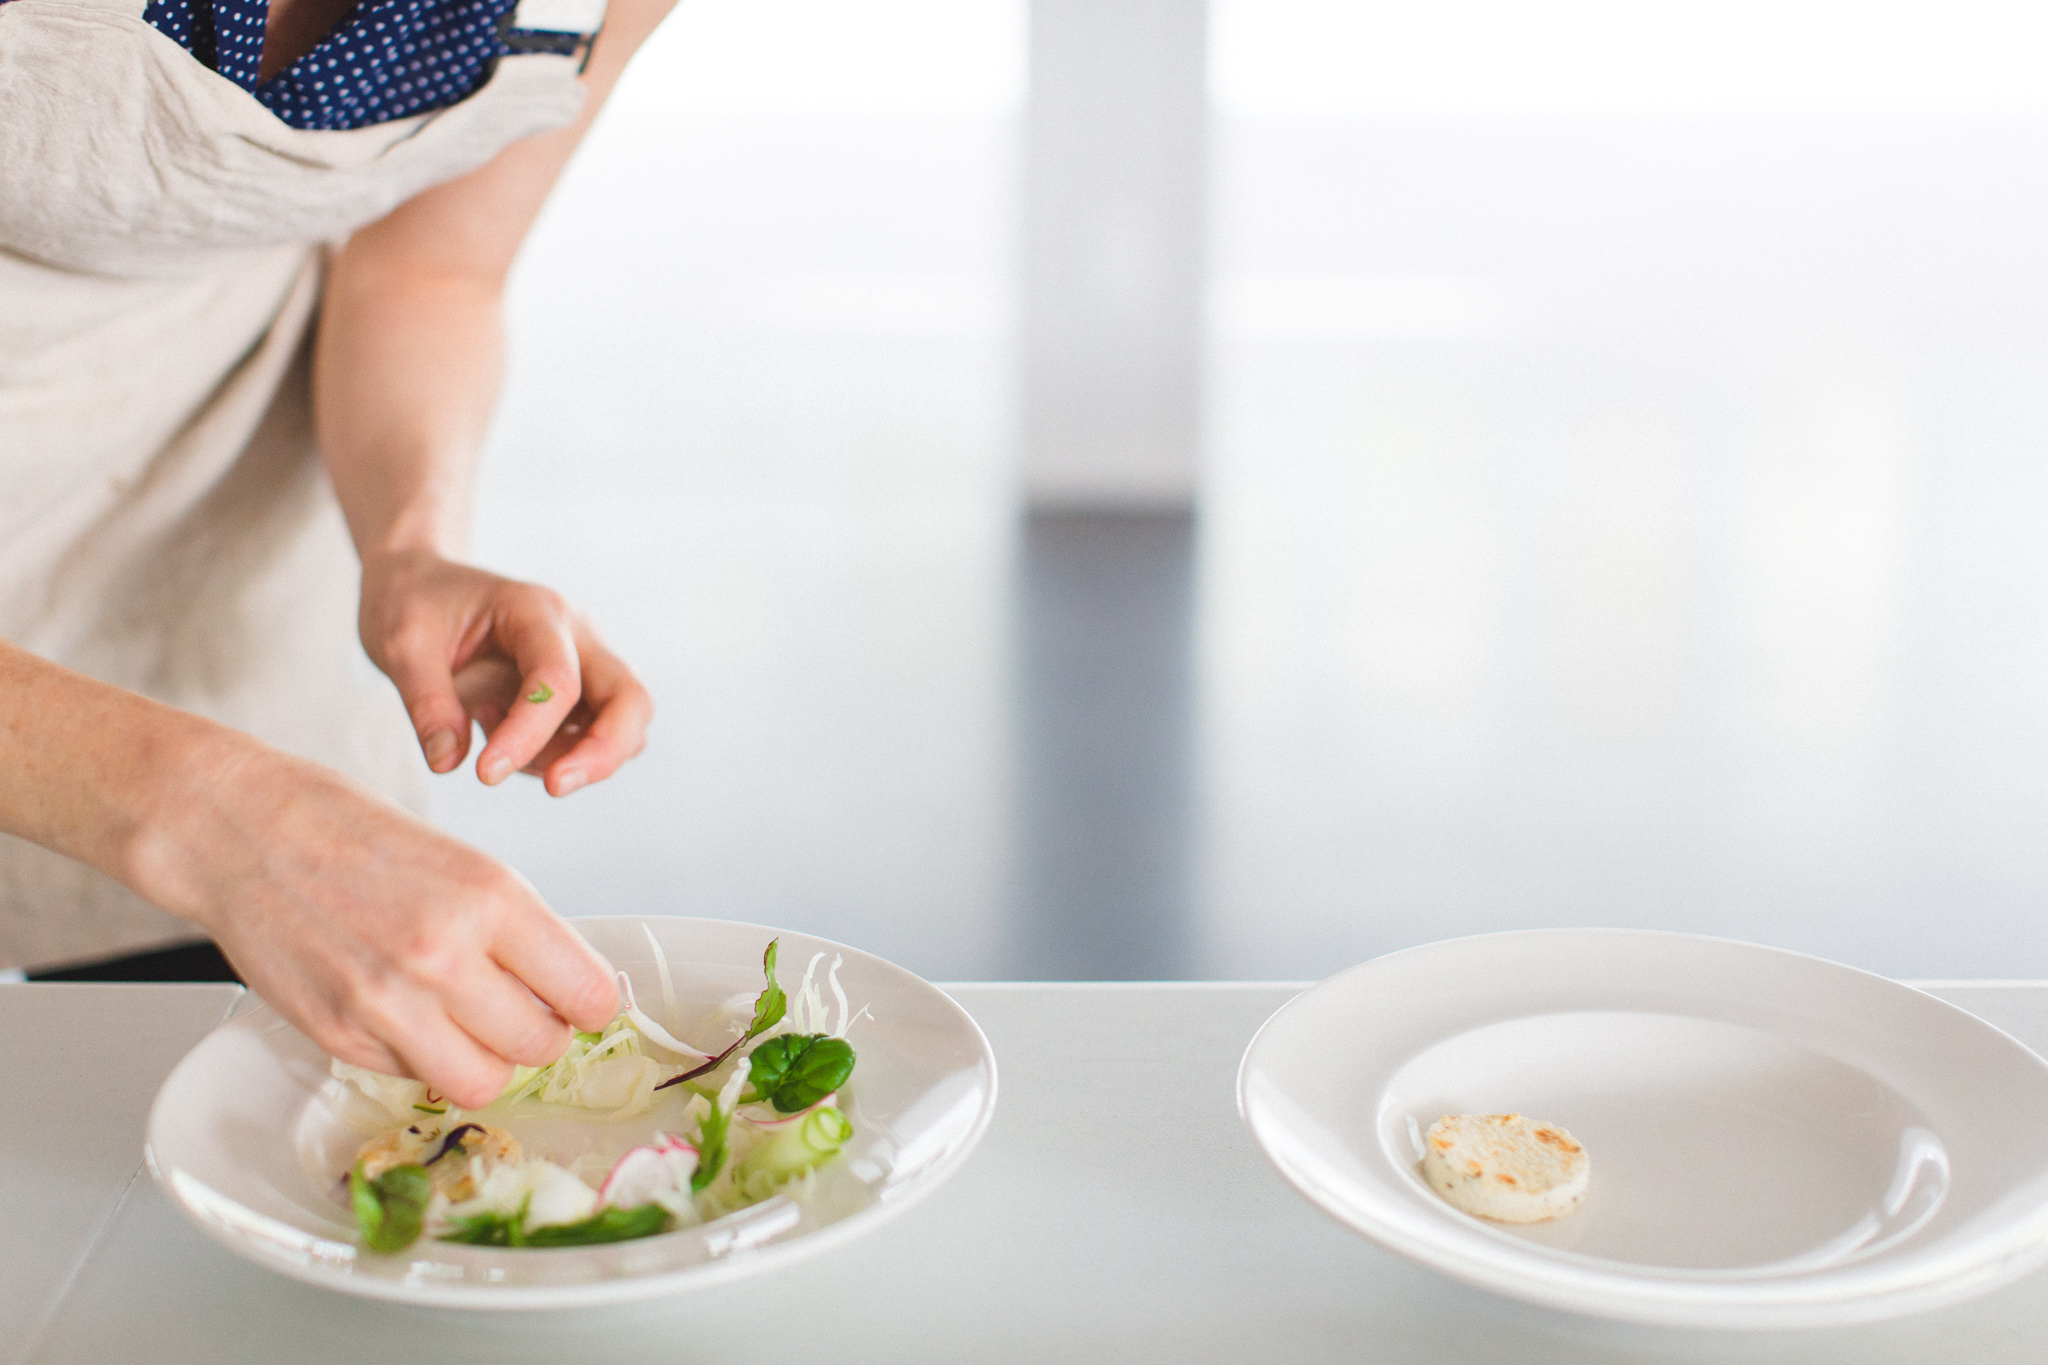
The secret to making the salad look stunning is to mandolin the fennel and radishes thinly lengthways, and to place them in iced water prior to plating. This gives them the beautiful curl which you hopefully can see in the pictures. The same applies to the spring onion which I cut thinly cut on the bias (i.e. on an angle).
The other secret is vibrant leafy greens which make the salad ping in front of your eyes. I used an organic mesculin mix, handpicking mizuna and beet leaves for their pretty colours and shape.
I've made a few further adjustments to the recipe, compared with what is pictured. To make the dish dairy-free, I replaced the baked ricotta with avocado. I've also replaced fried capers, with dried cranberries for a burst of sweetness, and added activated pine nuts for a nutty crunch.

In my next post I plan to share more Kinfolk scenes, plus a vegan take on one of the delicious "Ottolenghi" style dips we served as a starter. Until then, have a lovely week and feel free to bombard me with any questions or to just say hi! =)


fennel & radish salad
serves 1
- 1/2 fennel bulb sliced thinly on a mandolin length ways
- 1 radish thinly sliced lengthways (about 2 mm thick)
- 1/4 -1/2 spring onion cut thinly on the bias
- 1/2 avocado
- a handful of pretty leafy greens for e.g. a mesculin mix with beet leaves, mizuna, baby spinach etc
- 10cm length of cucumber sliced on mandolin (approx 2 mm thick)*
- small handful of dried cranberries**
- 2 tsp activated pine nuts ***
- small handful of radish sprouts (optional)
how to
Mandolin fennel and radish lengthways and place in iced water for 10 mins or until the vegetables start to curl. Cut spring onion thinly on the bias and place in iced water with the fennel and radish. Mandolin cucumber and roll into curls as shown in the photos above. Remove the half avocado carefully from it's skin and place on the inside edge of a shallow bowl. Compile the rest of the components of the salad around the inside edges of the bowl (so the salad and avocado has the aesthetic of a wreath shape). Drizzle with citrus dressing and garnish.
*2 - 4 rolls of cucumber will be sufficient, you may have a few pieces left over.
** choose organic dried cranberries and be sure to check that they are not the sort injected with a lot of sugar =)
*** 'activated' pine nuts means that I have soaked the nuts overnight, and then dehydrated them in a dehydrator. This step brings the nuts 'to life' and makes for easier digestion (yay!), but can be omitted if preferred.
citrus dressing
- 1 Tbsp lemon juice
- 1 Tbsp red wine vinegar
- 1/4 cup olive oil
- 1 tsp manuka honey
- 1 tsp chopped shallot
- pinch of himalaya mountain salt or sea salt
garnish
edible flowers, fennel fronds, small mint leaves
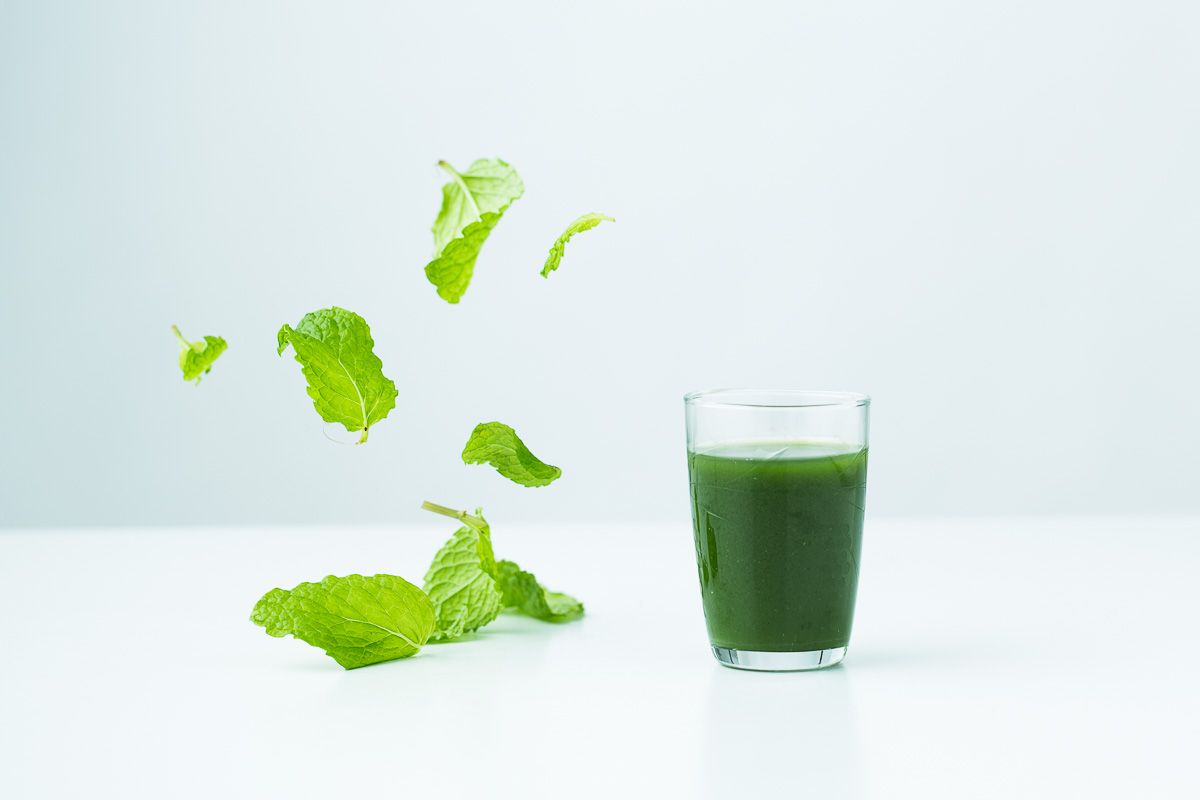
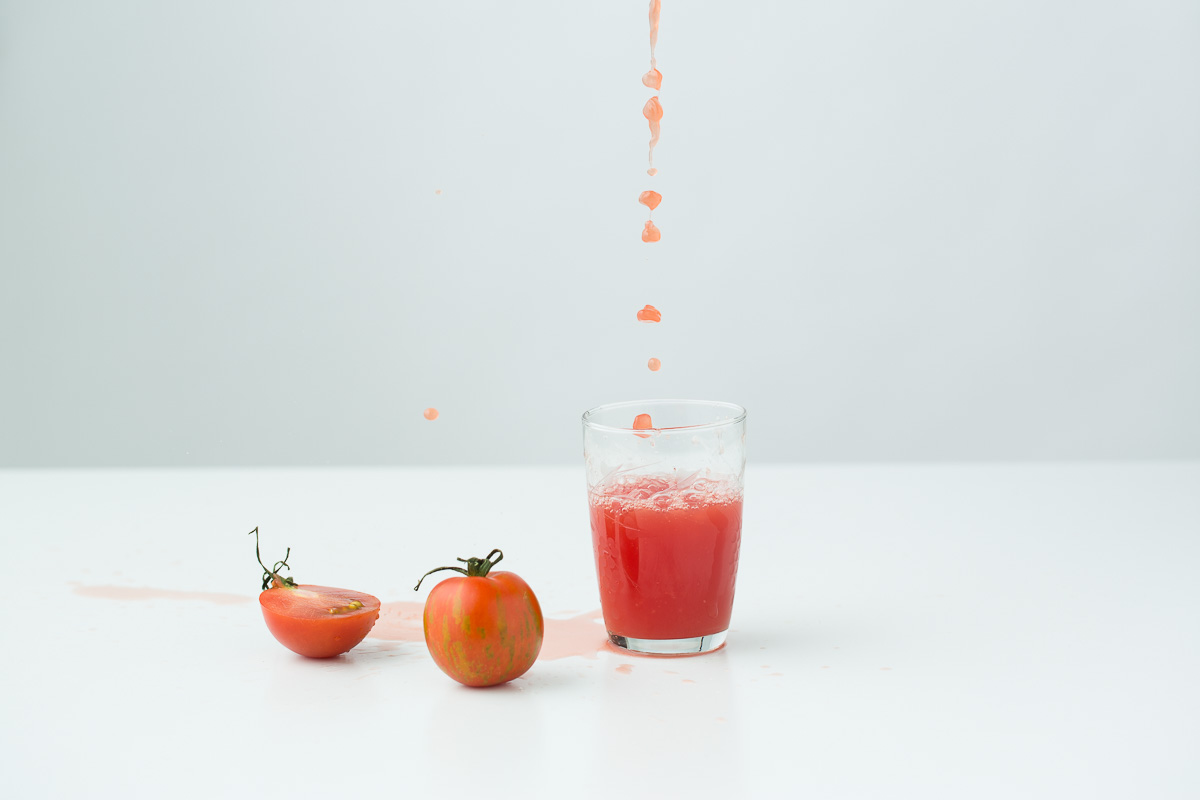
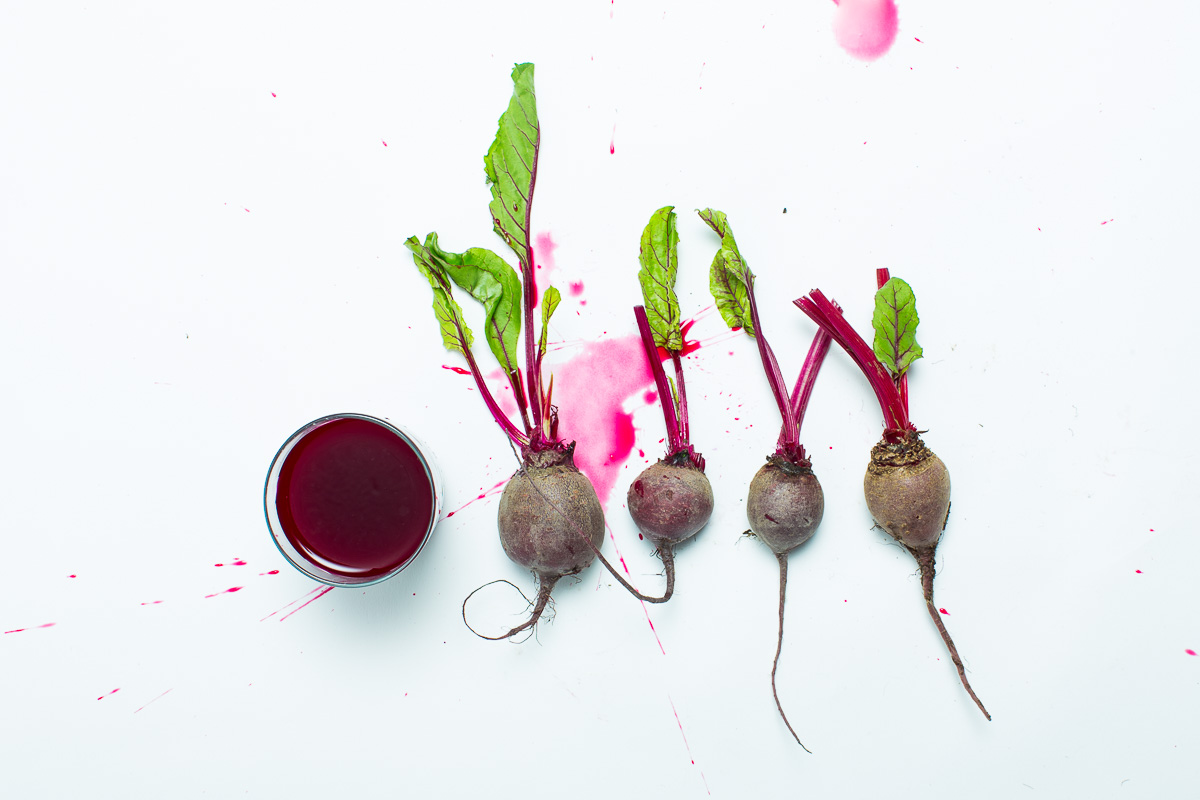
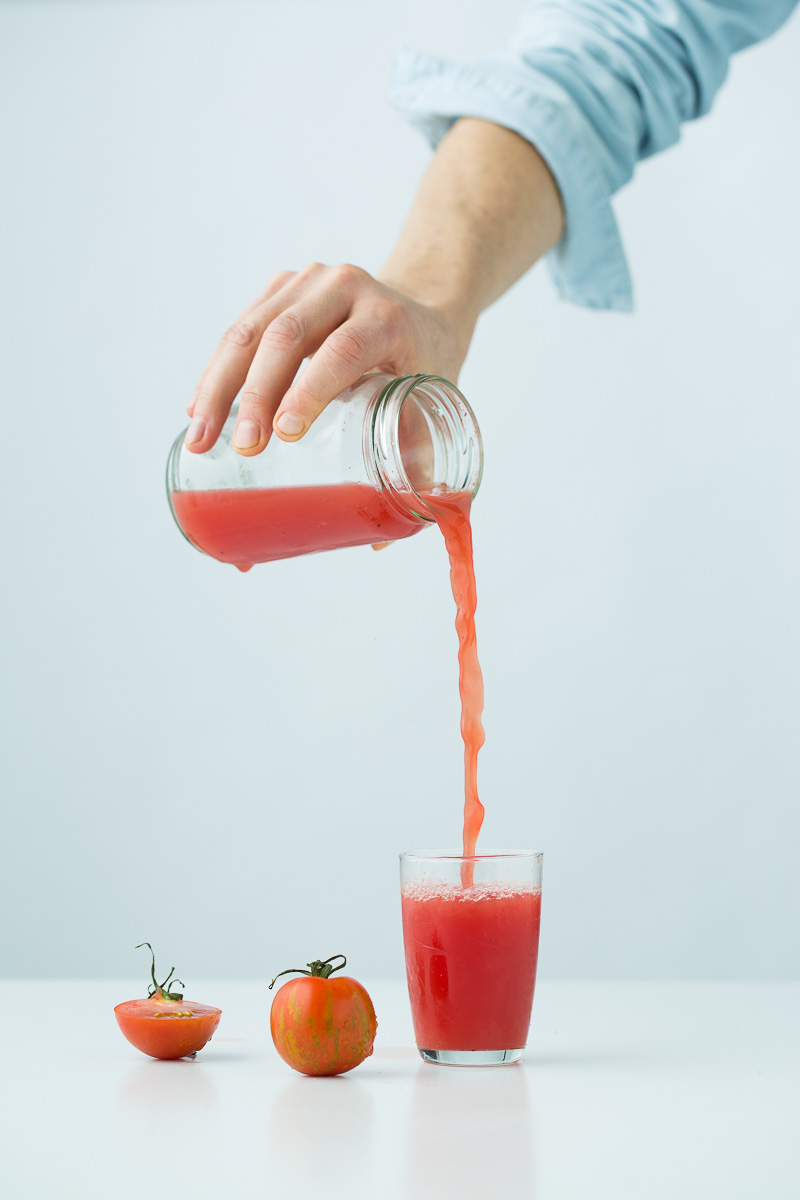
4 juices

I love juice. Cold-pressed juices predominately made with vegetables, something citrus and sometimes a dash of fruit. Before starting my website, we thought long and hard about starting up our own cold-pressed juice business. Apart from places selling non-organic, predominantly fruit juices, there didn't seem to be a juice source in the middle of the city where I worked (hence me taking an array of multi-coloured juice jars to the office everyday - way to feel like a weirdo). What deterred me I guess were thoughts of long hours chopping and juicing vegetables, which would take me away from the 'food' aspect, while at the same time not really helping my plight of a skill I could take with me to Sweden.
I first came into contact with juice in Stockholm, when I assisted Josefine Jäger in the very first of her 'Cleanse 8' programmes (a cleanse comprising 3 days of cold-pressed juices and nut milks, plus 5 days of raw food). The juice was produced on a Norwalk 280 juicer. Juicing long into the night before the first day, we quickly learnt that juicing large quantities on a Norwalk takes a looooong time!! (Although despite that I also have a Norwalk juicer at home, which cost me an entire months wages. Hmm... the things we do for the things we love..).
Following this my understanding and affinity for juice deepened when I lived in Santa Monica whilst studying at Matthew Kenney's raw food culinary academy. Here I developed a great love for a one-stop, cold-pressed, organic juice and nut-milk shop called moon juice. Founder Amanda Chantall Bacon comes from a culinary background, meaning the rainbow of juices on offer are not only thoughtfully compiled for their medicinal qualities, but also taste amazing. Quite simply my attraction to juice, is because it makes me feel this way too.
In case your wondering what I mean when I mention "cold-pressed" juices, this is simply juice made by pressing the ingredients slowly through a cold-press juice machine (sometimes this can be a two step process involving a hydraulic press, such as with a Norwalk and commercial cold press machines). A centrifuge juicer on the other hand, which quickly spins the crushed ingredients around, can cause heat thereby compromising the nutritional quality of the items being juiced. It is the same premise as to why nutritionally speaking, raw foods are superior to cooked. With cold-press juicing you also extract more juice from dark leafy greens, meaning there is less wastage.
Another common question on the topic of juicing, is whether it is better to drink juices or smoothies. The difference between the two is that a smoothie retains the fibre of the fruits and vegetables, while juices do not. Two positives with juicing is that the nutrition is more concentrated in a juice (because you need more fruits and vegetables to make a juice), and the liquid form means it is easier for the nutrients to be absorbed by the body. For me it is a personal preference and how my body is feeling, as to what I prefer. In the morning my preference is to have a juice to ease my body into digestion after fasting through the night. A smoothie on the other hand, I'll prefer when I want something more fulfilling.
In terms of cleansing, juicing is perfect because the body is flooded with beneficial nutrients, while at the same time you are able to give the digestive system a rest. This makes it easier for the other systems to heal and restore balance.
Nature is smart and has a way of providing us with what we need, when we need it. I therefore like to compile my juice recipes according to the season (although there is a bit of an array in this post!). A good idea is to get your fruits and veggies direct from your local farmers market, that way you are ensured of getting seasonal produce at it's freshest. Following the seasons also means less of a negative impact on the environment - always a thumbs up!
Using organic or spray free produce is especially important when juicing as any pesticide residue will be more concentrated when juiced. If organic produce is not available or affordable, then I recommend peeling any skins from the ingredients for e.g. the green skin of a cucumber, and avoid fruits and vegetables known for being sprayed for e.g. the 'dirty dozen'. Also, always wash your fruits and vegetables throughly in filtered water.
These are just my perspectives on juice. I'd love for you to share any insights or favourite recipes. Have a lovely week! xx
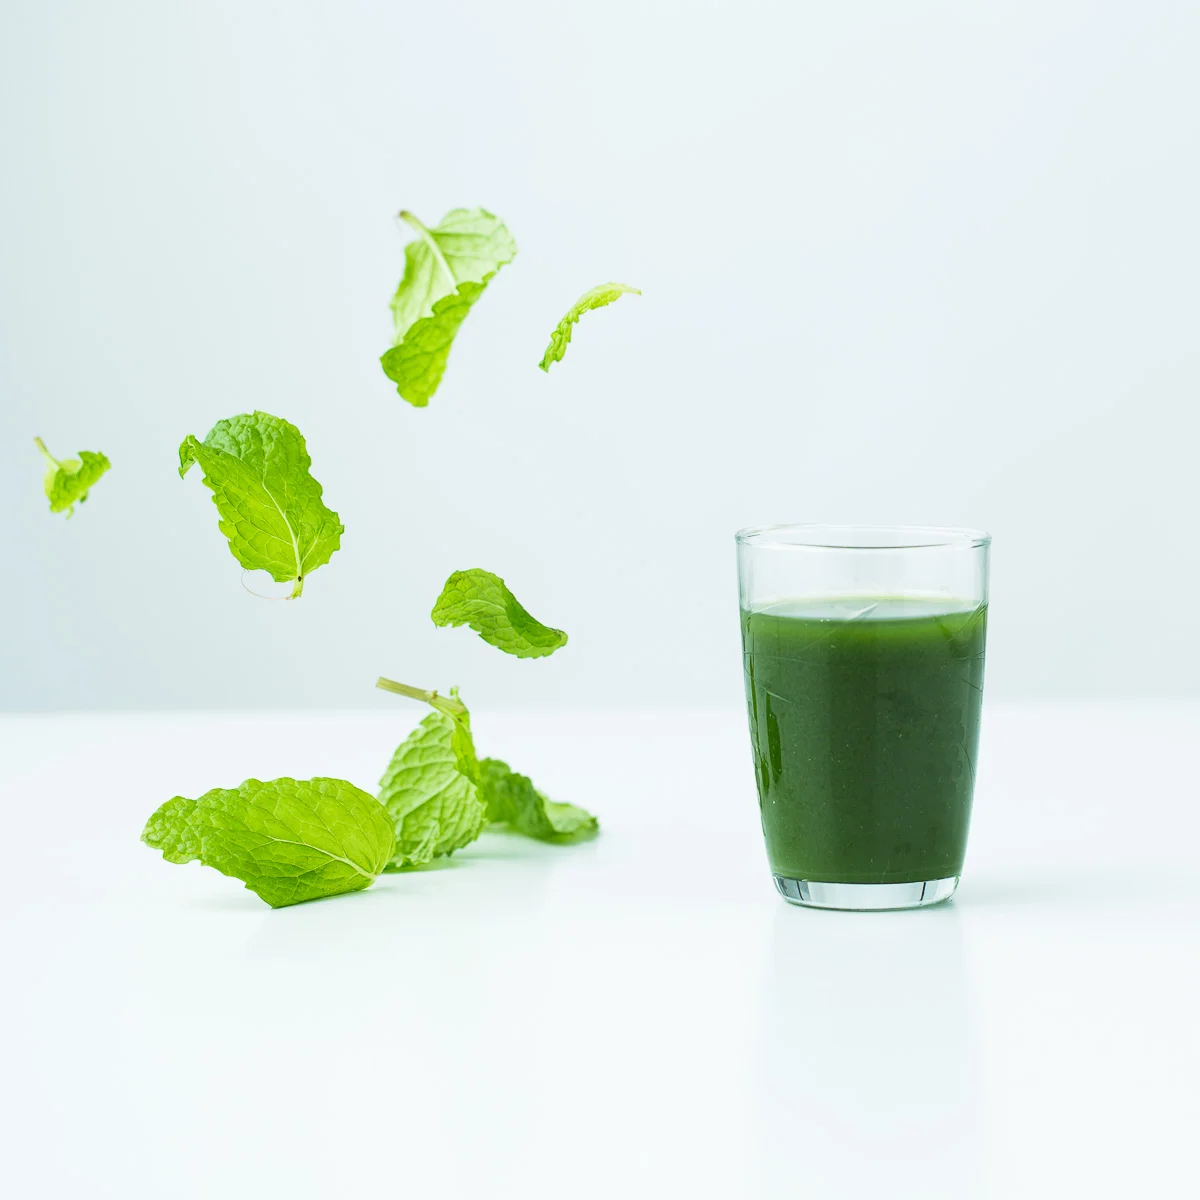
spinach, cucumber, pineapple & mint
Every juice post has to contain some form of green juice, and this is my version. What's special about this juice is that it taught me how to shoot movement in the studio. After a number of blurry attempts we got our settings right and captured the falling mint leaves as if they were floating.
- 1 handful of spinach
- 1/2 cucumber
- 2 cups of chopped pineapple
- 1 handful of mint
- 1/2 lime (optional)

watermelon, tomato & lime
Watermelon is very hydrating which makes this juice perfect on a hot summers day. If you increased the tomato proportion and added a pinch of cayenne peppar I bet this juice would taste like a smooth gazpacho.
- 4 cups of watermelon
- 1 tomato
- 1/2 lime
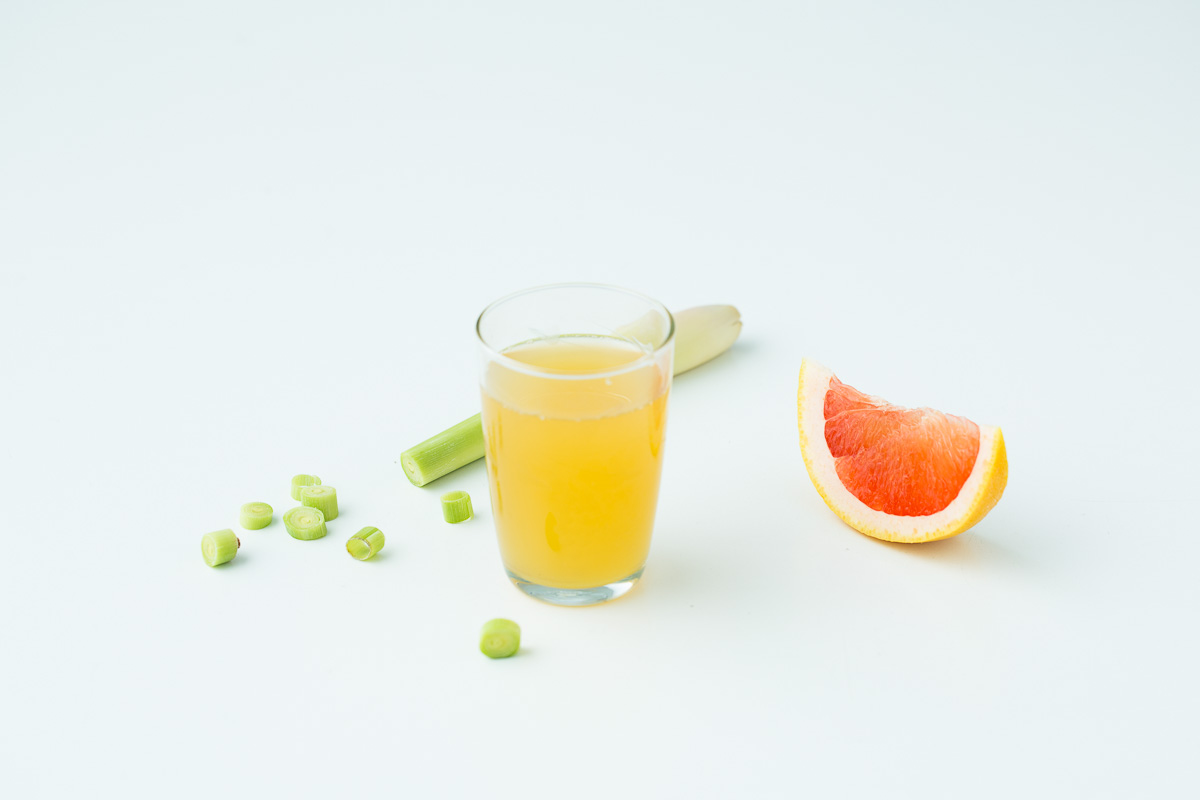
Pineapple, grapefruit & lemongrass
I love lemongrass. I discovered and started using it in my own recipes, only after we moved back to New Zealand. I like to mix it with tropical fruits such as pineapple and mango which has led to many lemongrass in green smoothies, chia puddings and I've even mixed with white chocolate when making truffles.. Enjoy this juice as it is or make it green by including a handful of coriander to the recipe.
- 2 cups of chopped pineapple
- 1 1/2 - 2 grapefruit
- 5-10 cm lemongrass stalk (start with 5 and adjust accordingly)
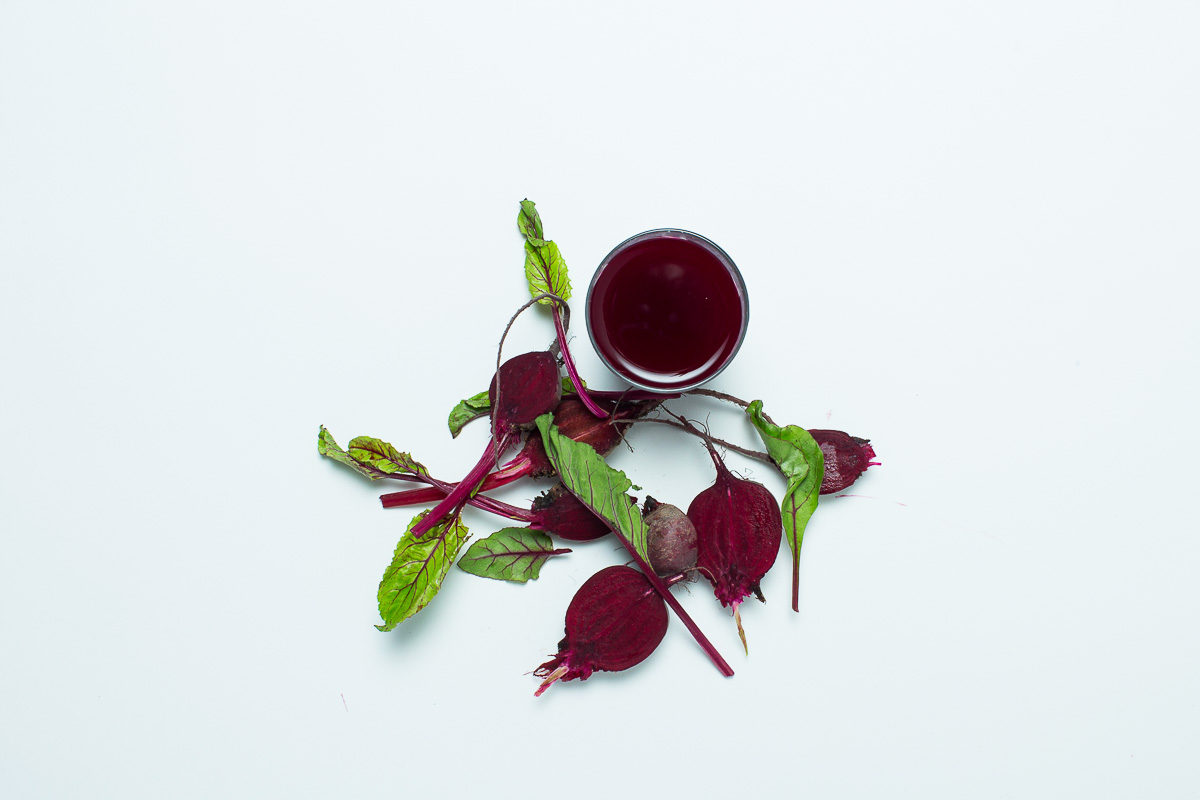
beet, grapefruit & ginger
A juice post wouldn't be complete without a beet concoction. Here is my favourite.
- 1 large beet
- 1 grapefruit
- 3 cm chunk of ginger